SpriteLab Validation Overview
TLDR: jump to I'm Ready - Let's Write Validation Code
- Getting Started
- Validation Functions
- A Tangent: Sprites and Events
- Criterion Commands & Helper Libraries
- I'm Ready - Let's Write Validation Code

The validation box in a level can look intimidating. There's like almost no clue what should go inside - what's up with that?
Maybe you start by experimenting and putting in a console.log() and see what happens?

Well, it just prints over and over again.

That's because code in the validation box runs every frame of the animation. It's like extra code that runs after your main Sprite Lab code has finished.
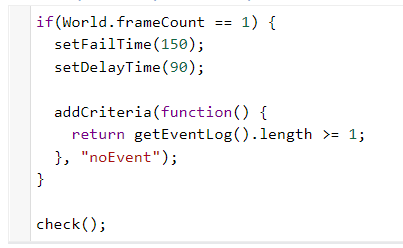
But what if you wanted something to just happen once? Well, a nifty trick is to use the World.frameCount property, which keeps track of how many frames have occurred in a level. For example:

...results in it just being printed once:
However, you might notice that the Finish button has disappeared from the level:
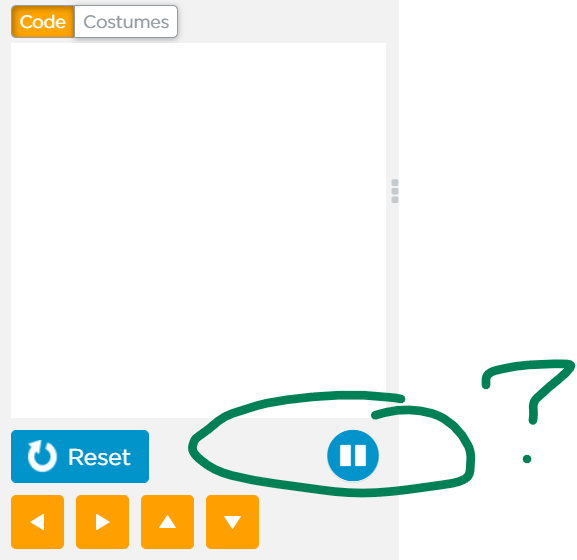
You can't actually move on! That's because validation expects you to tell it when the level is over... which we haven't done. This is where we get some help from our engineer friends in the next section...
Summary:
if(World.frameCount == 1) {
  console.log("Anything in this if-statement will just happen once, on the first frame");
}a
console.log("Anything outside the if-statement will happen every frame of the animation, over and over again");There are some functions hard-coded into Sprite Lab that we can use for validation: Validation Commands. Let's start with a few important new validation commands:

-
setFailsets how long a level should wait before a feedback message appears. A purple bar will go across the bottom of the screen for the number of frames you tell it. This should always be called just once, inside the if-statement. -
setDelaysets how long a level should wait once a student successfully completes a level and show a green bar along the bottom. If the level was waiting for an event, the purple bar will reset and the green will appear instead. This should always be called just once, inside the if-statement. -
checkis what starts our validation logic to check if the level is complete or not. This should always be called on every frame of the animation, outside the if-statement.
To actually validate the level, we need to use the addCriteria function. Always use this function inside the if-statment, so it runs just once.
For example, the animation above was created using this code:
In general, this function looks like this:
addCriteria(function() {
  // Add your logic here
  // return true to pass validation; return false if it hasn't passed yet
}, "validationString");- The
functiongets called every frame of the level until it returns true. Once it returns true, it stops running.- The example above isn't actually working code because it doesn't return true or false. If I wanted to use this as a real example in a level, I could add
return trueto the end, which would make me pass the level no matter what.
- The example above isn't actually working code because it doesn't return true or false. If I wanted to use this as a real example in a level, I could add
- The
"validationString"is a key for the feedback string that a student sees if they fail the validation. It should match one of the keys in thisen_us.jsonfile.- There's a process for adding new feedback strings, but let's save that for another page in the wiki.
We can write our own code in these functions, including calling functions from the validation commands. For example, getEventLog() is a validation command I can use to check how many events have occurred over the course of the level.
We can also use native Sprite Lab syntax here. For example, if there was something I knew how to do in Sprite Lab, I can code it there and press "Show Code" to see what the syntax is here

And then use it in addCriteria
addCriteria(function() {
  //Get all of the spriteIds in use. getSpriteIdsInUse returns an array of sprites in the order they're created.
  var sprites = getSpriteIdsInUse();
  //Check that we have at least one sprite and that it is the purple bunny
  return sprites.length >=1 && isCostumeEqual({id: sprites[0]}, "purple bunny");
}, "noPurpleBunny");
You can add multiple addCriteria functions to a level to check for different things. If you do, they follow these rules:
- Each criteria is checked until it becomes true. Once it's true, it is no longer checked.
- At the end of the
failTime, the criteria are examined in the same order you code them in the level and the top-most feedback string is displayed. This means you should write criteria to match the order of tasks you expect students to complete in a level (ie: "add a sprite, then add an event, then have the sprite say something when you click it"). - In the console, there is a helpful debugging message that displays the state of each criteria.

In the animation above, I met 2 criteria but not the other 3. And since the top-most criteria wasn't met (visiting all the storytellers), that's the feedback string I receive. If I run the level again and visit all 3 storytellers but still have an error, then a lower feedback string will be displayed.
Summary:
if(World.frameCount == 1) {
  setFailTime(150);
  setDelayTime(90);

  //first criteria
  function addCriteria(function() {
    //Add your validation code and return true or false
    //To make this easier to templatize: right now this just returns true
    return true;
  }, "validationString");

  //second criteria
  function addCriteria(function() {
    //Add your validation code and return true or false
    //To make this easier to templatize: right now this just returns true
    return true;
  }, "validationString");

  //etc etc

}

check();When sprites are created on the screen, they're given a unique id in the order they're created. These ids are surprisingly simple: they're just a number. So the first sprite created on the screen has an id of 0:

When you click or touch a sprite, it creates an event. Events are also surprisingly simple - they're just strings formatted a specific way. Here's how click events look:

Generally, click events look like whenClick: [spriteId] or whileClick: [spriteId].
Here's how touch events look:

Generally, touch events look like whenTouch: [movingSpriteId] [touchedSpriteId] or whileTouch: [movingSpriteId] [touchedSpriteId]
There are two useful functions that get used pretty often: getSpriteIdsInUse() and getEventLog(). Using these two together, you can start to validate click and touch events
-
getSpriteIdsInUse()returns a list of spriteIds in the order they were created. Most of the time, the list looks like [0, 1, 2...] for however many sprites someone added to the screen -
getEventLogreturns an array where each element is a string in a format like the ones above.
Some of the commands within Sprite Lab itself don't use spriteIds, but instead use what I'll call selectors:
{id: 0}{costume: "purple bunny"}{name: "mySprite"}
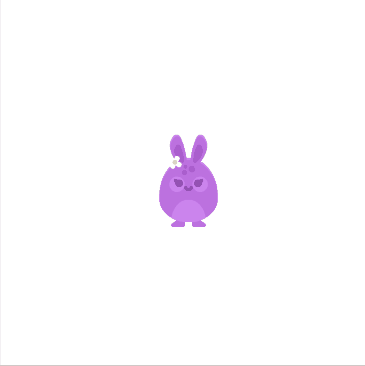
For example, with the purple bunnies in the animations above, this will set the x-location of the upper-left bunny:
setProp({id: 1}, "x", 0);But this will set the x-location of all the bunnies:
setProp({costume: "purple bunny"}, "x", 0);Using everything in this section together, we could do something like check if a bunny sprite touched a corgi sprite:
addCriteria(function()
  var events = getEventLog();
  //check that we had an event
  if(events.length == 0) {
    return false;
  }
  var mostRecentEvent = events[events.length - 1];
  //check that it was a touch event
  if(mostRecentEvent.includes("Touch") == false) {
    return false;
  }
  //This means mostRecentEvent is a string with the format "whenTouch: # #"
  //So let's split the string by the spaces to isolate the last two spriteIds
  var eventComponents = mostRecentEvent.split(" ");
  var movingSpriteId = eventComponents[1];
  var touchedSpriteId = eventComponents[2];
  //Let's check if they're the costumes we wanted using the isCostumeEqual function from Sprite Lab
  if(isCostumeEqual({id: movingSpriteId}, "purple bunny") && isCostumeEqual({id: touchingSpriteId}, "corgi")) {
    return true;
  } else {
    return false;
  }
), "noTouchingSprites");Let's start talking about helper libraries and criterion functions that can help simplify all of this.
Summary:
- spriteIds are just numbers in the order they're created. You can use
getSpriteIdsInUse()to get a list of current sprite Ids. - events are just strings formatted a certain way. You can use
getEventLog()to get a list of all the events that have occurred while a level has been running- Click events look like
whenClick: [spriteId] - Touch events look like
whenTouch: [movingSpriteId] [touchedSpriteId]
- Click events look like
- Some native Sprite Lab functions use selectors, like
{costume: 'purple bunny'}, which affects all sprites with that property. - All of this makes from-scratch validation code long and complex - use criterion commands and libraries instead (see below)
The ideal validation for a level has as many addCriteria functions as it needs, but each criteria function is at most 3 lines and typically relies on calls to external functions:
//Level instructions: create a sprite and add a click event so that when the sprite is clicked, it says something
if (World.frameCount == 1) {
  //check that there's at least 1 sprite
  addCriteria(function() {
    return minimumSprites(1);
  }, "noSprites");
  //check that the student clicked the sprite while the level was running
  addCriteria(function() {
    return anySpriteClicked();
  }, "clickAnySprite");
  //check that, after they clicked the sprite, an event happened (ie: there's a `when sprite clicked` block in their code)
  addCriteria(function(){
    return clickEventFound();
  }, "clickButNoEvent");
  //check that, after they clicked the sprite, a sprite starting speaking
  addCriteria(function(){
    return clickEventFound() && anySpriteSpeaks();
  }, "clickButNoSay");
}

check();
This is only possible with the use of criterion commands and helper libraries.
Criterion commands are defined by engineers and are available by default in any Sprite Lab level. You can view the criterion commands here. All of the functions in the above example are criterion commands and can be used in any sprite lab level.
Helper libraries can be added to a level on a case-by-base basis within the levelbuilder editor. They have a convention of starting with z so that they are loaded after all of the other libraries are loaded (this is kind of a hack to make this happen).
When selecting a library, always use Ctrl+click to make sure you don't accidentally de-select the other libraries in the level.
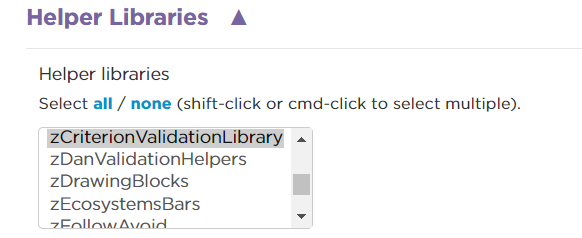
Helper libraries load once at the beginning of your code. Here are a few common helper validation libraries:
- zCriterionValidationLibrary: a library created by Dan while working with the new criterion forms of validation. If you're not sure where to start with validation, this is a good library to load
- zValidationHelperFunctions: a library created by Mike when validating CSF Course F and Hello World levels. Not actively maintained, but may have a function or two not available anywhere else.
If you use the zCriterionValidationLibrary library, there are a few additional functions to add to your validation template:
if(World.frameCount == 1) {
  setFailTime(150);
  setDelayTime(90);
  setupPrevious(); // <--- only when using zCriterionValidationLibrary helper library

  // addCriteria functions here

}
getHelperVars(); // <--- only when using zCriterionValidationLibrary helper library
check();
updatePrevious(); // <--- only when using zCriterionValidationLibrary helper library
These extra functions are required to use other functions in the library. A quick summary is:
-
setupPrevious()sets up your validation code to also keep track of the state of the animation during the previous frame. This allows you to check when new events happen, or if an action happened at the same time as an event (like a sprite says something when clicked)- This is surprisingly tricky to keep track of without a helper library, and also super necessary for most post-Hello World sprite lab levels that use events.
-
getHelperVars()gets the state of the level in the current frame (ie: current sprites, current event log, current background, etc) so they can be used in theaddCriteriafunctions -
updatePrevious()saves the state of the level to apreviousobject (which we already setup). This lets us check when new events occur.- For example: comparing
getEventLog()toprevious.eventLoglets us know if a new event happened this frame
- For example: comparing
You can also create your own helper libraries to help with validation, which could be useful for special blocks use in certain levels. For example, storylab blocks have their own validation library that have additional functions for the setHeading and setSubheading blocks.

Summary:
- Use criterion commands to simplify
addCriteriafunctions - Use helper libraries to simplify
addCriteriafunctions. When in doubt, use the zCriterionValidationLibrary- If you do, use the template in the documentation page for each level
- You can create your own helper library to help with validation
- Add the zCriterionValidationLibrary helper library to your level. Use Ctrl+click to add it to the box!
- Copy-and-paste this template into the level:
if(World.frameCount == 1) {
  setFailTime(150);
  setDelayTime(90);
  setupPrevious();

  addCriteria(function() {
    //update to the criteria you want
    return true;
  }, "");

}
getHelperVars();
// drawHandsOnUnclickedSprites() //uncomment on levels where the user needs to click sprites to advance
check();
updatePrevious();-
Read the zCriterionValidationLibrary Documentation and the criterion commands to determine what types of functions you can use for validation. Many functions include links to existing levels you can reference.
-
Add your
addCriteria()functions for each thing you want to test -
Either use an existing feedback string, or create a new tab at the bottom of this Validation Strings Google Sheet and add the feedback string there. See the
cscLandmarkandcscBookcovertabs as examples. (This part could use a more formal process, but for now: this is what we've got!)