Linux_contribution_guide
This Linux contribution guide was created by Theodore from the Q&A community and ported to the wiki by StevenPuttemans.
- Linux x64 bit operating system (e.g. Arch Linux / Ubuntu / OpenSUSE / RedHat / ...)
- Git (git-2.2.2-1)
- Register at Github
- Install Git
-
pacman -S git(Arch Linux) -
sudo apt-get install git(Ubuntu)
-
- Go to GitHub
- Login to your account using your Github username and password
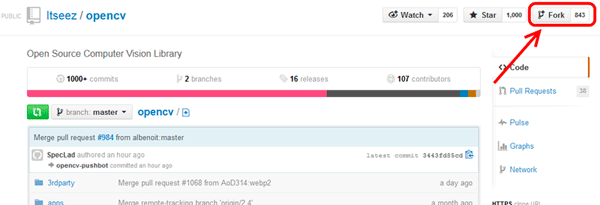
- Open the Itseez OpenCV GitHub page
- Press the fork icon on the right hand top side of the page which will help you to make a personal copy of the OpenCV sourcecode:
- When you are done return back to your own github page where you should find the copied repository:
- This means that you successfully forked the OpenCV repository to your personal account. We are ready now to clone the forked repository to our local environment, where will make the actual changes to the source code.
-
Go to your local desktop environment and open your favourite terminal emulator. (I consider that you know what a terminal is and how to execute commands on the command prompt.) Browse to the path/folder where you want to sync up the OpenCV source code from your fork. In my case I decided to locate it into the
/home/theodore/documents/gitfolder.
-
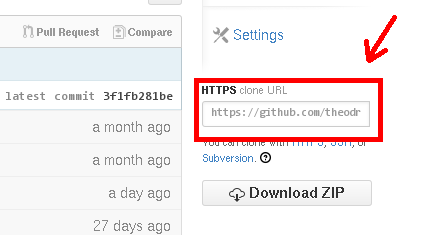
We are ready now to clone the forked repository in our GitHub account to the current folder. Just type:
git clone <link_to_your_forked_repository_in_your_GitHub_account> <name>you will find the link on your account in GitHub right here:
and for the name just choose something that you like and correlates that you have the source code of OpenCV library. I choose
opencv_source.If everything went right, you should end up with something like this:


-
Before we start making any changes into the source code let's configure some global git attributes. Every commit you make will have your name and email address to identify the ‘owner’ of the commit, so you should start by giving it those values. To do so, go into the source folder:
and run these commands:
git config --global user.name "Your Name"git config --global user.email "your@email.com" -
Install the default pre-commit hook by renaming
opencv_source/.git/hooks/pre-commit.sampletoopencv_source/.git/hooks/pre-commit- this will prevent you from committing whitespace errors.


-
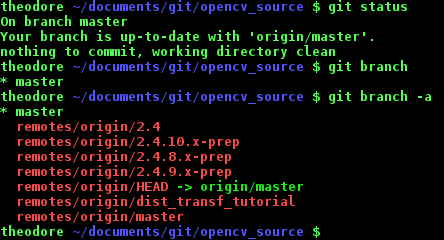
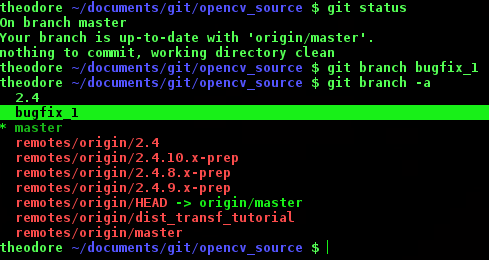
First let's see how is the status of our local repository and in which branch we are. We can achieve that by giving:
git statusgit branchgit branch -aWe see at the moment that the master branch is active and that it is up-to-date with the
origin/master. Moreover, with the last command we see which other branches are available. -
According to the official contribution page you can choose a base branch for your work. You have two options:
- 2.4 - the branch that will be used for future minor releases in the 2.4.x line. Choose it when fixing a bug that's reproducible in this branch, or when making performance optimizations relevant to it. 2.4 has been feature-frozen; as such, new functionality will not be accepted.
- master - the branch that will be used for the next major release of OpenCV (tentatively, 3.0). Choose it when adding new functionality, or for bugfixes/optimizations that don't apply to 2.4.
If you decide that the 2.4 branch is the one that you should go, you need to shift to this branch. The way to do that is by typing:
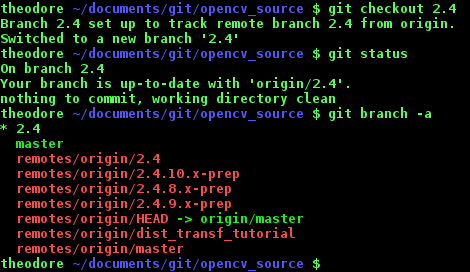
git checkout 2.4 -
I decided to work with the master branch. Be sure that you are on the master branch with the status option, if you are not switch to it with:
git checkout masterOnce, you have made sure that you are on the master branch create a new branch on your Git repository, which derives from master, to apply changes. Do not forget to create a new branch for every single update you want to do! These branches are local, but will be pushed to GitHub after editing the source code. Choose a correct name for your branch, which will be representative to the changes that you want to make. To actually create a new branch, add the name of your new branch after the command:
git branch <name>I chose to name it bugfix_1, and then I verified that it has correctly been created.
Then switch to the newly created branch. We are ready now to start making changes into the source code.
git checkout <branch_name>or both creation and switching can be shorted with:
git checkout -b <name> -
Open now your desktop file manager, and go to the path where you have cloned the source code (i.e. here
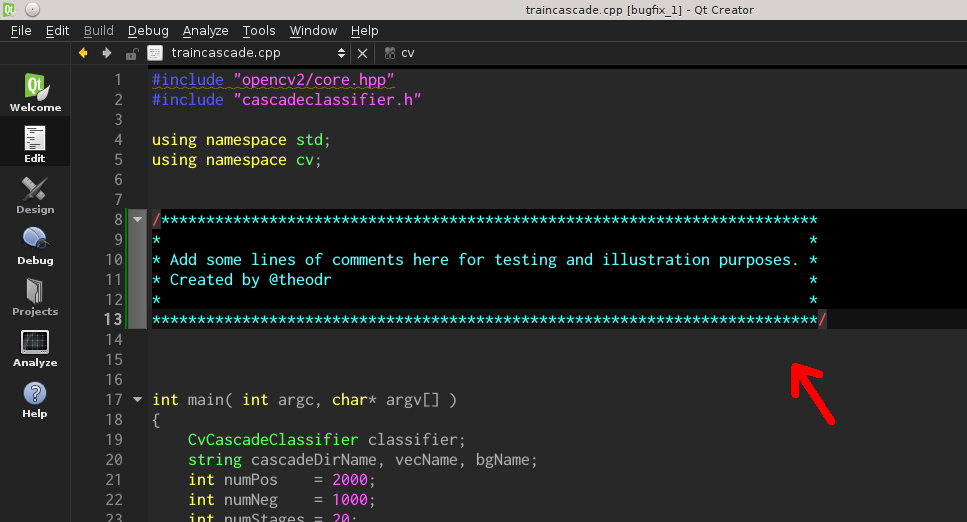
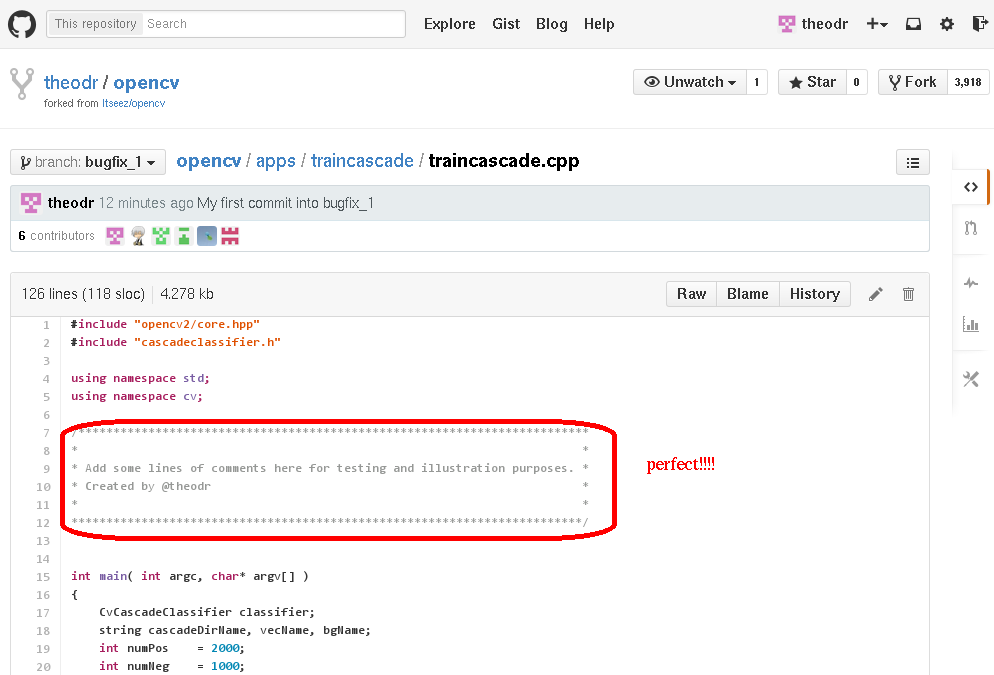
/home/theodore/documents/git/opencv_source). Select the file you want to adapt (in our case it's an adding extra comment to a source code file). In our case, we open up the fileapps/traincascade/traincascade.cpp, and we modify it.Save the file so that your adaptations are stored onto the system. Then again on your terminal type:
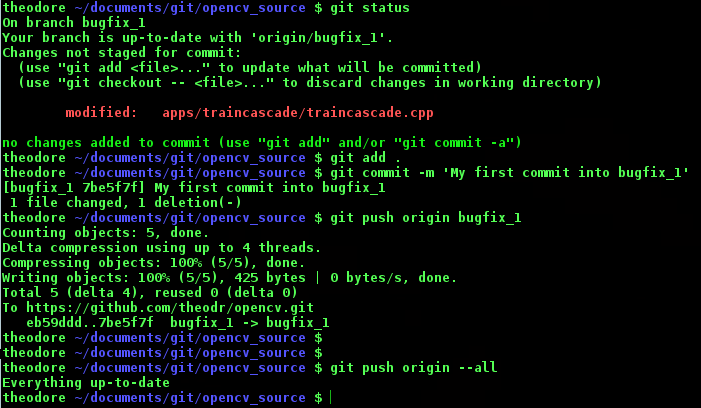
git statusto see that indeed the file is modified.
git add .git commit -m '<representative_message_for_the_commit>'to commit these changes and
git push origin <name>or
git push origin --allto push these changes, from a specific branch that you will name with the name attribute or from all the available branches to GitHub.
during the push procedure bear in mind that you might be asked to insert your GitHub login info (i.e. username and password).
Edit(update): ("squash" commits with rebase command)
As it is stated from the devs it is good to try not to include "oops" commits - ones that just fix an error in the previous commit or similar. If you have those or if you asked to merge any kind of commits, this can be achieved either before submitting these commits or if it is already late afterwards. In git this known as squash. This means that you can squash those fixes directly into the commits where they belong. You can achieve this with the
rebasecommand:-
First be sure that you are in the correct branch with the
git statuscommand -
Obtain the full amount of commits you have done within that branch by:
git rev-list --count master..<your_branch_name> -
Finally access those commits with:
git rebase -i HEAD~<number_obtain_from_previous_step>
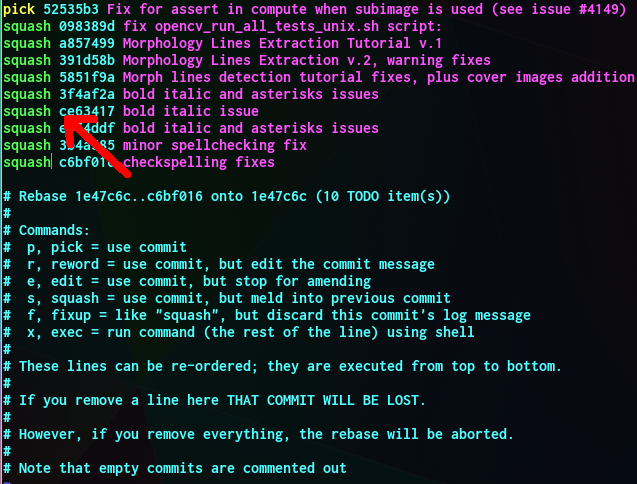
- If everything went fine you will get something similar to the following, where you will be able to see the history of your commits prefixed (i.e. heads) with the pick option.
- Replace all commit heads (first word) with a s or squash prefix:
- Then make a global commit message:
- As a final step push these changes to corresponding branch in GitHub by:
git push origin <name>or
git push origin --all
-


-
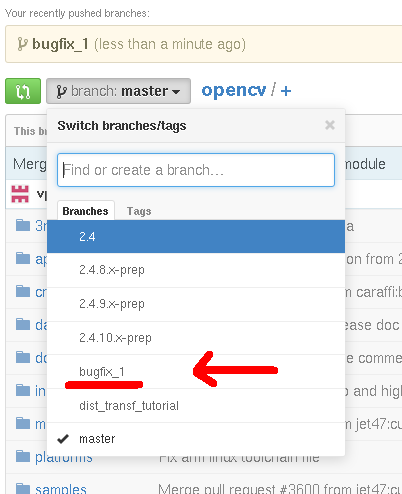
Now in order to find out if GitHub got sync'd up with our local environment, open a browser and login into your account in GitHub. If everything is correct, the branch you created for the fix should be visible in the branch setup.
Select the one you just created. Then browse within to find and check the file. If adaptations worked, you should be able to see them.
-
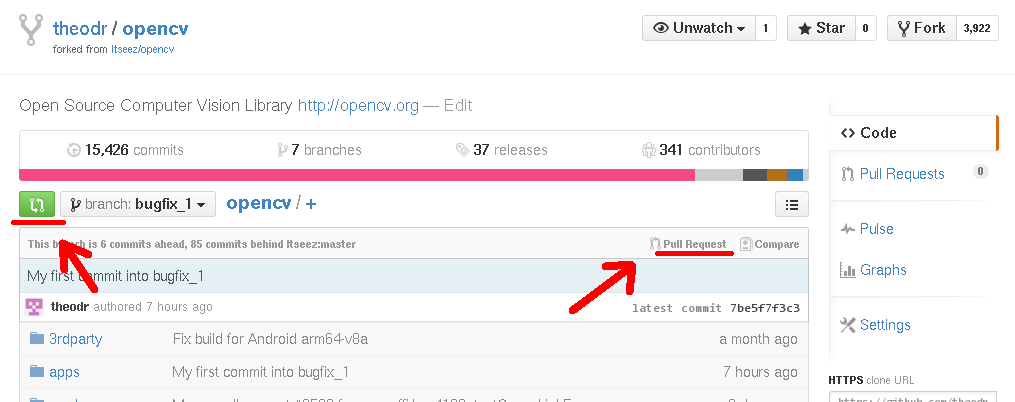
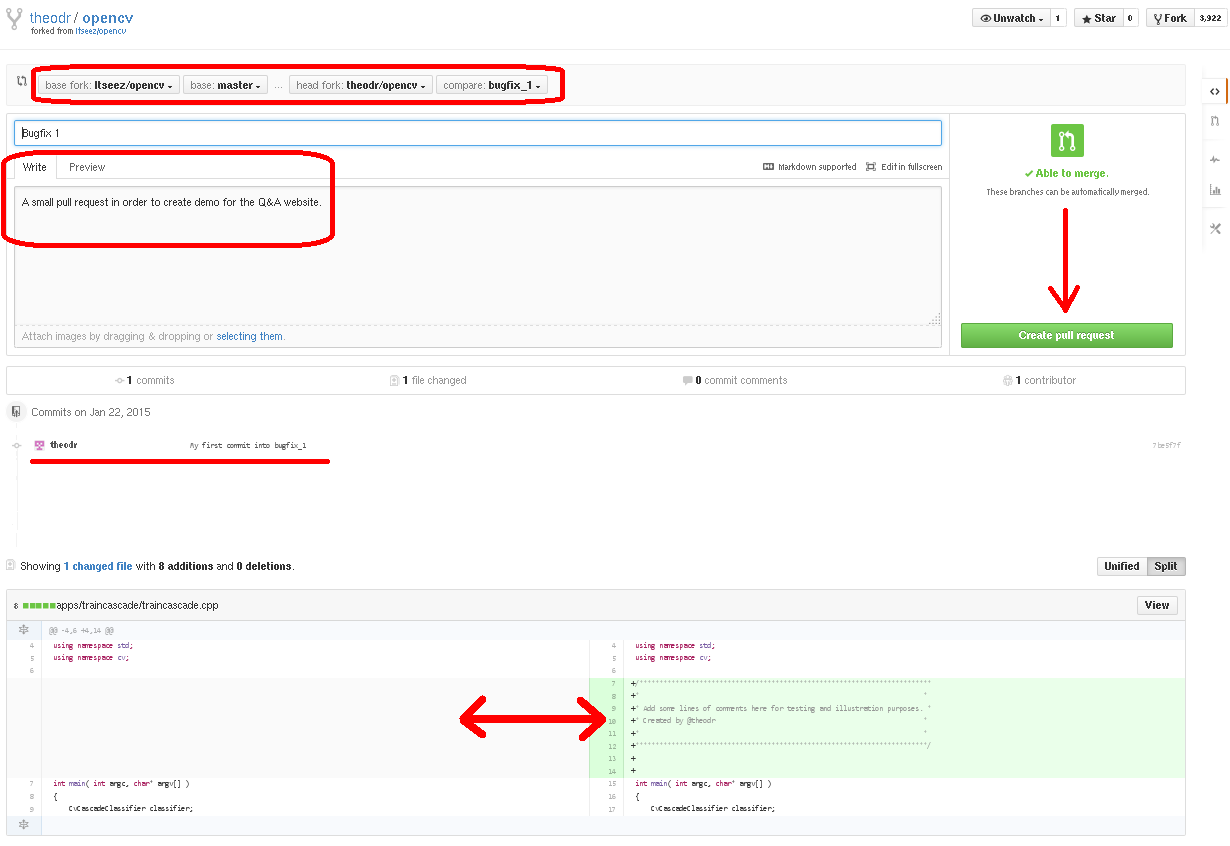
We are ready not to create a PR. Just click on the PR buttons:
Immediatly we can see, that there is a single file found, which is different between the current 'master' branch on Itseez/opencv and the 'bugfix_1' branch on theodr/opencv. Moreover, we can see the commit that we did earlier, and the actual differences between the two files. We now assign a pull request at this change (which is basically asking to upload your code to the sourcecode of OpenCV). Click to create a PR at the designated button. Do not forget to add some explanation on what your add-on does exactly. Then click the create PR button:
This all will result in an actual PR being pushed towards the source code manager. Congratulations!!! Now wait and go check from time to time (most likely you if you have set up everything correct you will also get a mail notification), to make sure the developers don't ask you to change something drastically.
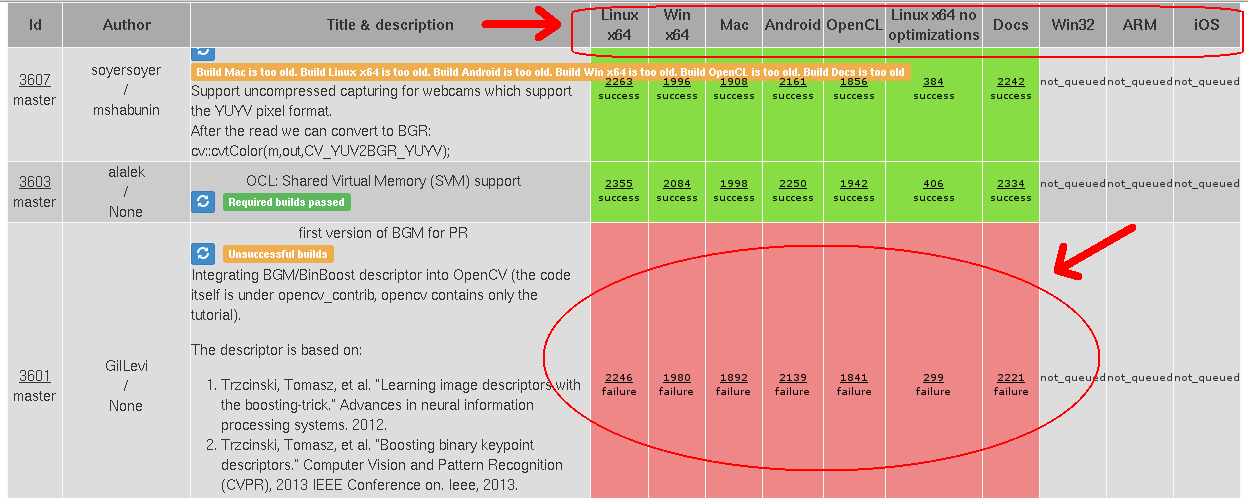
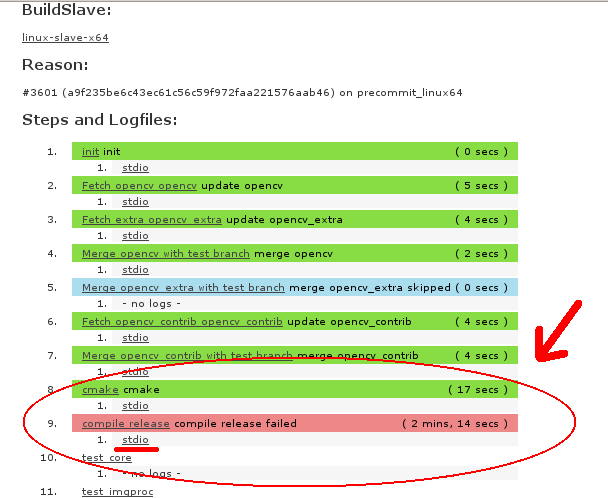
If you want there is also the option to follow the status of your PR on the OpenCV's official GitHub repo buildbot. When an error occurs in your build (error build status on PR), this will appear on the latter. Shortly:
- Look up in the table your PR and take a look at what system builds are failed (i.e. red color)
- Press the build specific tab and open up the report
- Look for the step that is red in the list
- Click on stdio if you want to see the exact error output
- Sometimes a report is also generated as a second point containing all error messages separately
-
A last step you should consider, is going back to the Issue tracker and add the link to your PR at the actual bugfix task. The bug will be then "automatically" closed, once your PR has been merged (for some reason this is not working at the moment, therefore you will need to do it manually).
-
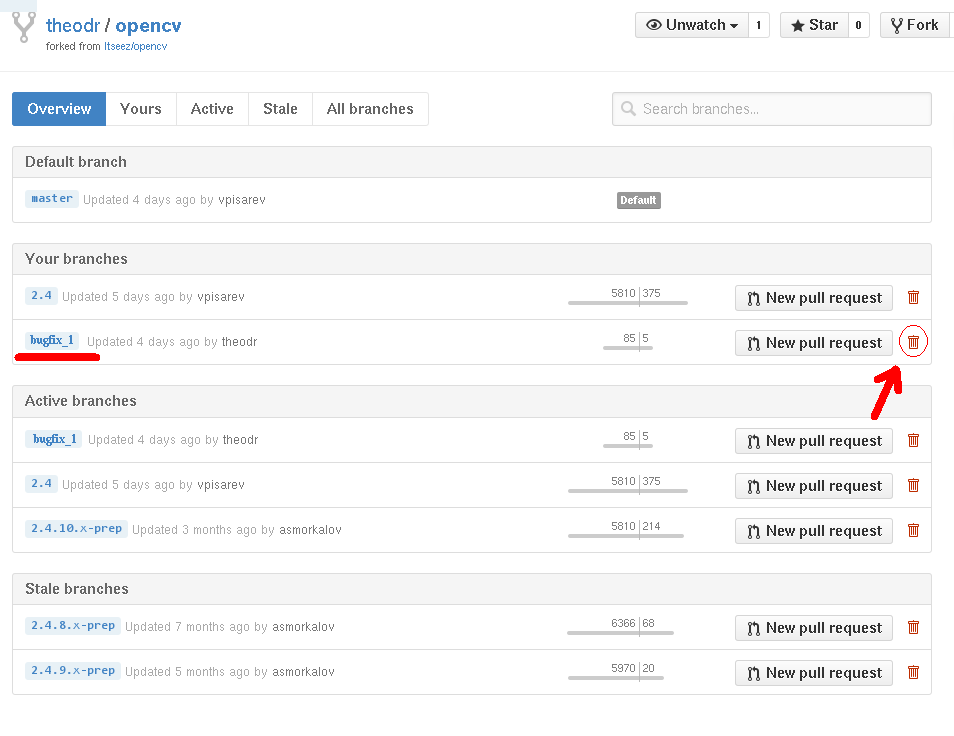
Once your PR got accepted, a button to delete that branch will appear at the end of the PR comments. and you can delete your local branch, too. Make sure that you are back to the original branch where your bugfix branch derived from:
git checkout master (or 2.4)and delete it by typing:
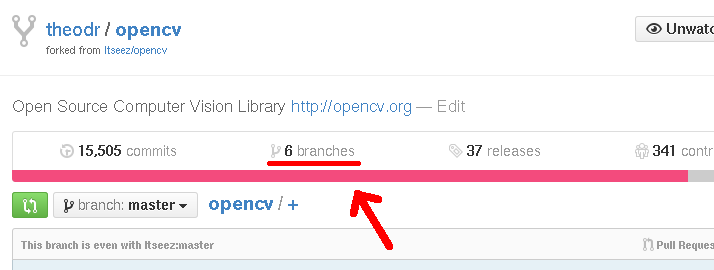
git branch -D <branch_name>(this applies locally in your computer)git push origin --delete <branch_name>(this applies for the forked repository in Github)same procedures applies, if it got rejected or for any reason you do not want to work on this branch/bugfix anymore. The branches in your GitHub account can also be removed online. Just browse to see all you your available branches, then find the branch that you are interested in and click to delete it:
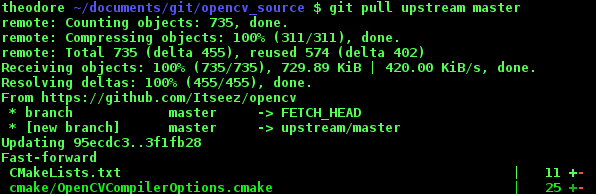
Finally, to update(merge) your local repository, just do a:
git pull upstream master (or 2.4)and
git push origin --allto keep up to date the fork in GitHub, as well (see next section for more info).
-
When creating a fork to the GitHub repository, you fork it as it is on that moment. However, when adding pull requests, on a later moment, you might want to add changes to merged stuff. Then you notice all of a sudden your fork doesn't contain new commits from OpenCV repository, so you need to update your fork.
Browse to the folder where you have cloned the repository:
Make sure that you are on the "master" or "2.4" branch with the git status or git branch command, if you are not then switch to it with the git checkout master (or 2.4) command. Once you are into the parent branch, create the upstream connection to it in order to be able to retrieve all changes by typing:
git remote add --track master upstream https://github.com/opencv/opencv.git(for master)or
git remote add --track 2.4 upstream https://github.com/opencv/opencv.git(for 2.4) -
Retrieving the changes of the remote master to your local master branch is easy by the following command:
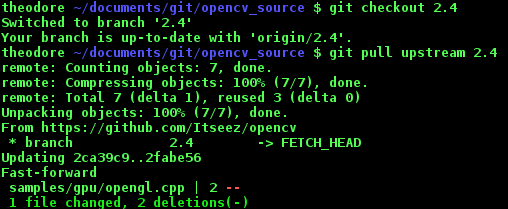
git pull upstream masterIdentical for the 2.4 branch of the remote to your local 2.4 branch. Do not forget to first checkout to the 2.4 branch, else this will screw up your master:
git checkout 2.4git pull upstream 2.4 -
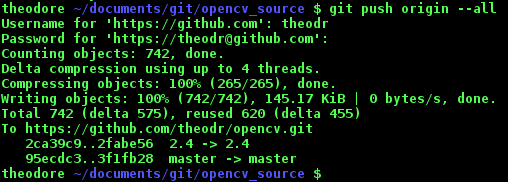
Finally, what remains is to update your fork. You can accomplish that with the git push origin -all command that we have seen earlier:
git push origin --all