The Distributed Systems simulator is an offline simulator for distributed systems. The simulator provides an integratable and easy-to-use interface for running, and testing your distributed system on various underlays, as well as extracting grafana metrics.
The simulator provides a channel for every node for receiving, and sending messages to the other nodes in the clsuter. These messages are of type events, and they are used to invoke certain actions in the destination node.
Under the master branch, you will find a Maven project which you can clone and use directly.
Additionally, the simulator requires Docker to be installed on your machine.
Docker is available for free on its official website
- simulator setup
- Integrating node class
- Integrating communication events
- Interaction with the simulator
- Starting the simulation
- Registering Prometheus metrics
- Visualizing metrics using Grafana
- Supporting a new communication protocol
load the simulator.simulator package to your project.
Your node class should implement BaseNode interface from the simulator.simulator package. Every node is supposed to
have a unique Identifier.
which will be generated and be passed to the node by the simulator.simulator.
Five methods needs to be overridden:
onCreat: this is where you can setup your node. All nodes'onCreatmethod will be called before any other node start processing. Once the node finishes its setup it should declare itself as ready by callingnetwork.ready()wherenetworkis an instance ofMiddleLayerwhich will be passed by the Simulation upon creation.onStart: to start the node's initial process. After all te nodes in the cluster are ready. the nodeonStartmethod will be called by the simulator.onStop: this method will be called by the simulator once the node terminate. This method can be used for garbage collection.onNewMessage: the node will receive all the event requests through this class. Every event request will be received in a separated thread.newInstance: this method serves as a node factory method. For a givenIdentifier, and a network layerMiddleLayer, it should return a new node instance.
All the event classes in the network should implement the Event interface from the simulator.simulator package.
You will need these events to send messages between nodes through the simulator
Two methods should be implemented.
actionPerformed: receive an instance from the host node that will perform the event and will be used to activate the event by the user. Once the destination node receive the event, it can activate the action by callingevent.actionPerformed(this)logMessage: should return a message of the event state. It is used for the logging purpose.
The simulator provides a simulated network underlay for the sake of the nodes' communication. It provides the following methods:
network.ready: for the node to declare itself as ready after it finishes its setup.network.send(BaseNode targetNode, Event event): is used to send an event from one node to another.network.done: can be used for the node to terminate itself. The simulator will delete this node from the network and call the nodeonStopmethod.
simulator.simulator static logger can also be accessed using simulator.simulator.getLogger()
Consider you have a myNode class, and you want to run a simulation of 100 nodes.
you need to create a new simulator instance and pass a fixture factory node, and the number of nodes in the
simulation.
Subsequently, you can either start a constant simulation using constantSimulation(duration) or start
a simulation with churn feature
using churnSimulation(Long simulationTime, BaseGenerator InterArrivalTime, BaseGenerator sessionLength).
Various types of distributions can be accessed from the Generator package.
myNode fixtureNode = new myNode();
simulator<myNode> simulation = new simulator<myNode>(fixtureNode, 5, "tcp");

simulation.constantSimulation(10000);

simulation.churnSimulation(10000, new UniformGenerator(100, 500),
        new WeibullGenerator(1000, 3000, 1, 4));
Supported communication protocols are: **tcp**, **javaRMI**, **udp**, and **mockNetwork**
The output log of the simulation will be generated in a `log.out` file under your project's directory.
The simulator provides three metric types under the Metric package-- SimulatorCounter, SimulatorGauge,
and SimulatorHistogram
the static register method can be used to register a new metric:
SimulatorCounter.register("MetricName")
The simulator provides basic default metrics such as
packets delay, number of sent messages, number of received messages, session length, inter-arrival time.
The simulator uses a Docker container for Prometheus and configures it automatically with Grafana.
You can directly access Prometheus on localhost:9090, and Grafana on localhost:3030.
Access Grafana on localhost:3030. The default username and password is admin.
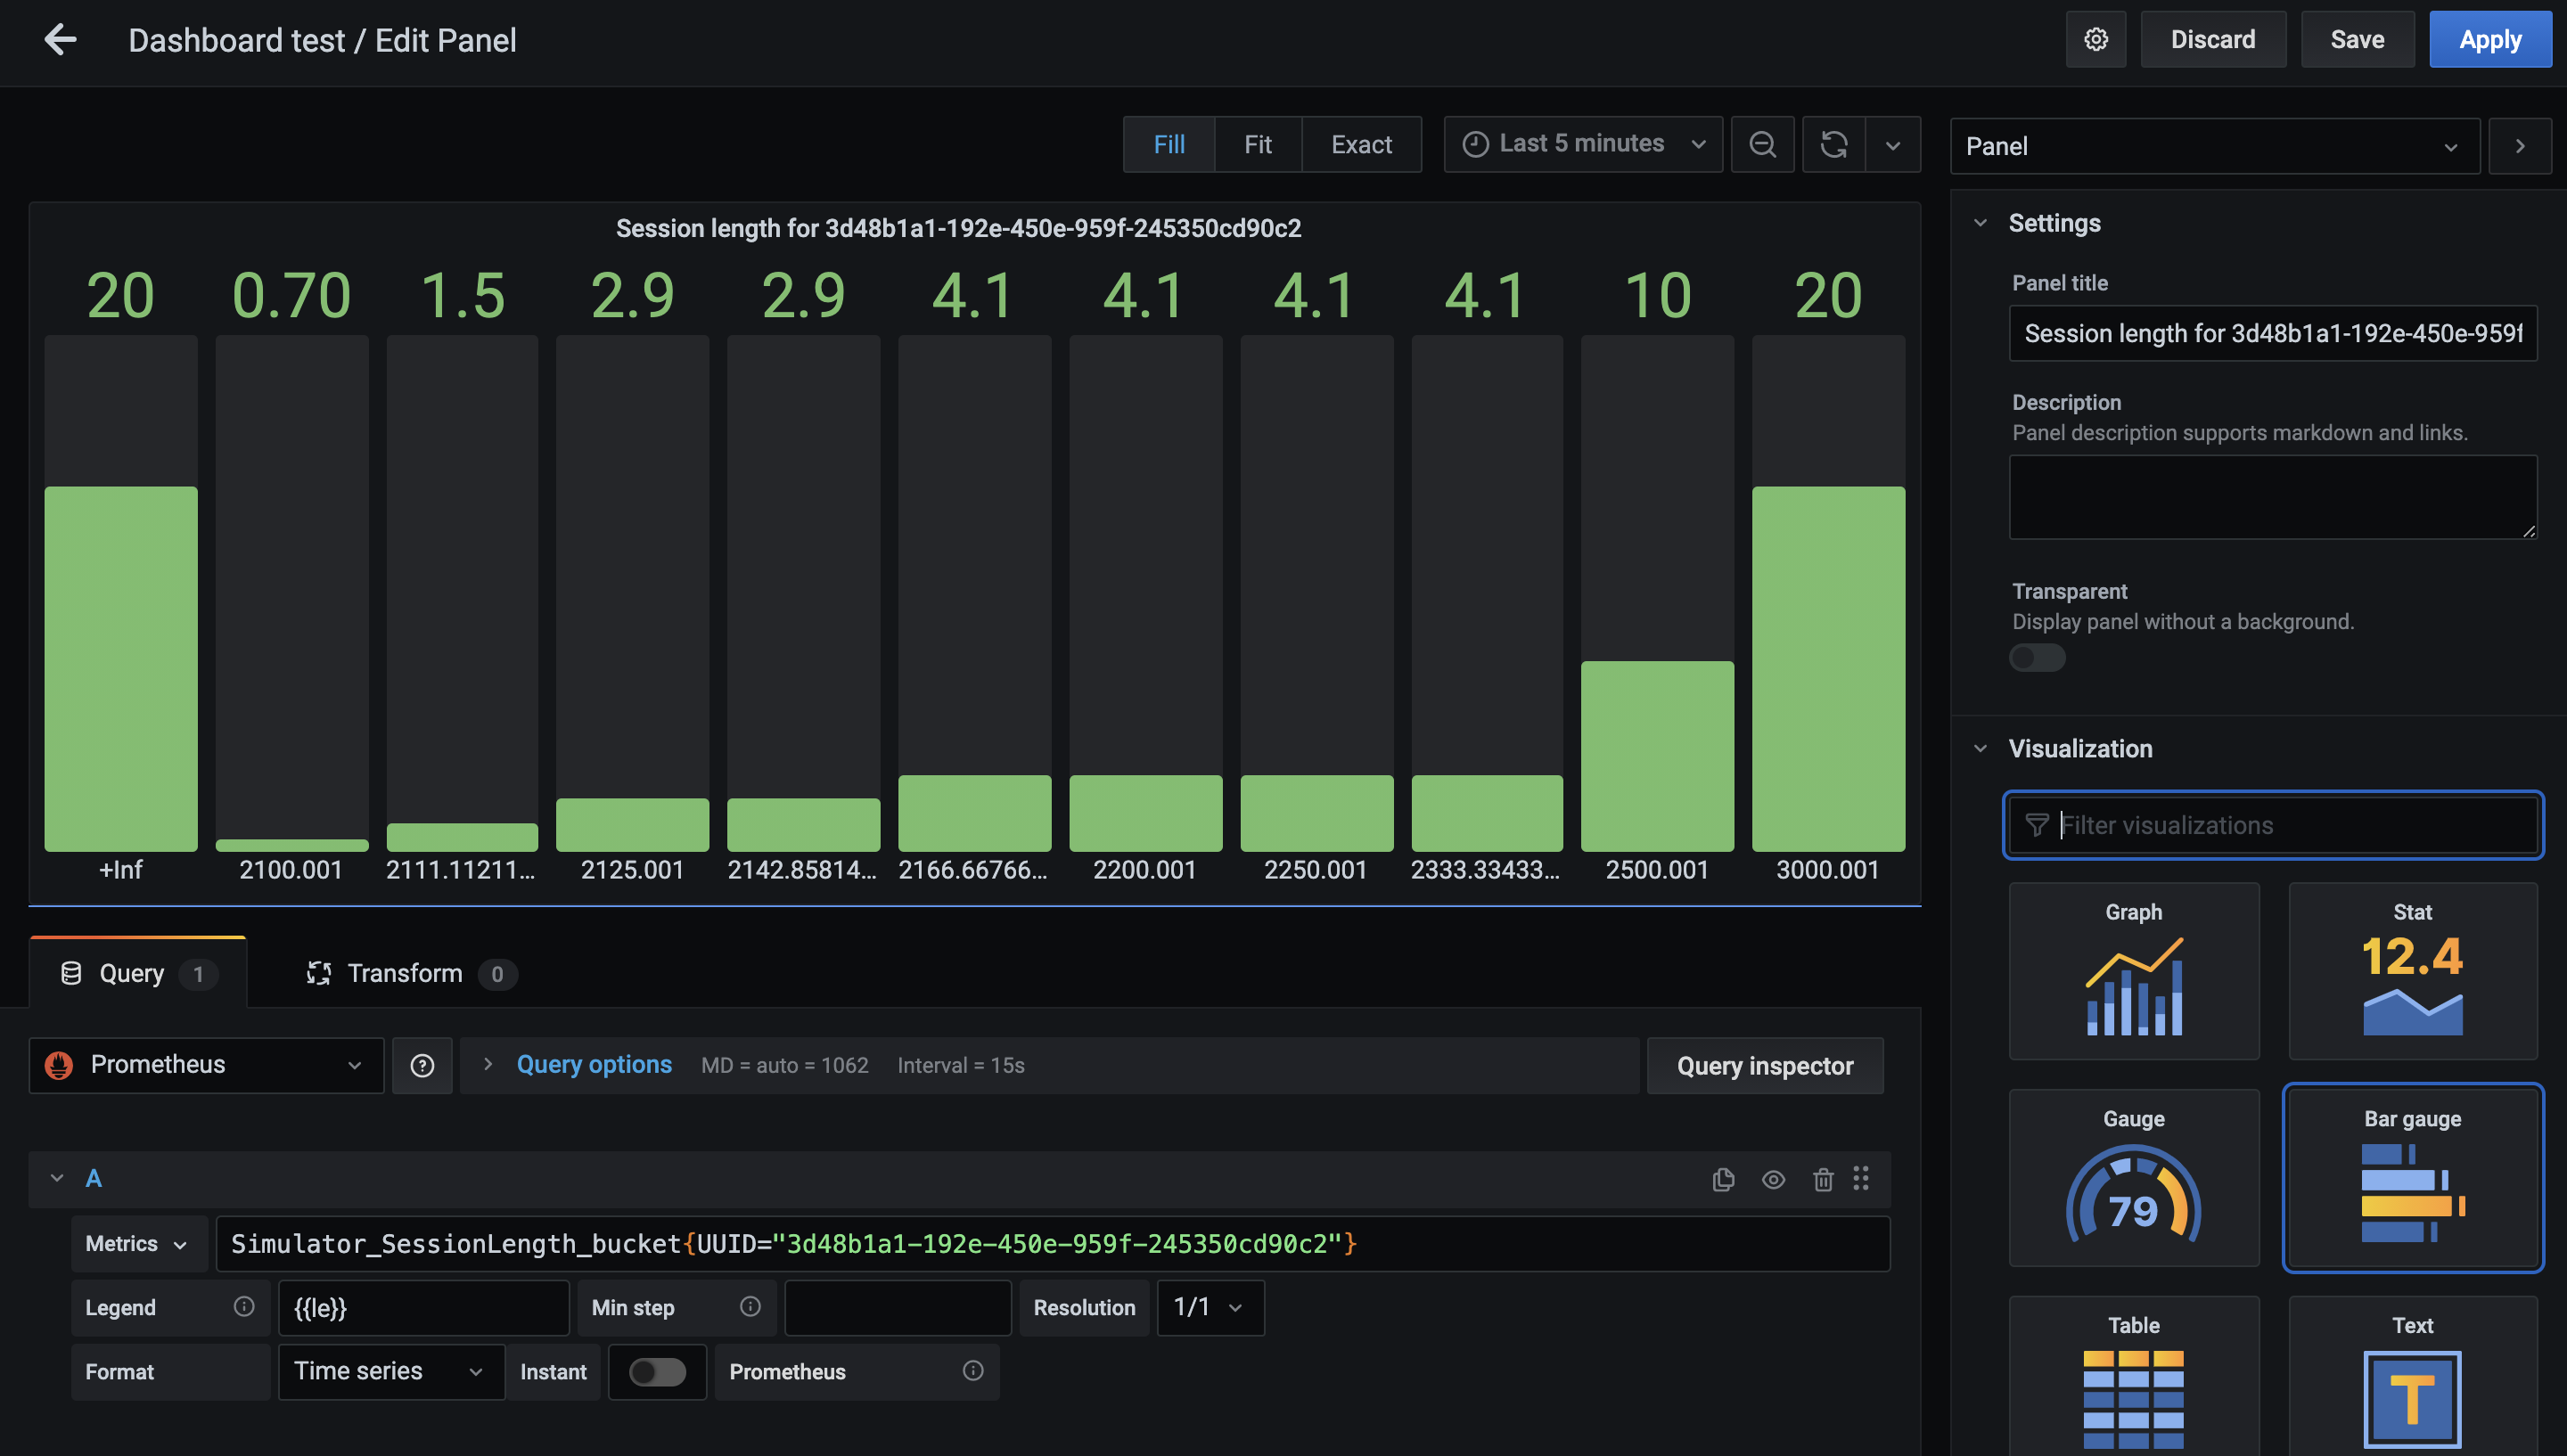
Create a new dashboard, and add a new panel.
Enter your metric in Metrics field. In order to obtain metrics for a specific
node, specify the corresponding Identifier for that node. From Visualization, specify
the type of visualization that you want to obtain.
Example of obtaining the session length metric for a specific node
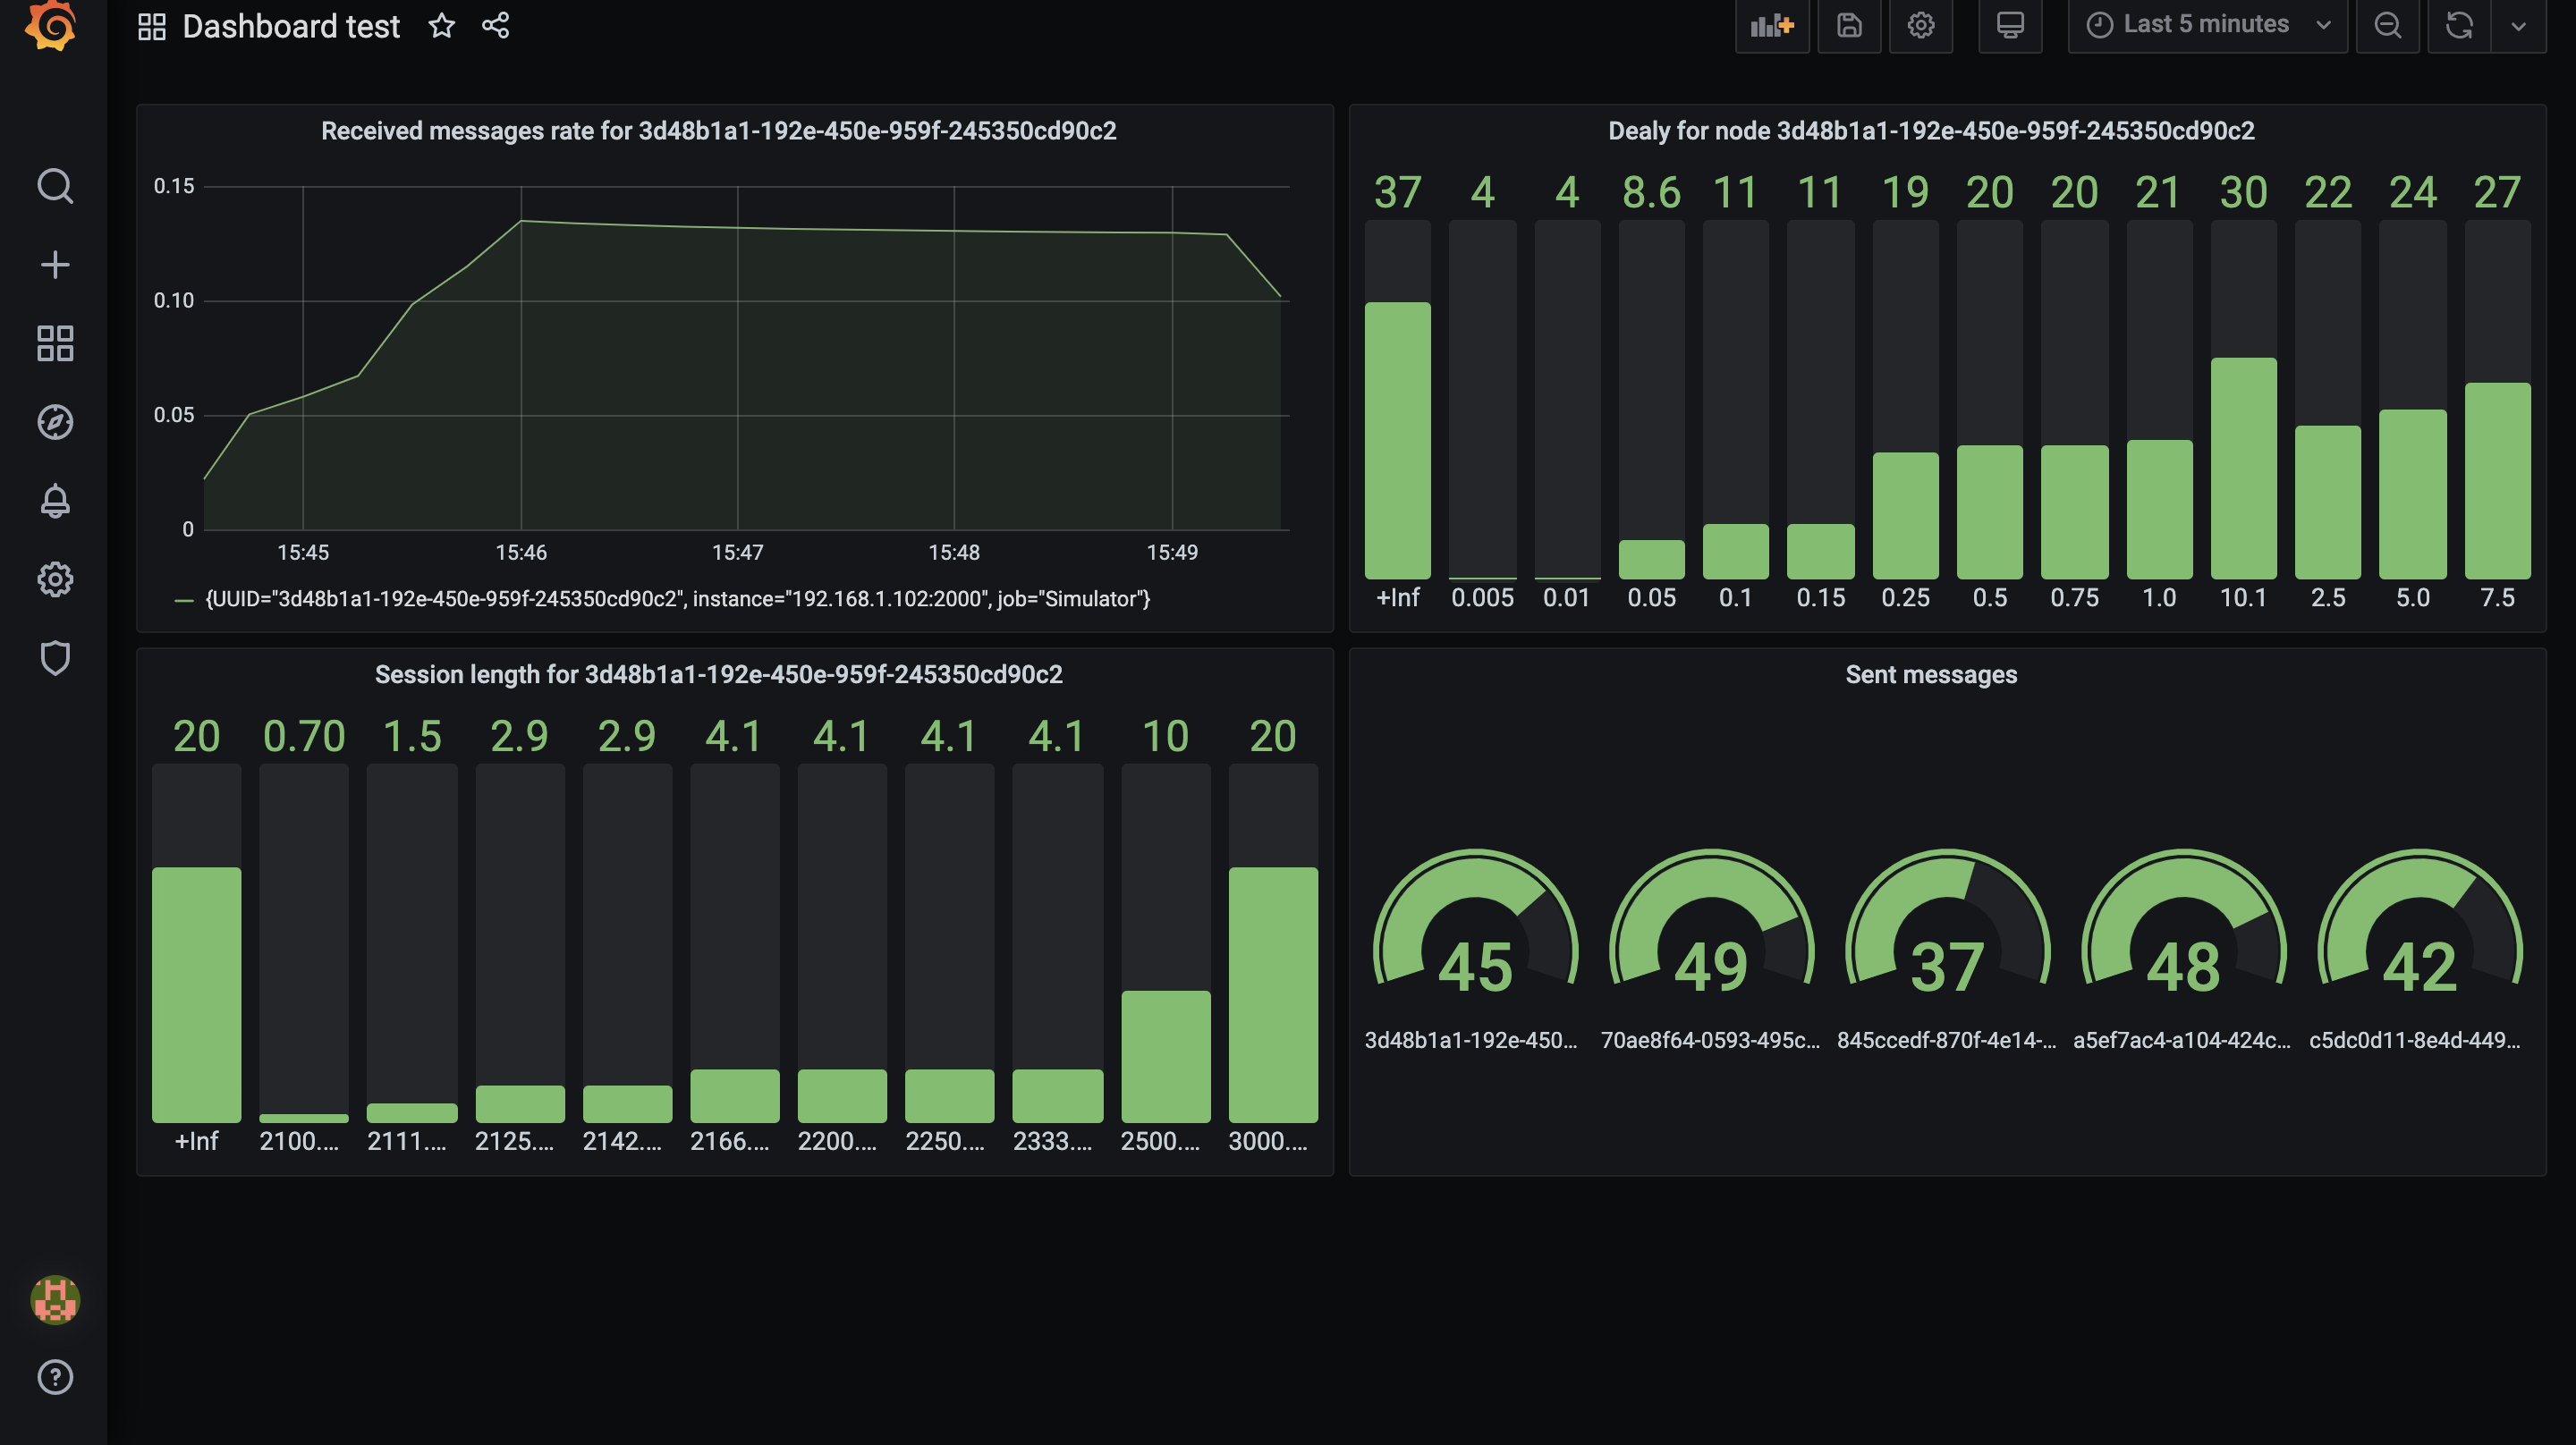
You can add multiple panels to a dashboard, and save it.
Example of a sample dashboard
Create a new communication protocol and extend the underlay superclass.
Additionally, add your protocol name, and class name in the underlayTypes.yml file.
Supported communication protocols are: tcp, javaRMI, udp, and mockNetwork
Two simulation examples are provided under the SimulatorExamples package.
Simulate a basic interaction between the nodes of the servers where every node send "Hello" to a randomly selected node, and the node replies by "Thank You".
A slightly more complicated example that illustrate the nodes' setup, termination, the interaction between the events
and the nodes parameters and thread safety.
It demonstrates a battle between the servers.
- Every node start with an initial random power level.
- Every node sends a
BattleInvitationof a battle with a random duration to a randomly selected node. - This node either confirm the battle or decline it (in case it was involved in another fight) by sending
an
BattleConfirmationevent. - In case of confirmation, the host node either starts the fight or abort the game in case it was involved in another fight while the invitation was pending.
- In case the fight started, the node with the higher power level win. It gains +5 points for winning, -10 for losing,
and 1 for drawing.
It let the opponent node knows the results by sending
BattleResultevent. - When a node reaches a zero power level, it dies and send a goodbye message. The simulation continues until either the simulation duration finishes, or a winner (a single node) is declared.
- Prometheus' metrics for the fight duration, health level, and number of fights are provided for each node.
the JavaDoc Documentation can be found under the doc directory under the project directory.
- All tests:
mvn test - Tests in class:
mvn test -Dtest="underlay.UnderlayTest" - Specific test:
mvn test -Dtest="underlay.UnderlayTest.A_testTCP"
Make sure you have the latest version of Java JDK installed on your machine.
Clone the project repository using the Github address.

Import the project as a Maven project into your IntelliJ IDEA.

Navigate to the folder the project is cloned to.

Create a project from the existing sources.

Proceed with other steps as you always do.
Once the project is created, you will be prompted with a message on the bottom of your IDEA Add as Maven Project.
Click on that.

Wait until IDEA finishes the indexing process. The final project structure will look like below.

Now, to confirm that your setup works, run make test in your terminal. If you do not run into any errors, you are good
to go!