
This project is a simplified fork of the original Galactic Aztec Data Acquisition project, designed to be used with the Galactic Aztec Heavy Raspberry Pi Add-on: ADC board.
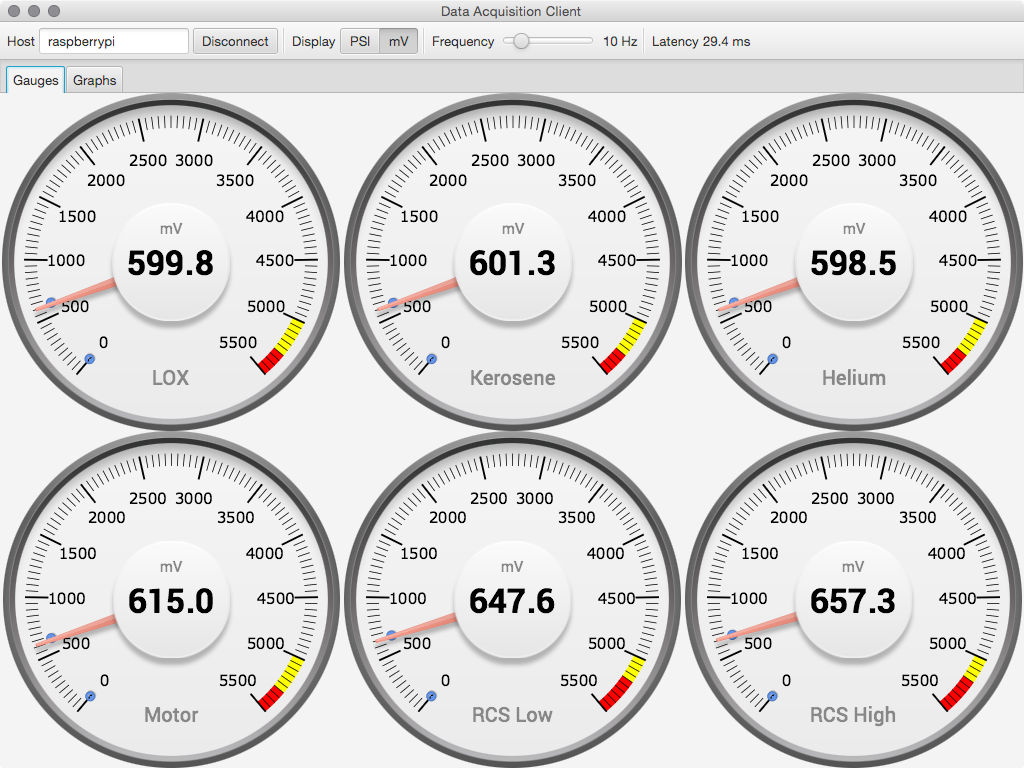
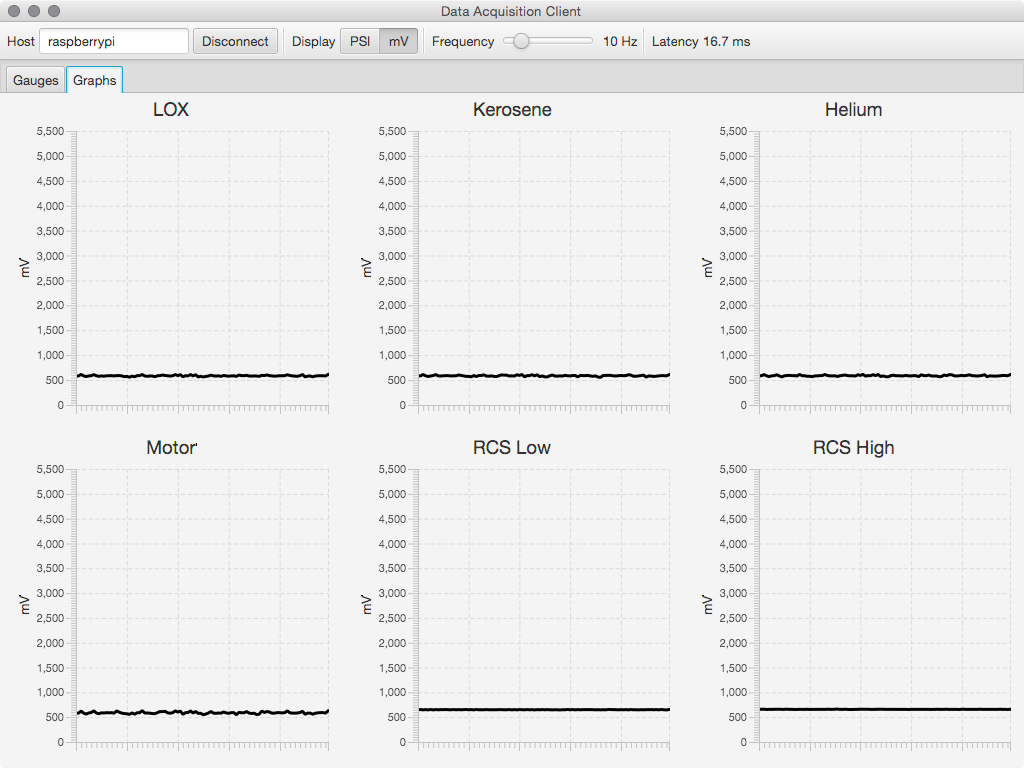
The software suite consists of a server (designed to run on a Raspberry Pi) and a multi-platform client application. The server reads from the Analog-to-Digital converters and transmits the data to the client application which displays the data in gauges and graphs.
Designed for the SDSU Rocket Project to be used on the Galactic Aztec Heavy rocket in order to read tank pressures. Although it can operate as a general purpose data acquisition software suite, providing data recording and transmission capabilities.
Browse the latest release page to determine the latest version, then SSH into your Raspberry Pi and run a command similar to:
wget -qO- https://github.com/twyatt/galactic-aztec-heavy-data-acquisition/releases/download/1.1.0/server.tar | tar xv
Where 1.1.0 should be replaced with the latest version number appearing on the latest release page.
The server is designed to record all readings to file; you can specify the directories to save the recordings to when you start the server:
server/bin/server logs/
The server can be executed with the --help argument to see more options.
Alternatively, if you wish to start the server without recording readings, then you can use the --allow-no-logs argument:
server/bin/server --allow-no-logs
After the server has been started, you can issue commands to perform functions such as printing out readings or quiting the application. To see a list of available options press ? followed by the Enter key. To quit, press q then Enter.
If you don't have the Galactic Aztec Heavy Raspberry Pi Add-on: ADC, or similar board available, then you can start the server in testing mode (whereas it generates sinusoidal test data):
server/bin/server --test
The server logs to a simple binary format that can be converted to CSV using log2csv, which can be installed by running a command similar to:
wget -qO- https://github.com/twyatt/galactic-aztec-heavy-data-acquisition/releases/download/1.1.0/log2csv.tar | tar xv
Where 1.1.0 should be replaced with the latest version number appearing on the latest release page.
You can then convert logs produced by the server by running log2csv with the log directory as the only argument, for example:
log2csv/bin/log2csv server/bin/logs/20161113233302
In this example, we are running log2csv and specifying a log directory that was created after running the server; be sure and replace 20161113233302 from the example with the appropriate directory created after running the server.
The client does not write sensor config data, so log2csv must be instructed to skip the config data when converting logs written by the client, for example:
log2csv/bin/log2csv --skip-config server/bin/logs/20161113233302
Simply download and install the OS X package (named DataAcquisitionClient-VERSION.dmg) from the latest release page.
Where VERSION represents the latest version number appearing on the latest release page.
Locate and download the latest DataAcquisitionClient.zip file from the releases page. Extract and run DataAcquisitionClient.exe.
Locate and download the latest dataacquisitionclient-VERSION.deb file from the latest release.
Where VERSION represents the latest version number appearing on the latest release page.
On Debian based systems, you can install the package by running:
sudo dpkg -i dataacquisitionclient-*.deb && sudo apt-get install -f
If you don't already have Java SE Development Kit 8 installed, download and install it.
- Download and extract the latest Source code (zip).
- Open the
build.commandscript.
The built application will be saved into the client/build/jfx/native/ sub-directory.
- Download and extract the latest Source code (zip).
- Open the
build.batscript.
The built application will be saved into the client/build/jfx/native/ sub-directory.
The Linux distribution can be built on a Linux machine or via Docker image.
To build on a Linux machine you'll need:
- JDK 8 (Oracle or OpenJDK w/ JavaFX)
- fakeroot
- rpmbuild
On Debian based systems you can run:
sudo apt-get update && sudo apt-get install fakeroot rpm
./gradlew :client:jfxNative
Alternatively, if you have Docker installed, then you can simply run:
docker/project-build.sh