This is an interactive real-time Mandelbrot fractal zoomer. You can watch a video of it in action, here:
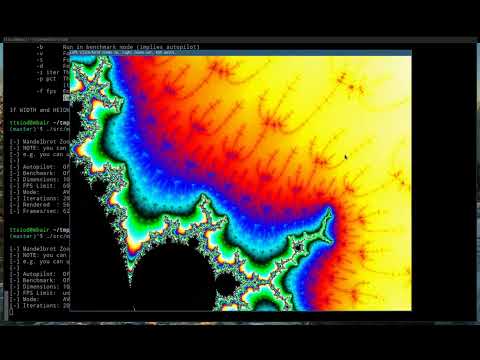
(Click on picture to play the video)
Windows users can download and run a pre-compiled Windows binary here.
After decompressing, you can simply execute either one of the two .bat files. The 'autopilot' one zooms in a specific location, while the other one allows you to zoom interactively using your mouse (left-click/hold zooms in, right-click/hold zooms out).
For those of you that want to build from source code, there are cross-compilation instructions later in this document.
Make sure you have libSDL2 installed. In Debian and its derivatives,
like Ubuntu, just sudo apt install libsdl2-dev.
Then, build the code - with...
$ ./configure
$ make
You can also use a WASM port that runs in modern browsers. But please note that the native code is dramatically faster, since it uses AVX/SSE instructions, and utilises all cores available in your machine. WASM is a poor substitute :-)
You can then try these:
$ src/mandelSSE
(Runs in autopilot mode, in a 1024x768 window)

$ src/mandelSSE -m 1280 720
(Runs in mouse-driven mode, in a 1280x720 window)
(left-click/hold zooms-in, right-click/hold zooms out)
Option -h gives you additional information about how to control
the Mandelbrot zoomer:
$ ./src/mandelSSE -h

Usage: ./src/mandelSSE [-a|-m] [-h] [-b] [-v|-s|-d] [-i iter] [-p pct] [-f rate] [WIDTH HEIGHT]
Where:
        -h      Show this help message
        -m      Run in mouse-driven mode
        -a      Run in autopilot mode (default)
        -b      Run in benchmark mode (implies autopilot)
        -v      Force use of AVX
        -s      Force use of SSE
        -d      Force use of non-AVX, non-SSE code
        -i iter The maximum number of iterations of the Mandelbrot loop (default: 2048)
        -p pct  The percentage of pixels computed per frame (default: 0.75)
                (the rest are copied from the previous frame)
        -f fps  Enforce upper bound of frames per second (default: 60)
                (use 0 to run at full possible speed)

If WIDTH and HEIGHT are not provided, they default to: 1024 768
For ultimate rendering speed, you can disable the frame limiter (option -f).
By default, you are limited to 60fps:
$ src/mandelSSE -m -f 0 1280 720
The benchmarking mode (-b) does this automatically. If you want to benchmark your CPU only (and not display anything) tell SDL you don't care about displaying the fractal:
$ SDL_VIDEODRIVER=dummy src/mandelSSE -b 512 384
Be mindful of your CPU's thermal throttling if you are benchmarking :-) Note that you can force AVX (-v), SSE (-s) or dumb floating point (-d) to see the speed impact made by our usage of special Intel instructions.
You can also control:
-
the percentage of pixels actually computed per frame, with option
-p. If you e.g. pass-p 0.5, then 100-0.5 = 99.5% of the pixels will be copied from the previous frame, and only 0.5% will be actually derived through the Mandelbrot computations. Amazingly, this is enough for a decent quality fly-through zoom in the fractal. By default, this is set to 0.75. -
the number of Mandelbrot iterations (option
-i). By default this is set to 2048 to allow for decent zoom levels, but if you want to see insane speeds, set this to something low, like 128; and disable the frame limiter; i.e. use-f 0 -i 128.
Long story.
When I got my hands on an SSE enabled processor (an Athlon-XP, back in 2002), I wanted to try out SSE programming... And over the better part of a weekend, I created a simple implementation of a Mandelbrot zoomer in SSE assembly. I was glad to see that my code was almost 3 times faster than pure C.
But that was just the beginning.
Over the last two decades, I kept coming back to this, enhancing it.
-
I learned how to use the GNU autotools, and made it work on most Intel platforms: checked with Linux, Windows (MinGW) and OpenBSD. A decade later, I also tested it on Raspbian and Armbian; it works fine in ARM machines as well. Autotools also allow me to cross-compile for Windows (more on that below).
-
After getting acquainted with OpenMP, in Nov 2009 I added OpenMP #pragmas to run both the C and the SSE code in all cores/CPUs. The SSE code had to be moved from a separate assembly file into inlined code - but the effort was worth it. The resulting frame rate - on a tiny Atom 330 running Arch Linux - sped up from 58 to 160 frames per second.
-
I then coded it in CUDA - a 75$ GPU card gave me almost two orders of magnitude of speedup!
-
Then in May 2011, I made the code switch automatically from single precision floating point to double precision - when one zooms "deep enough".
-
Around 2012 I added a significant optimization: avoiding fully calculating the Mandelbrot lake areas (black color) by drawing at 1/16 resolution and skipping black areas in the full resolution render.
-
I learned enough VHDL in 2018 to code the algorithm inside a Spartan3 FPGA. That was quite a learning experience.
-
In September 2020 I ported a fixed-point arithmetic version of the algorithm inside a 1.4$ microcontroller.
-
In October 2020, I implemented what I understood to be the XaoS algorithm; that is, re-using pixels from the previous frame to optimally update the next one. Especially in deep-dives and large windows, this delivered amazing speedups; between 2 and 3 orders of magnitude.
-
In July 2022, I optimised further with AVX instructions (+80% speed in CoreLoopDouble). I also ported the code to libSDL2, which stopped video tearing.
This used to be my main loop, right after I ported to SSE back in 2002:
    ;  x' = x^2 - y^2 + a
    ;  y' = 2xy + b
    ;
    mov     ecx, 0
    movaps  xmm5, [fours]     ; 4.     4.     4.     4.       ; xmm5
    movaps  xmm6, [re]        ; a0     a1     a2     a3       ; xmm6
    movaps  xmm7, [im]        ; b0     b1     b2     b3       ; xmm7
    xorps   xmm0, xmm0        ; 0.     0.     0.     0.
    xorps   xmm1, xmm1        ; 0.     0.     0.     0.
    xorps   xmm3, xmm3        ; 0.     0.     0.     0.       ; xmm3
loop1:
    movaps  xmm2, xmm0        ; x0     x1     x2     x3       ; xmm2
    mulps   xmm2, xmm1        ; x0*y0  x1*y1  x2*y2  x3*y3    ; xmm2
    mulps   xmm0, xmm0        ; x0^2   x1^2   x2^2   x3^2     ; xmm0
    mulps   xmm1, xmm1        ; y0^2   y1^2   y2^2   y3^2     ; xmm1
    movaps  xmm4, xmm0
    addps   xmm4, xmm1        ; x0^2+y0^2  x1...              ; xmm4
    subps   xmm0, xmm1        ; x0^2-y0^2  x1...              ; xmm0
    addps   xmm0, xmm6        ; x0'    x1'    x2'    x3'      ; xmm0
    movaps  xmm1, xmm2        ; x0*y0  x1*y1  x2*y2  x3*y3    ; xmm1
    addps   xmm1, xmm1        ; 2x0*y0 2x1*y1 2x2*y2 2x3*y3   ; xmm1
    addps   xmm1, xmm7        ; y0'    y1'    y2'    y3'      ; xmm1
    cmpltps xmm4, xmm5        ; <4     <4     <4     <4 ?     ; xmm2
    movaps  xmm2, xmm4

; at this point, xmm2 has all 1s in the non-overflowed pixels

    movmskps eax, xmm4        ; (lower 4 bits reflect comparisons)
    andps   xmm4, [ones]      ; so, prepare to increase the non-over
    addps   xmm3, xmm4        ; by updating the 4 bailout counters
    or      eax, eax          ; have all 4 pixels overflowed ?
    jz      short nomore      ; yes, we're done

    inc     ecx
    cmp     ecx, ITERATIONS
    jnz     short loop1
The new AVX code (inside CoreLoopDoubleAVX) follows the same motif; except that it also includes periodicity checking, and uses the YMM registers.
The comments should help you follow what's happening... Basically, we compute 4 pixels at a time.
The idea behind the XaoS algorithm is simple: don't redraw the pixels; instead re-use as many as you can from the previous frame.
The devil, as ever, is in the details.
The way I implemented this is as follows: the topmost scaline goes
from X coordinate xld to xru - in xstep steps (see code
for details). I store these computed coordinates in array xcoord;
and in the next frame, I compare the new coordinates with the old
ones. For each pixel, I basically find the closest X coordinate match.
I do the same for the Y coordinates. In both cases, we are talking about a 1-dimensional array, of MAXX or MAXY length.
After I have the matches, I sort them - based on distance to the
coordinates of the previous frame. The mandel function then forces
a redraw for the worst N columns/rows - where N comes as a percentage
parameter in the function call. Simply put, if the pixel's
X and Y coordinates fall on "slots" that are close enough to the
old frame's xcoord and ycoord, the pixel color is taken
from the previous frame without doing the expensive Mandelbrot
calculation.
This works perfectly - the zoom becomes nice and smooth, and is also improved with a full Mandelbrot render the moment the user stops zoooming.
The code has a lot of comments explaining the inner-workings in detail. Have a look!
After decompressing the SDL 2.0.22 tarball, install MinGW:
$ sudo apt install gcc-mingw-w64
Then download the source code of libSDL and compile it as follows:
$ cd SDL-2.0.22
$ ./configure --host=x86_64-w64-mingw32 \
        --disable-video-x11 --disable-x11-shared \
        --prefix=/usr/local/packages/SDL-2.0.22-win32
$ make
$ sudo make install
Finally, come back to this source folder, and configure it like this:
$ ./configure --host=x86_64-w64-mingw32 \
        --with-sdl-prefix=/usr/local/packages/SDL-2.0.22-win32 \
        --disable-sdltest
$ make
$ cp src/mandelSSE.exe \
        /usr/local/packages/SDL-2.0.22-win32/bin/SDL2.dll \
        /some/path/for/Windows/
You can also get the "ingredients" (DLLs for SDL2, OpenMP, libstd++, etc) from the packaged release here.
Since it reports frame rate at the end (option -b), you can use this as
a benchmark for AVX instructions - it puts the AVX registers under quite a load.
I've also coded a CUDA version, which you can play with, if you have an NVIDIA card. Some details about it, in the blog post I wrote back in 2009 about it here.