This repository contains the modifications, upgrades, and repairs to the SecKit Tank which I've created. Other modifications and repairs can be found on the primary SecKit website or wiki -- these are just those I have personally developed.
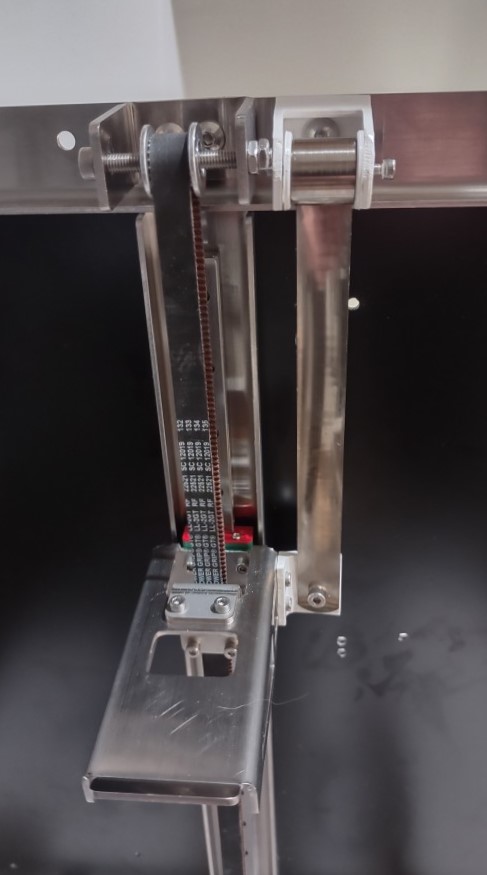
During assembly, I accidentally bent the constant force spring used to counter the weight of the build-plate along the z-axis. This is apparently somewhat easy to do, as all it took in my case was slightly bending the spring in a half-circular curve, roughly 10cm in diameter, opposite to the natural curl of the spring.
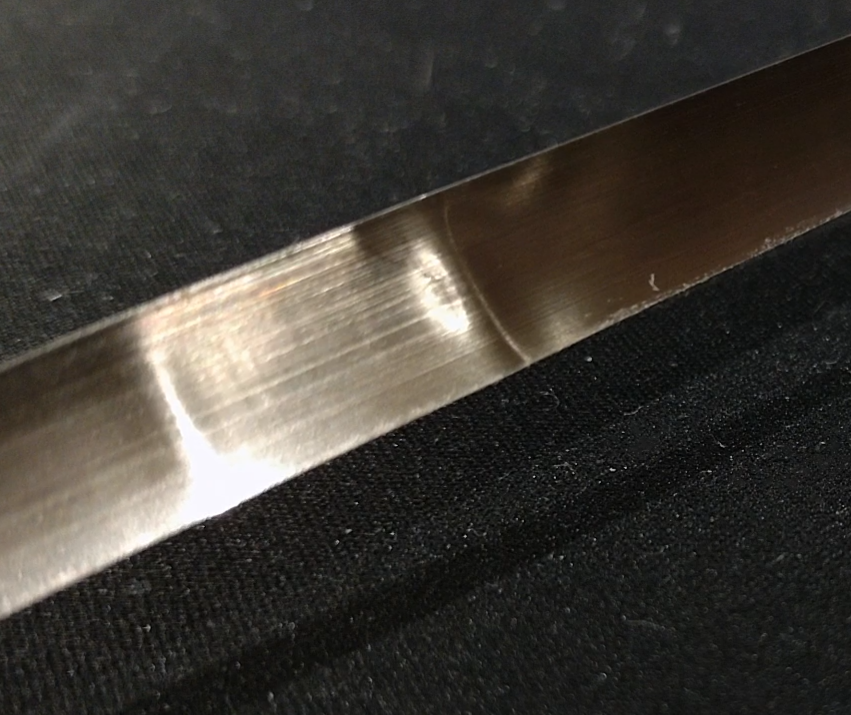
I believe the issue has more to do with the natural longitudinal curve running along the length of the extended strip of the spring, sort of like a tape measure or "snap bracelet". This imparts a sort of bistable structure to the spring. When bent in a direction opposite to the natural "curl" of the spring, it is quite easy to create a permanent fold or "kink" in the spring.
In my case this caused a number of issues when the spring was extended and retracted. During extension, a variable amount of force was applied by the spring as the kinks were being unwound from the bobbin. It also produced an audible "click" and associated vibration as the kink/fold would unwind from the bobbin.
Kinks in the original spring:
I've been told that the constant force spring now used in the Tank is a custom part designed specifically for the tank. It has a force of ~1.2 kg and a length of roughly 600mm.
Being in the US, shipping a tiny part like this from overseas is not worth shipping.
I could not find a part which was exactly the same dimensions or parameters, but I did find one that was sufficiently close enough which was readily available from supplier McMaster-Carr.
This is item 9293K295.
At the time of writing this, it is ~$5 USD, which is pretty cheap.
Unfortunately the spring is wider and thus the attachment hole to the z-axis bed bracket does not line up with the hole used by the existing spring.
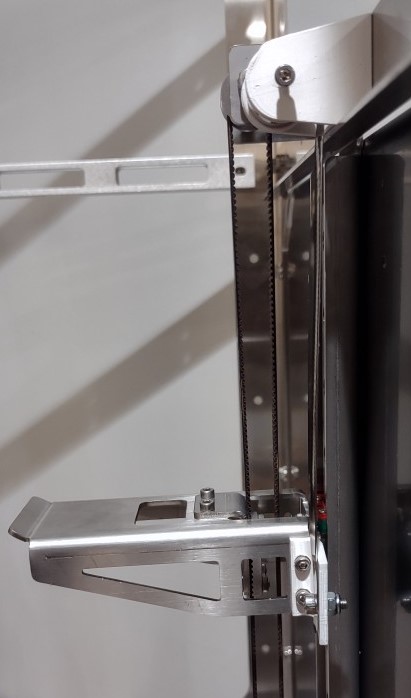
I've created a new attachment method which re-orients the spring and provides a new attachment location, coupling the spring to the same location the original spring was connected to.
The design is such that the spring should be perfectly vertical when extended, reducing the amount of unwanted lateral force.
A diagram of the updated design:
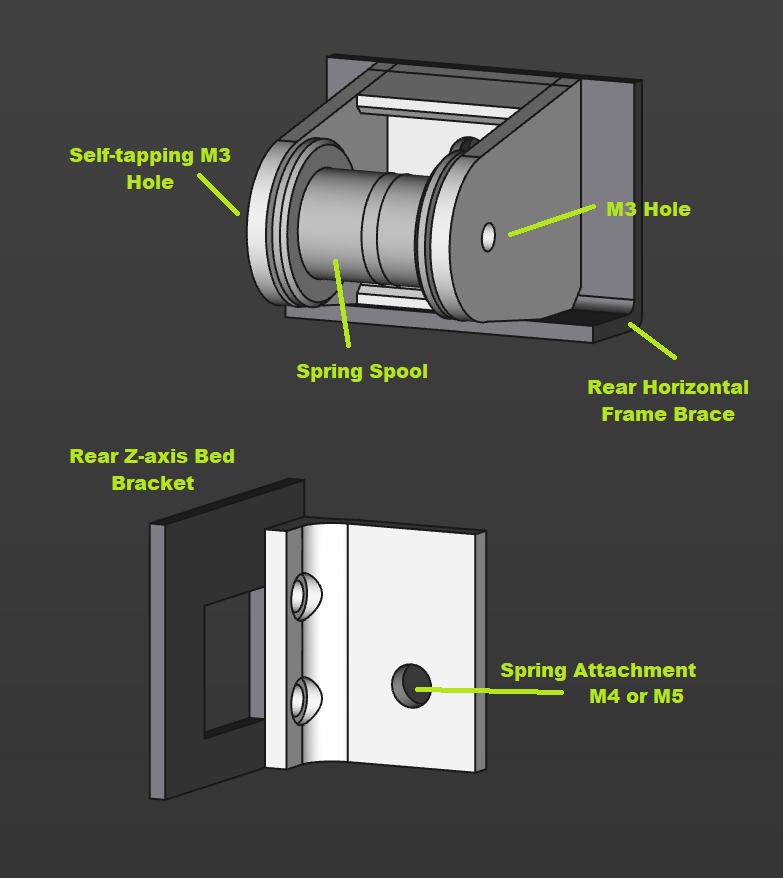
The spring is mounted to the same mount hole on the horizontal brace of the frame, but instead of extending out horizontally in the y-axis, it is parallel to the x-axis. It then attaches to a plate
- Printed STLs (linked below)
- 10mm M3 screws (x2, and corresponding nut)
- 30mm M3 screw (no nut)
- 15-30mm M5 screw (and corresponding nut)
- 10mm M4 or M5 screw (and corresponding nut)
- New spring, item 9293K295 from McMaster-Carr
- Print the STLs linked below. I used ASA for higher thermal resistance.
- Assemble the bobbin so that the spring is fixed onto it. Use some CA glue or similar, but make sure the glue does not ooze out onto the spring.
- Place the 15-30mm M5 screw through the bobbin mount, with the cap on the inside of the mount (the screw threads should extend to the back-side of the frame and mount). Attach and tighten bobbin bracket to the same place the old spring was attached to.
- Place bobbin into bracket such that the spring strip is on the back-side of the bobbin when it extends. Fix the bobbin to the mount with the 30mm M3 screw. It should self-tap into the other side of the mount. Do not overtighten or strip the plastic.
- Fix the spring attachment plate to the rear z-axis bed bracket at the same location the old spring was attached to. Use 2x 10mm M3 screws and nuts.
- Extend the spring and attach to the attachment plate using an M4 or M5 screw (10mm or so).