With homerrr you can create your own php based home automation system. For the communication beween the webserver and the arduino the php_serial.class.php is used.
Why another solution? I didn't get the other work :-)
What can be done?
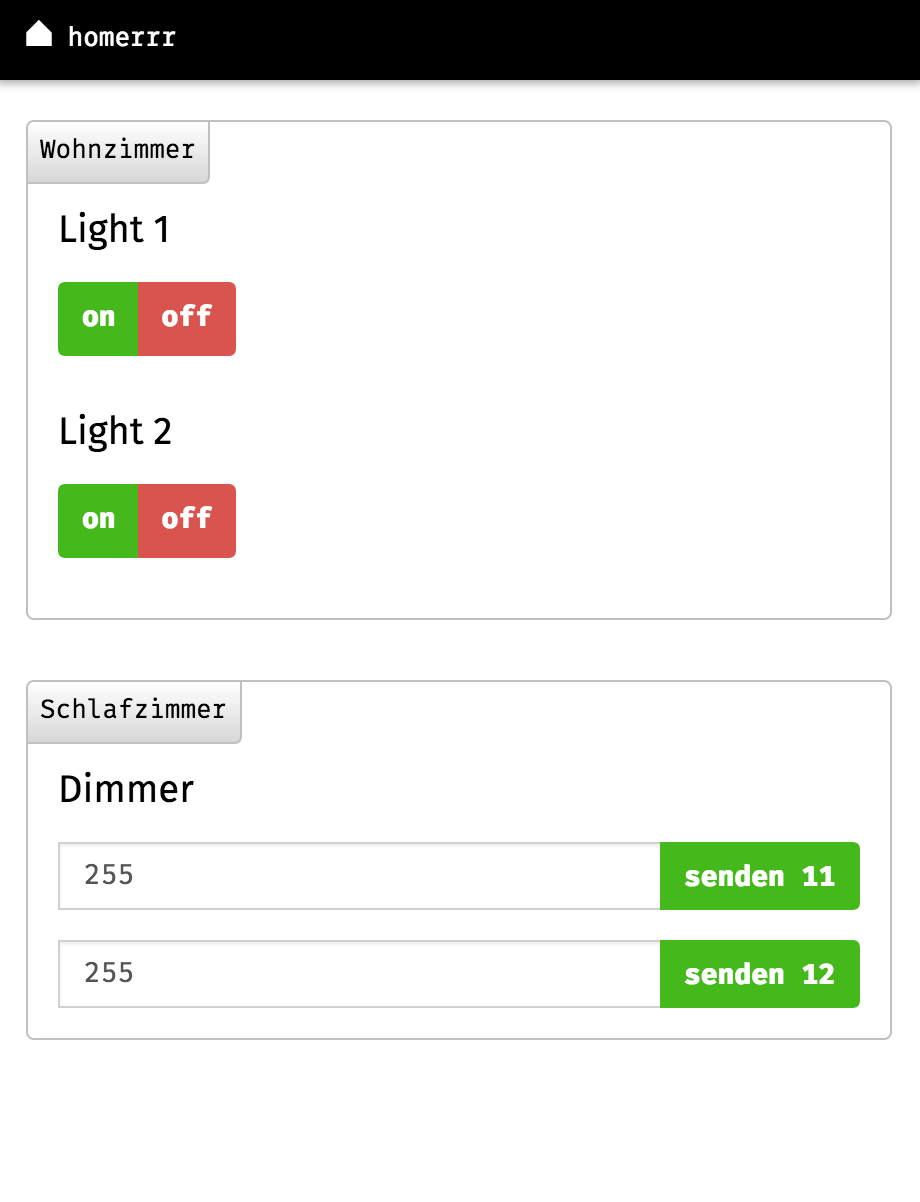
With the first version its possible to send different values with one command. So, you can take your light on and of, or even dimm it.
You have to install a local webserver with php. For OSX you can use http://www.mamp.info/de/ or the build in server For Rasperry Pi look at this tutorial http://www.raspberrypi.org/documentation/remote-access/web-server/apache.md
Clone the repository in your htdocs folder an try to open it. For example with http://localhost/homerrr/.
To allow access to the serial port of your device, you have to chmod 777 the driver for the serial. You can find the right serial port with the arduino ide. At the bottom right is written to which port your arduino is connected. In my case it was "/dev/cu.usbmodem1421" for mac and "/dev/ttyACMO" for my raspery. This connection must be set in the "initSerial.php" file in $serial->deviceSet. Look at the examples there.
The command for chmod is sudo chmod -R 777 ttyACM0
To set the chmod on every startup (because the tty files are created new), use paste this Code "chmod a+rw /dev/ttyACM0" to your /etc/rc.local file. Attention: This works for me. But I don't know if this cuases security issues. So dont't use this in critical environments.
Use the arduino software to push the code (arduino/arduino_homerrr/arduino_homerrr.ino) on the arduino.
Open the arduino serial monitor - otherwise sending won't have any effect. Another solution: Put a 100 Ohm resistor between the 5v and the reset pin of the arduino to disable the autoreset. And the solution that worked best for me: put a 100qf transistor between the RESET and the GND Pin. Or google "disable arduino reset".
- It took me a lot of time to find a working baud rate and a working arduino code. The best working baud rate for me is 9600.
- Another important thing: After opening the serial connection in the initSerial.php file, a "usleep(200000);" is the best solution, that the serial connection is realy open and no data is send too early.
- add a while (!Serial); to your arduino setup code. This is the second solution, which works fine with the usleep. So nearly every signal goes through.
The Frontend need some google fonts and jquery. If you don't have an internet connection, comment the js files and the google font files out.
This Project is heavily inspired by a few other projects: heimcontrol.js - http://ni-c.github.io/heimcontrol.js/ - i wanted to have something like this that I understand arduinoPi - https://github.com/JanStevens/ArduinoPi-Controller - here I understood the working of the php_serial.class - thanks a lot!