Security system for control and video surveillance implemented on a raspberry PI

Security system PI is an application that allows us to build a security system based on low-cost video surveillance using a raspberry PI, a camera and a motion sensor.
The idea is to be able to control this device through a telegram bot connected to our API that controls the main system. The main functions are the following:
- Automatic system of alerts generated when capturing movement.
- Manual system to capture video or a photo instantly.
- Streaming system to visualize the image in real time.
In addition, we can add custom camera configurations, such as resolution, rotation ... and the option of being able to activate an agent that will filter automatic alerts, generating only alerts when a person is detected in an image.
This system can be used through a telegram bot. It is very easy to use and intuitive, thanks to the buttons interface that has been developed, in addition to the advantage of being a multiplatform application.
In this documentation, you will be able to find all the related information, such as, the necessary hardware, the installation process, user manual...
As hardware devices to create our security system, we need the following components:
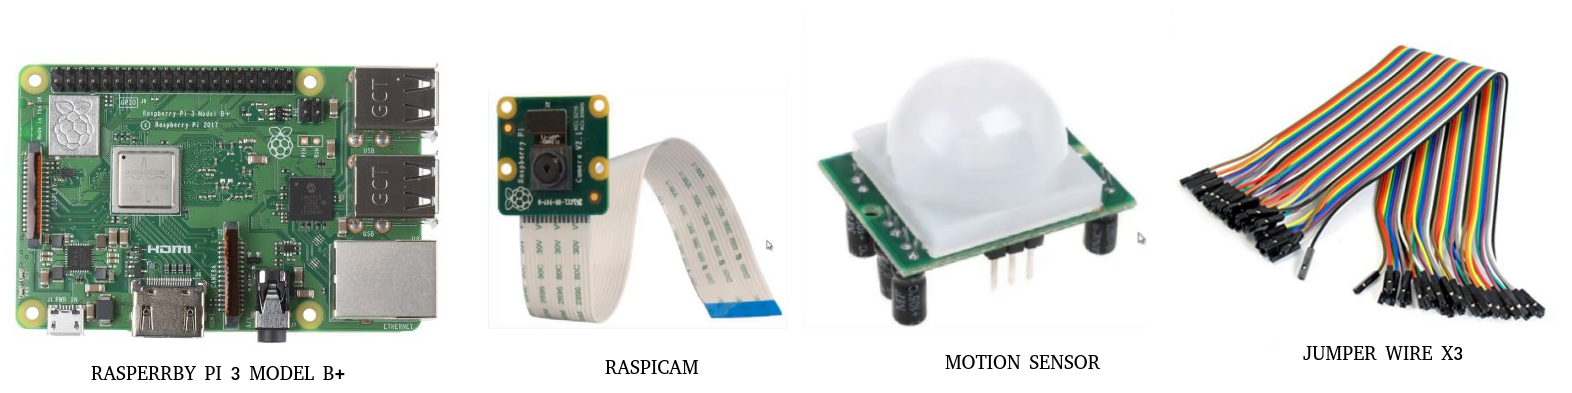
When we talk about raspberry PI, we mean the set of elements necessary for it to work (Normally, it's always included in a pack), such as they are the power supply unit and SD card where we have installed an SO (in this case Raspbian 9).
If you need to buy the components, you can check this link. to see the components that it has been purchased for this project, their price and the purchase link.
-
First, you need to connect the raspicam to the raspberry PI and configure it to detect the camera. If you don't know how to do it, you can watch the following tutorial: https://thepihut.com/blogs/raspberry-pi-tutorials/16021420-how-to-install-use-the-raspberry-pi-camera
-
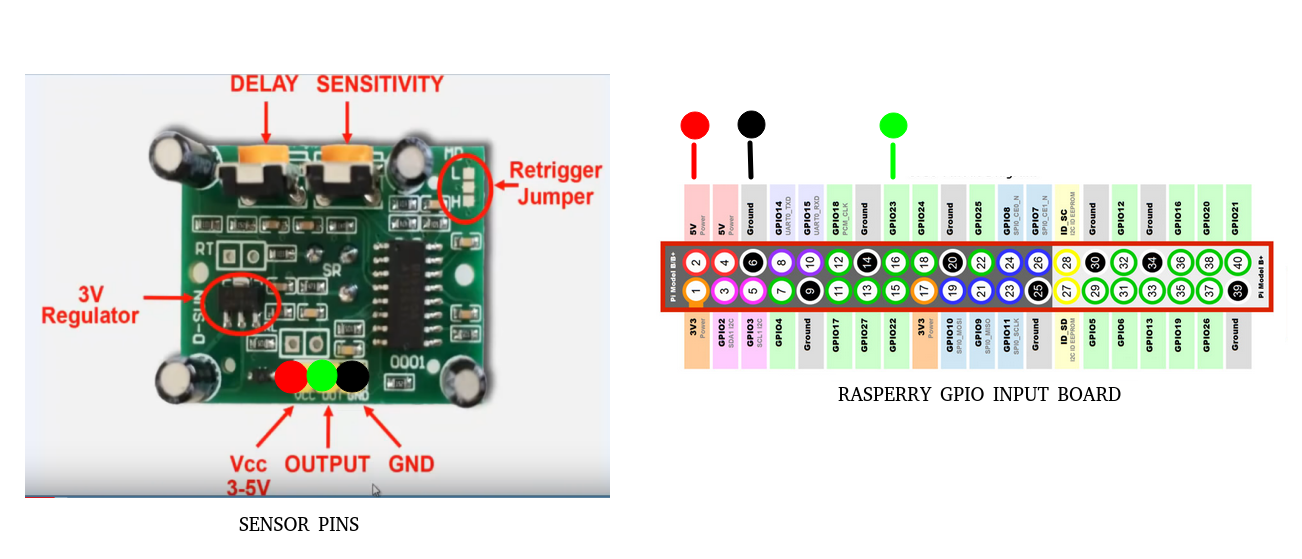
Once you have installed the camera and tested that it works, the next step is to install the motion sensor. To do this we have to connect the jumper wires as indicated in the following figure (pay attention to the colors that indicate where each pin has been connected)
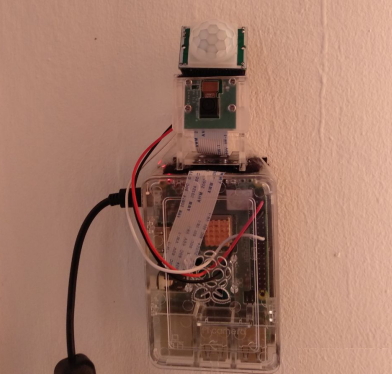
- And that's it. Put the camera and sensor where you want to watch. For example, I have placed it as follows:
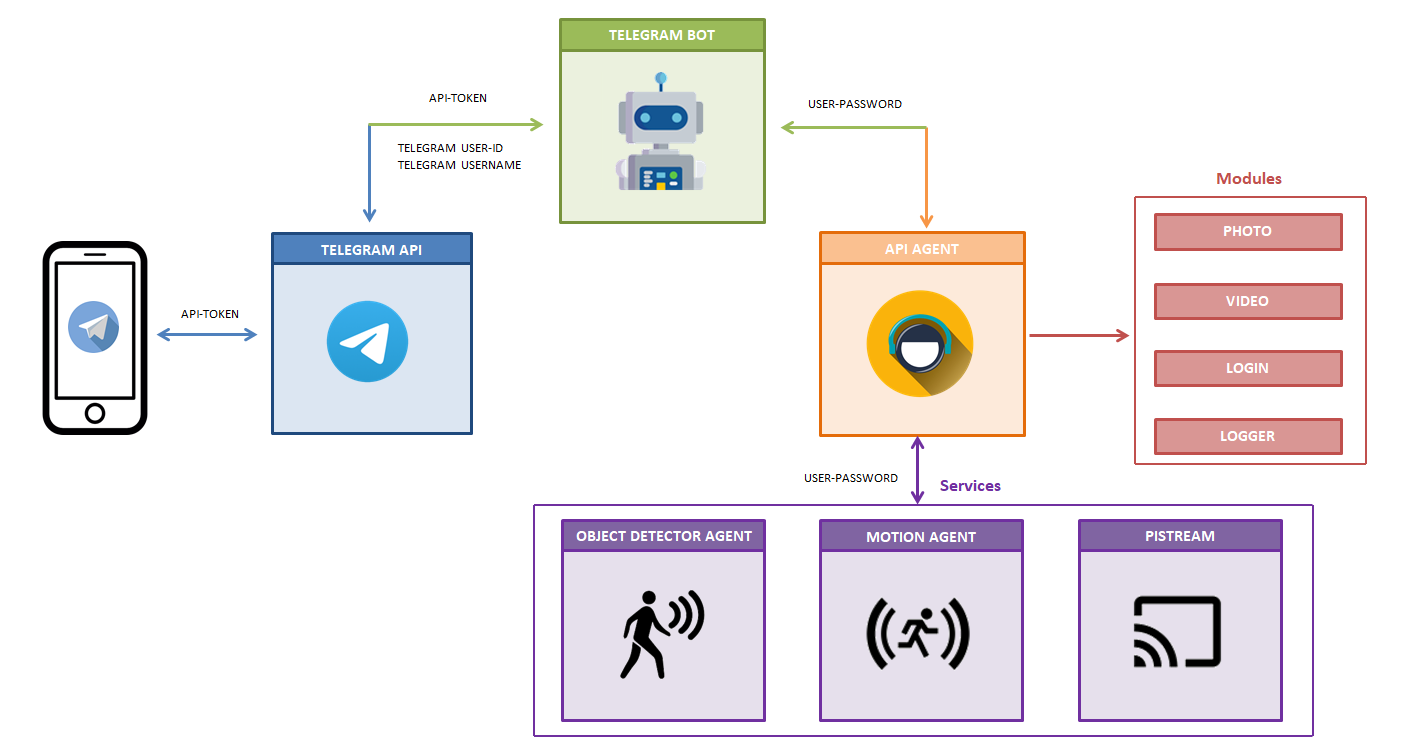
The backend application is responsible for interacting with the hardware through a set of microservices and modules connected to a main API.
In the following image, you can see the architecture of the application.
Note: You can see more information here.
In order to install the backend application correctly, it is necessary to install a set of dependencies.
-
Required: The basic components of the application are installed. These are:
- RabbitMQ server
- SQLite3
- Python3 dependencies
- Streaming server dependencies
-
Full installation:The complete installation includes the image processing for the detection of objects used by the object detector agent, whose functionality is to filter the alerts generated by the motion agent, alerting only in the case of detecting a person in the image captured during the alert.
This installation is optional, since you can disable this functionality by setting the False value to
DETECTOR_AGENT_STATUSin the settings.py configuration file.In addition to installing the necessary components in required installation, the following will be installed:
- TensorFlow
- OpenCV
- Protobuf
- Python3 dependencies
Note: You can see the entire installation process in detail here.
In this section, we are going to see how we can configure and deploy the application.
Note: Before starting to deploy the application, you must have done the installation. If you haven't done it yet, you can see the installation process in this link.
The steps to follow are:
- Create a telegram bot.
- Download the repository.
- Configure the app.
- Run the application.
Telegram is a cloud-based instant messaging and voice over IP service. Telegram client apps are available for multiple platforms.
-
First of all, you need to download the application, install it and register using your mobile number.
-
Then, you must search for BotFather's name in the search engine.
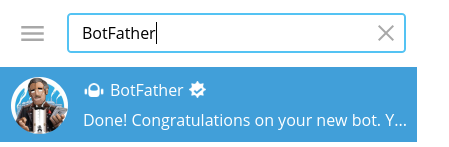
- Finally, you must start a conversation with this bot in order to create your own bot. To do this, you can use the
command
/newbotand the creation process will begin. It's very simple and quick, here's an example.
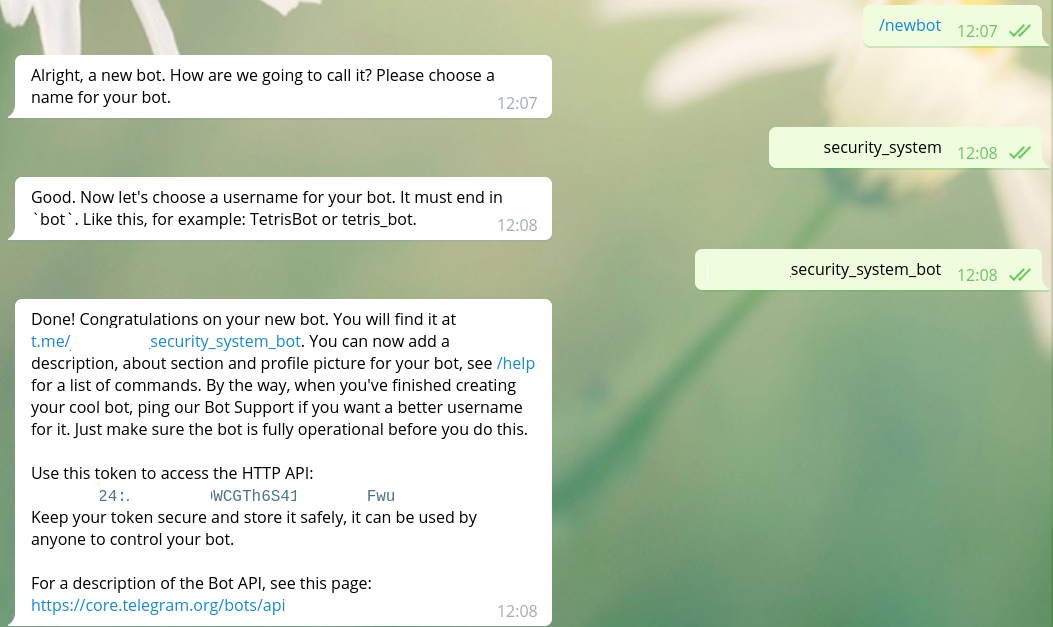
Note: Once the bot is created, it is very important that you save the API token, since it is necessary to insert it in the configuration that will be done in a few steps later.
The repository contains all the source code you will need to build and run the application.
You can easily download and unzip it using the git tool using:
git clone https://github.com/jmv74211/TFM_security_system_PI.git | tar -xzvfNote: If you don't have the
gittool installed, you can access the repository page and download it with a zip file.
To configure the app, you have to go to the config directory inside the src folder and make the following settings:
To do this, we will use the utility generate_has_password.py that is inside the tools directory.
-
First, let's generate a password hash for the API. To do this, we will use the utility generate_has_password.py that is inside the tools directory.
To get the password hash, we have to:
$ python3 generate_hash_password.py
Enter your password: password_test
Your hash password is  sha256$hqhX2BpC$638ce4d67d539de73fd19e8e29e789b43b64a0d75b8f8d64266c303b3bf5826d
-
Next, we need to enter the login credentials for our API. Go to the authentication.yml file, and set the access credentials for the application API (You have to add your user and password hash that has been obtained in the previous step).
-
The next step is to configure the telegram credentials. To do this, you have to edit the telegram_config.yml file, and add the information that is requested in the template.
Note: If you don't know all the data, don't worry, they can be obtained later. The mandatory data are
api_token,api_agent_userandapi_agent_password. (Note that in this case it is necessary to enter the password in raw format, (unencrypted)). -
If you have done a full installation (installed the necessary components for the object detector agent) then you have to set the value of the
OBJECT_DETECTOR_INSTALLEDvariable to "true" in app.sh to be able to start the object detection agent when running the application. -
The last step of the configuration process is to modify the settings file. In this file, we can modify the general configuration of the application, such as IP addresses of services, ports...
You can edit the information you need, but the minimum necessary is the following:
API_AGENT_IP_ADDRESS: IP address of the raspberry that is running the API service. If the installation is local, enter the local IP address. Example: 192.168.1.100API_PASSWORD: Your API agent raw password (unencrypted). Example: "test"GPIO_SENSOR_PIN_NUMBER: Your GPIO sensor pin number where the motion sensor has been connected. If you have followed the hardware installation above, then it will be number 16. Note that the numbering mode isGPIO.BOARD.STREAMING_SERVER_IP_ADDRESS: IP address of the raspberry that is running the streaming service. If the installation is local, enter the local IP address. Example: 192.168.1.100DETECTOR_AGENT_IP_ADDRESS: IP address of the raspberry that is running the object detector service. If the installation is local, enter the local IP address. Example: 192.168.1.100
Warning: Be careful with the syntax and the information you are going to modify. Any error in the configuration files will make the application not work properly.
Once the application is installed and configured, we can execute it using the app.sh script located in the root directory of the application.
Note: Remember that if you have done a complete installation (necessary components for the object detector agent) then you have to set the value of the
OBJECT_DETECTOR_INSTALLEDvariable to "true" in app.sh to be able to start all the services.
$ sudo chmod u+x ./app.sh-
To start the application, run the command:
$ ./app.sh start
-
To stop the application, run the command:
$ ./app.sh stop
-
To check the state of the application, run the command:
$ ./app.sh status
Attention: If you have not configured the telegram credentials (telegram username, id, bot username and bot id) you will only be able to access the utils section of the bot to obtain these credentials. Once obtained, add them to the configuration file, and restart the application (stop and start).
The application is very easy to use. It basically consists of a telegram bot that controls a restful API. Through this telegram bot, we will be able to manage the set of modules of the application to take pictures, record videos, activate the streaming...
You can activate the button interface by inserting the command /start or by typing any character
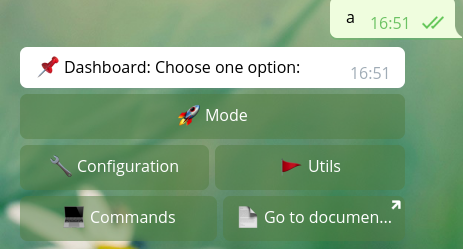
As you can see, there is an interface of buttons through which we can select the different options.
-
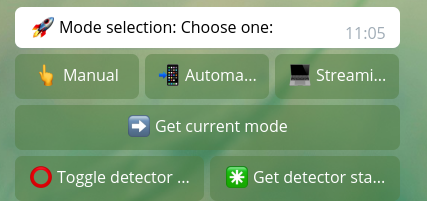
Mode: In this section we can select the mode of the application. We can activate the camera/video manually, activate the motion sensor, streaming or the alerts filter using the detector.
-
Configuration: In this section we can modify the configuration of the camera/video, modifying the resolution, rotation, hflip or vflip.
-
Utils: In this section we can visualize the credentials of the user of telegram and bot. This information can be useful, as it is necessary to configure the telegram application and for the application to run correctly.
-
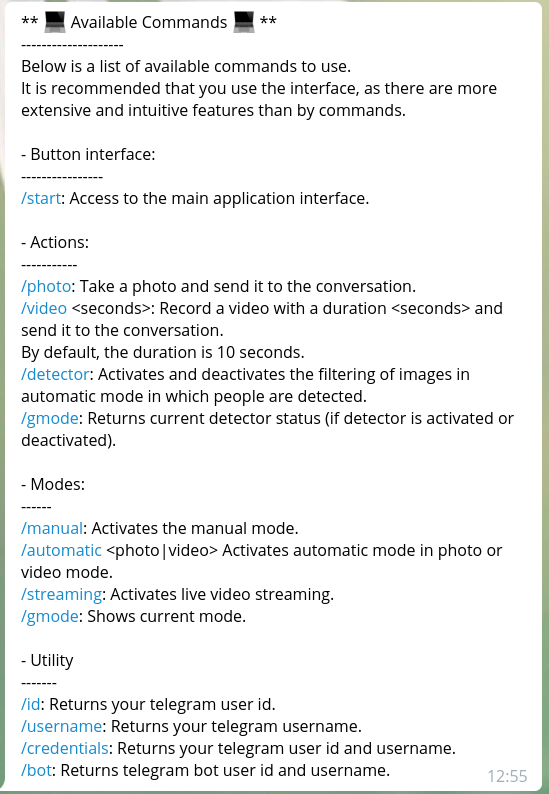
Commands: This button shows all the commands available to interact with the application instead of using the button interface.
-
Documentation: This button will redirect you to the application documentation that is available in this repository.
In this section you will find the following options:
-
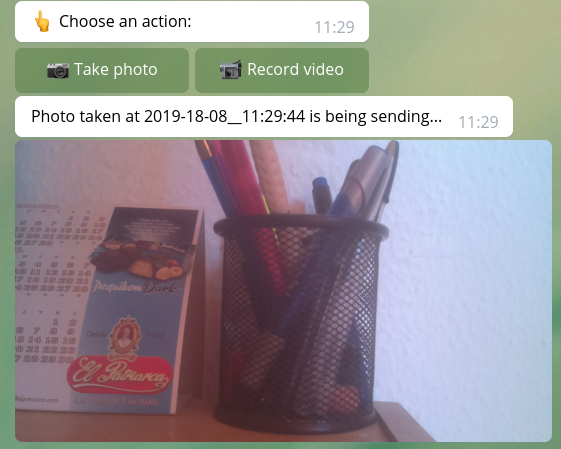
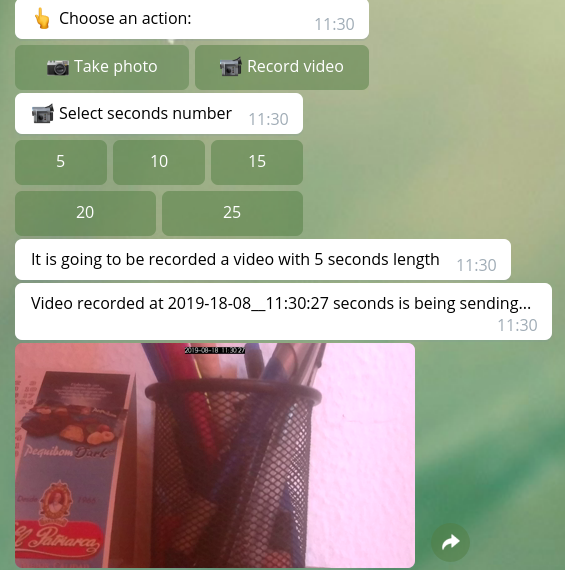
Manual: Activates manual mode. You will be able to capture a photo or record a video specifying the number of seconds of recording. After this capture or recording is finished, it will be sent to the conversation.
Taking a picture:
Recording a video:
-
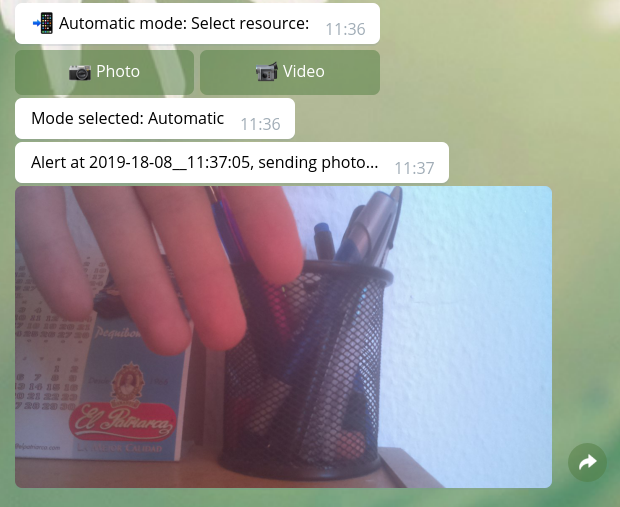
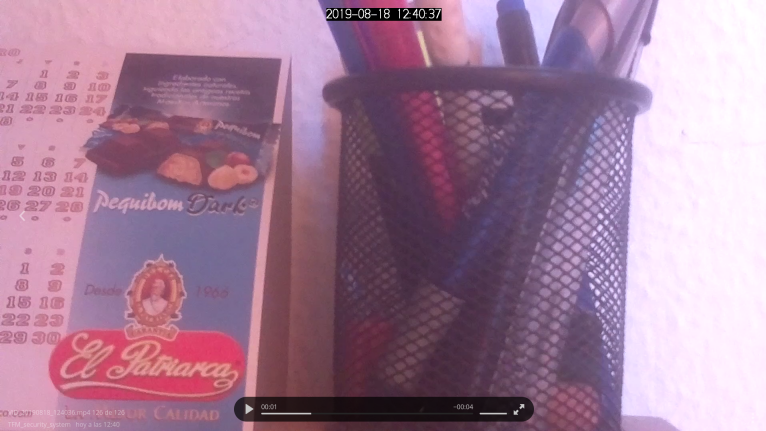
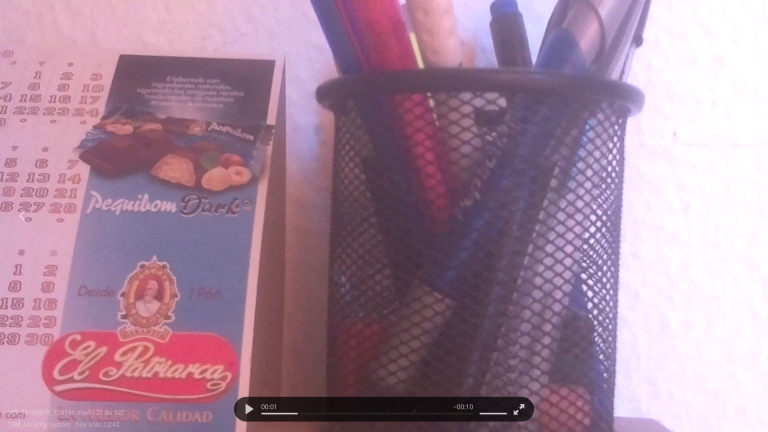
Automatic: Activates the automatic mode. In this mode the motion sensor will be activated and alerts will be sent when some type of movement is detected, and its corresponding photo or video (according to the choice) to be able to observe what is happening.
Activating automatic mode with photo alerts
-
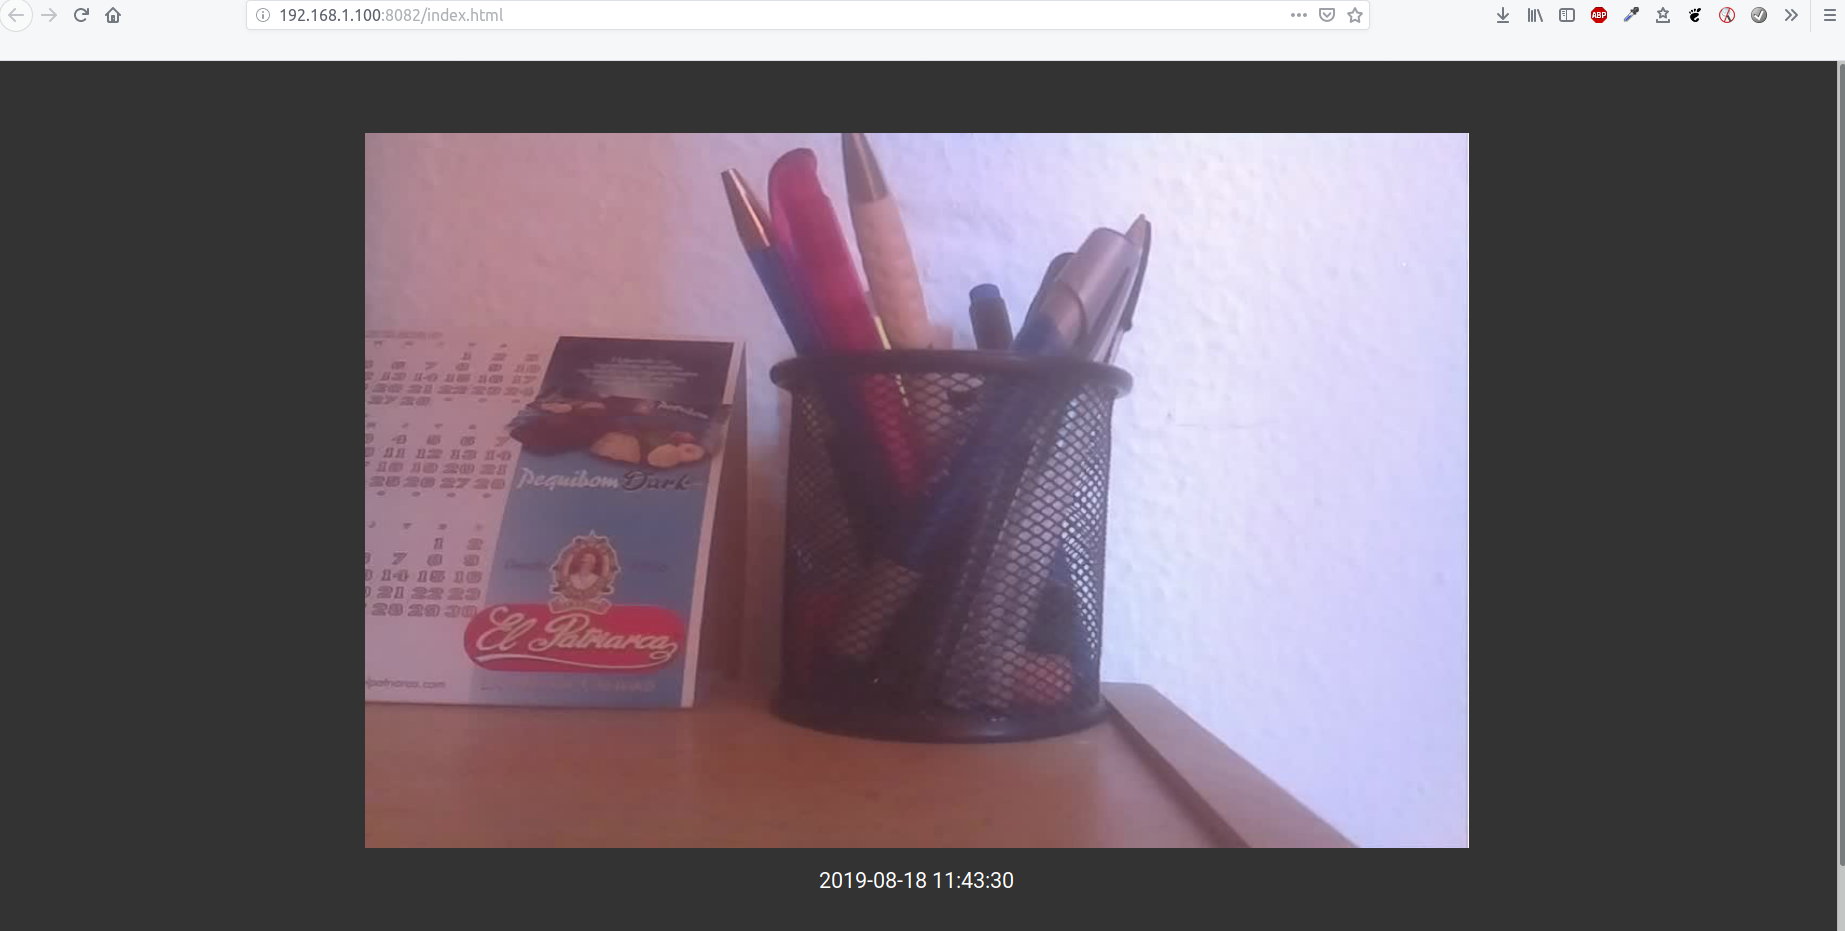
Streaming: Activates the streaming mode. In this mode, we will be able to observe in real time what the camera is visualizing. This retransmission is done in a responsive way, so it can be viewed through the browser of any device.
Attention, the broadcast will not be stored, but will only be retransmitted.

-
Get current status: The bot will tell you the current active mode

-
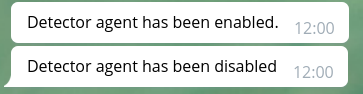
Toogle detector status: Activates or deactivates the object detector mode.
The functionality of this agent is to filter the captured images as alerts, and only send the alerts in which a person has been detected in the captured photo. The images catalogued as "false positives" will be sent to the directory specified in the settings.py file.
Note: It is important to know that it only has to be activated in the case of a full installation and the object detector agent process is running.It is recommended to configure a medium resolution (1280x720) for the camera, since on the contrary, the agent will take too long to process the image and the alerts will take too long to be sent to the conversation.
-
Get detector status: The bot will tell you the current object detector mode status.

Note: When a mode is activated, the previous mode is automatically deactivated, i.e., to deactivate a mode, simply activate another mode.
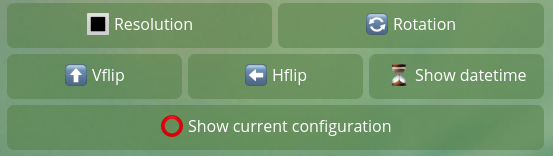
In this section you can modify the camera and video settings.
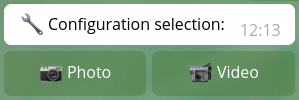
Photo configuration
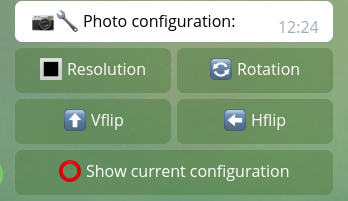
Here you can change all the settings of the captured photos both in manual mode and in automatic mode with photos.
-
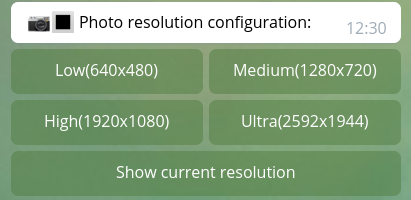
Resolution: Modify the resolution of the camera
-
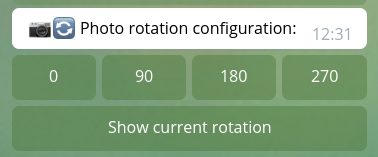
Rotation: Modify the rotation of the camera
-
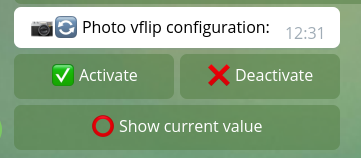
Vflip: Activate/deactivate the vertical flip of the camera
-
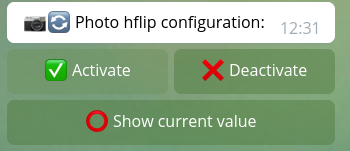
Hflip: Activate/deactivate the horizontal flipof the camera
-
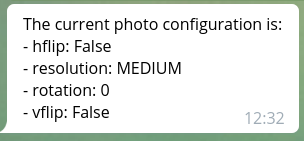
Show current configuration: Send a message to the conversation with the current photo configuration.
Video configuration
Here you can change all the settings of the video recording, both in manual and automatic mode with video.
In the video configuration, there are the same options as in the camera, adding show datetime, whose objective is to show the date and time of the recording at the top of the video.
- Show datetime deactivated
- Show datetime activated
In this section we can visualize the credentials of the user of telegram and bot. This information can be useful, as it is necessary to configure the telegram application and for the application to run correctly.
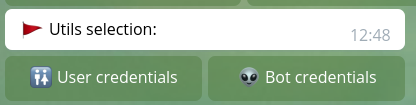
- User credentials

- Bot credentials

You can also interact with the bot as a command (instead of the button interface). This option shows you the possible commands with which you can interact with the bot, and may be able to speed up some task in certain cases.
This button redirects you to the application documentation page.
In this version of the application, a telegram bot is used to interact with the main API of the application, and show the information to the user.
As alternative applications to telegram, any type of front-end application can be built to obtain and show the data to the user making use of its API. In this case, you can do it without any type of problem, since it would be enough to connect this front-end to the main API, replacing the telegram bot.
If you plan to do this, it might help you to consult the API documentation, which shows all the requests that can be made, their answers and some examples of use.