Not debates, but a place where voters can get to know their candidates and candidates can connect to voters
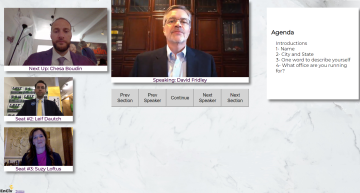
See our MVP/demo of the November, 5, 2019 San Francisco District Attorney race at: https://undebate.herokuapp.com/san-francisco-district-attorney
Copyright 2019 EnCiv, Inc. This work is licensed under the terms described in LICENSE.txt which an MIT license with a Public Good License Condition
You will need a github.com account, and a heroku.com account. Heroku is like a server in the cloud that you can push git repo's to, and after you push, heroku will build and run them. It's also great because they give you free accounts that you can use for development.
You will need to install the following, if you do not already have them.
- Git: On windows go to https://git-scm.com/download/win and install it. If you are on a Mac, install brew first, https://brew.sh/ and then
brew install git - Node.js: https://nodejs.org/en/download/
- Heroku: https://devcenter.heroku.com/articles/heroku-cli
- I use visual studio code, but you can use another environment, but you will need to be able to run git-bash terminal windows in your environment. https://code.visualstudio.com/
On your browser go to your github account and login
If you have just installed VSC you need to setup the bash shell. Use Control-Shift-P In the input field type "Select Default Shell" Choose "Git Bash"
Then open a git-bash shell - on VSC use Control-`
mkdir enciv
cd enciv
git clone https://github.com/EnCiv/undebate
cd undebate
npm install
Note - if you are using multiple accounts with heroku, make sure that on your browser you are logged into the account that you want to use.
Heroku calls them 'apps' but think of it as a server instance in the cloud with a URL, the name you give it is part of the url. Create create one:
heroku create undebate-something-unique
Then we add the MongoDB database. It's also in cloud. You will be able to use this one database when you are running locally, and when you are running in the cloud.
heroku addons:create mongolab:sandbox
Now lets get the environment variable with the URI for that database and store it in your bash configuration file so you can use it when you run locally. This string has a password in it and it should never be shared or commited to a repo. The .gitignore file ignores .bashrc so it won't get added into a repo - just make sure it stays that way.
echo "export MONGODB_URI="\"`heroku config:get MONGODB_URI`\" >> .bashrc
Now we will add Cloudinary - a Content Delivery Network that has image and video manipulation features. A CDN gives you a place to store these things, and deliver them quickly over the internet. Your node server would be slower, and doesn't keep the files after the server restarts.
heroku addons:create cloudinary:starter
Again we get the environment variable with the URL for Cloudinary and store it in your config file for local use. There's a password in the string, so keep it secret.
echo "export CLOUDINARY_URL="\"`heroku config:get CLOUDINARY_URL`\" >> .bashrc
Now we just tell node we are in development mode. Later we will set it to production
echo "export NODE_ENV=development" >> .bashrc
heroku config:set NODE_ENV=development
Then to get all these environment variable set in your current instance of bash do this. But you won't have to it the next time you start up.
source .bashrc
Now you should be able to run it.
npm run dev
You should now be able to browser to localhost:3011/schoolboard-conversation and see an undebate. The server is running locally on our machine. It's using webpack, which is really neat bacuase when you save changes to the source code, it will automatically be compliled and applied to the server and to the application in your browser. You may still have to refresh your browser page though.
You can use Control-C to terminate the server
To run this in the cloud on heroku:
git push heroku HEAD:master
Then you will be able to browse to https://undebate-something-unique.herokuapp.com/schoolboard-conversation and see the same thing.
Then, to record your own part in the schoolboard conversation browser to: localhost:3011/schoolboard-conversation-candidate-recorder or https://undebate-something-unique.herokuapp.com/schoolboard-conversation-candidate-recorder
Setting up email from the server is not required, and is kind of hard. For information on how to do it for g-suite see https://medium.com/@imre_7961/nodemailer-with-g-suite-oauth2-4c86049f778a If you do, edit the .bashrc file and add these lines
export NODEMAILER_SERVICE="gmail"
NODEMAILER_USER="no-reply@yourdomain.com"
NODEMAILER_SERVICE_CLIENT="XXXXXXXXXXXXXXXXXXXXX"
NODEMAILER_PRIVATE_KEY="-----BEGIN PRIVATE KEY-----\nXXXXX........XXXXX\n-----END PRIVATE KEY-----\n
If you use Zoho, you can do it like this.
export NODEMAILER_SERVICE="Zoho"
NODEMAILER_USER="no-reply@yourdomain.com"
NODEMAILER_PASS="xxxxxxxxx"
If you use some other service, or 'things change' as they always do, go to app/server/util/send-mail.js and address them, but don't break the above configurations After you make changes to the .bashrc file you will need to heroku config:set them to get them to heroku
There is a tool that lets you view and edit the database in a browser window. This has been really useful in development. To get there:
- Browse to heroku and login to your account.
- In the list find the undebate-something-unique app that you created.
- You should see a logo next to a link called "mLab MongoDB". Click on that link.
- That will open a new window into your database. You will see 3 collections:
- iota: this is where "objects" are stored related to the debates. Different objects have different content and this is an advanage of a NoSQL database.
- logs: We are using log4js and the output goes to this collection, and to the console. To view the logs from the server in the cloud use
app/tools/logwatch.js db $MONGODB_URI. To exit, Control-C - users: when people save their recordings, a users record is created. There's not much here now, and we need to expand on this.
- You can click on collections and look through them, you can edit entries (carefully!), and you can create new ones.