What motivated me to create this app was due to requests I received from people like Jerome and his crew after they observed that the app I had created a few months ago (Project App) didn't quite resemble a Project Management Application. I went back and forth with them about the scalability of the mini-app and I promised to make this app, which will be followed by another application which I intend to do next month.
// off-topic
As a Mentor and Teaching Assistant (TA) in the Ruby on Rails Web Development Specialization offered in the Coursera platform, I should reiterate that learning how to programme requires a lot of patience, curiosity, willingness to learn, research and excellent problem-solving skills. For instance if you write asking why Ruby is not working on your system and you have homebrew and rbenv, it means that you haven't researched enough. Such questions should be posted on Stackoverflow and FB forums.
Learning to do that early is of paramount importance as you will be stuck whilst debugging and at times your application won't do what you really want it to do. It may as well work but your client may decide to turn it upside down making you recreate DB's and other disruptive "high order thinking" from him/her.
// end of off-topic
In this project I used Vue.JS as a Frontend Framework just to change gears from Angular and React. It's great for building UI's and it integrates well with Ruby on Rails.
I also used Tachyons which is a framework built around functional styles and keeps stuff consistent and scalable. For instance you can declare font-styles in css and tweak your stylesheet with different font sizes in media queries for responsiveness puporses. At first I ignored it but after trying it I became a fun of it. See an example below and checkout the cool spacing it offers in their website (for those who design blogs). You can actually install individual modules of your liking with node packages instead of keeping the whole library.
http://tachyons.io/docs/typography/font-style/
/*

   FONT STYLE
   Docs: http://tachyons.io/docs/typography/font-style/

   Media Query Extensions:
     -ns = not-small
     -m  = medium
     -l  = large

*/

.i         { font-style: italic; }
.fs-normal { font-style: normal; }

@media (--breakpoint-not-small) {
  .i-ns       { font-style: italic; }
  .fs-normal-ns     { font-style: normal; }
}

@media (--breakpoint-medium) {
  .i-m       { font-style: italic; }
  .fs-normal-m     { font-style: normal; }
}

@media (--breakpoint-large) {
  .i-l       { font-style: italic; }
  .fs-normal-l     { font-style: normal; }
}
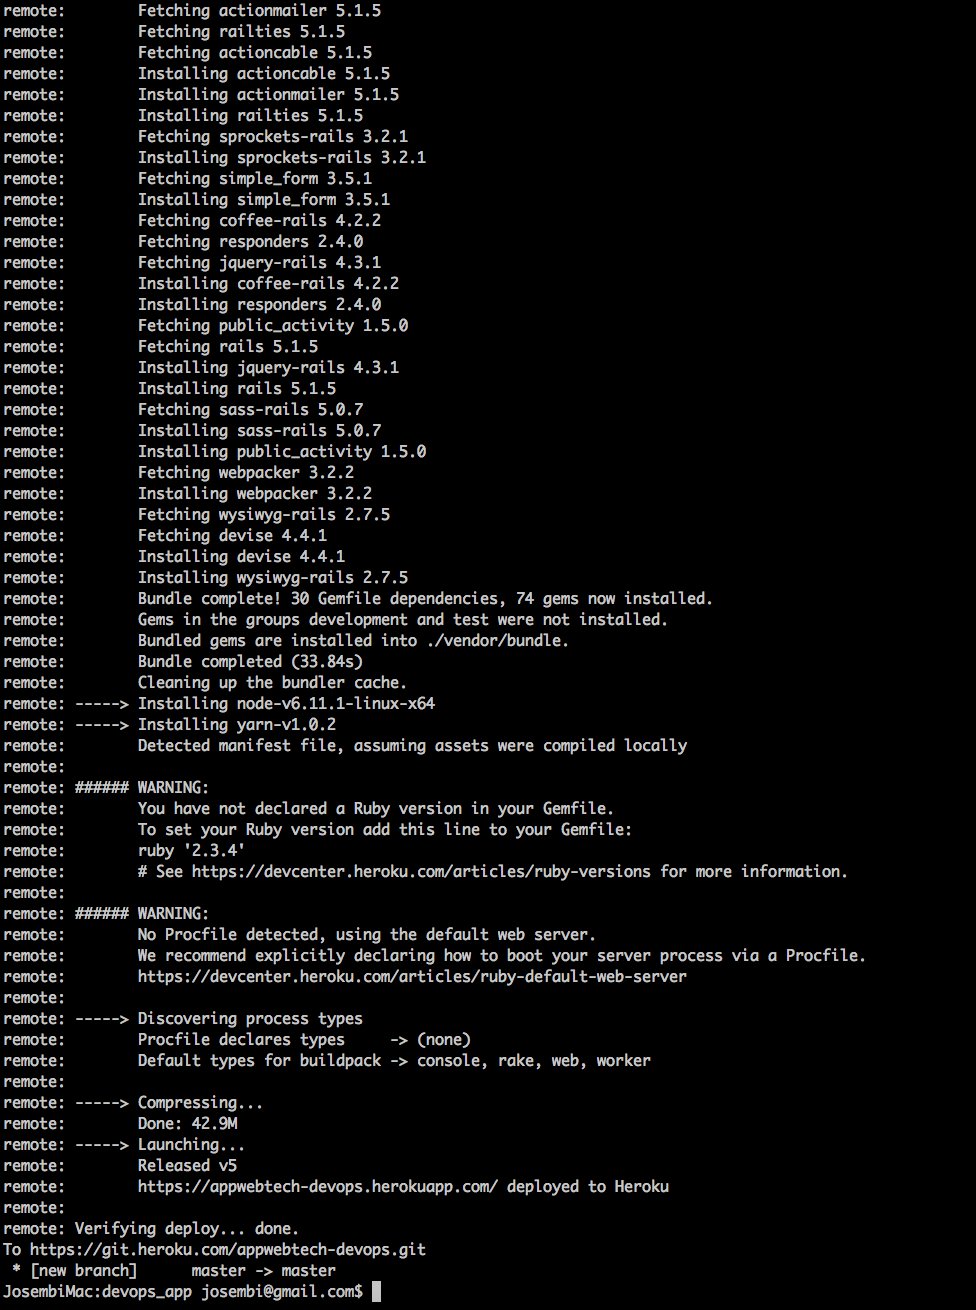
I tried to deploy the app and it does throw errors from the heroku servers. Funny thing is it compiles and deploys successfully if I use my paid account but fails with the other free accounts that I use for testing, debugging and prototyping. The main reason from the errors point to the app been compiled as a NodeJS app rather than a Rails app. This happened when I used npm to install webpack.
Webpack Installation

Deployment Failed with the free dynos account

Successful deployment in my paid account. (I deleted the project as it's wasting valuable space)
I may come back to re-deploy but meanwhile, whoever feels like trying can fork the project and create a staging branch via git.
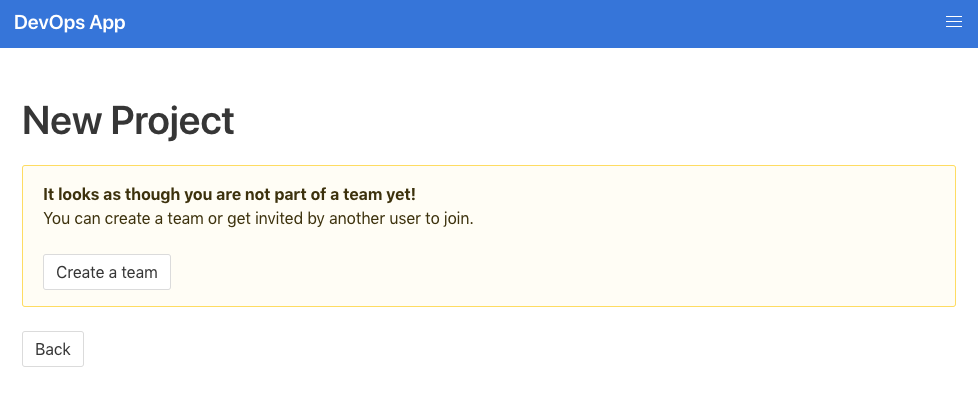
Users should be able to register and create a project. Each user can create a team to work with and a project history will be displayed on the right hand side of the browser. The concepts of MVC in RoR development are quite intuitive and below are a few screen shots of how the app should look like;
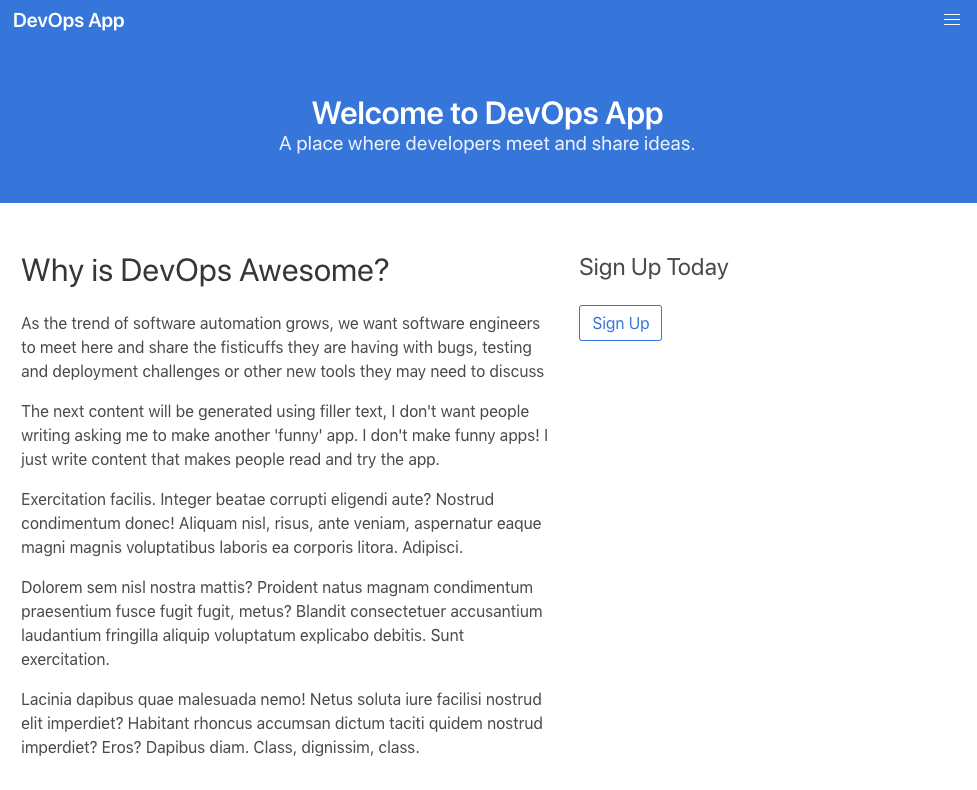
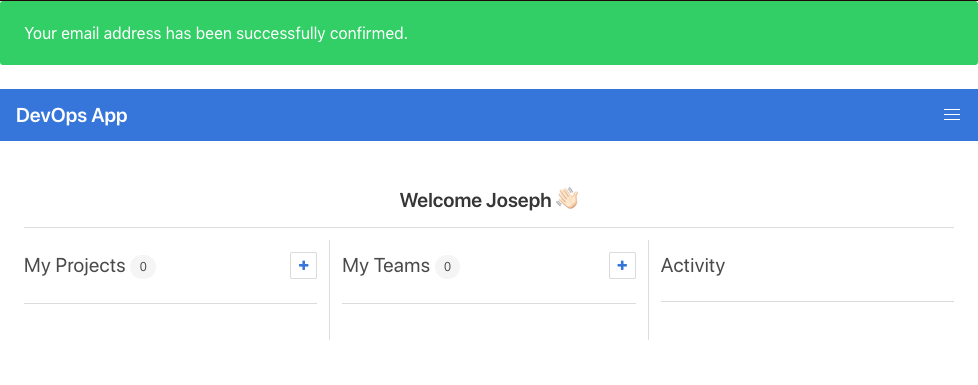
Homepage
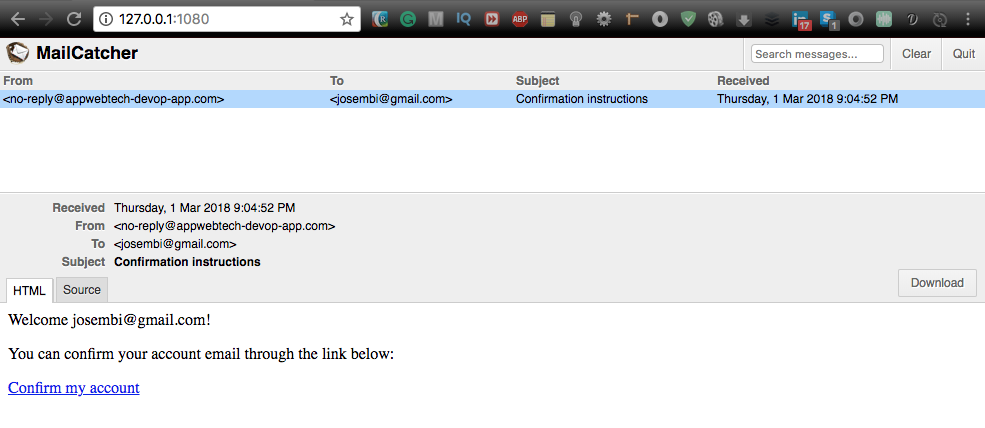
Sign-up (Confirming email)
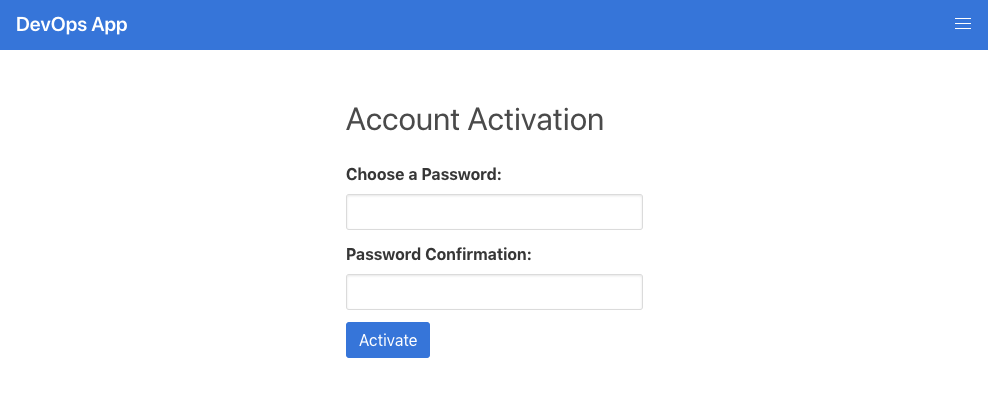
ccount Activation
Password Encryption & Saving as a Hash Algorithm
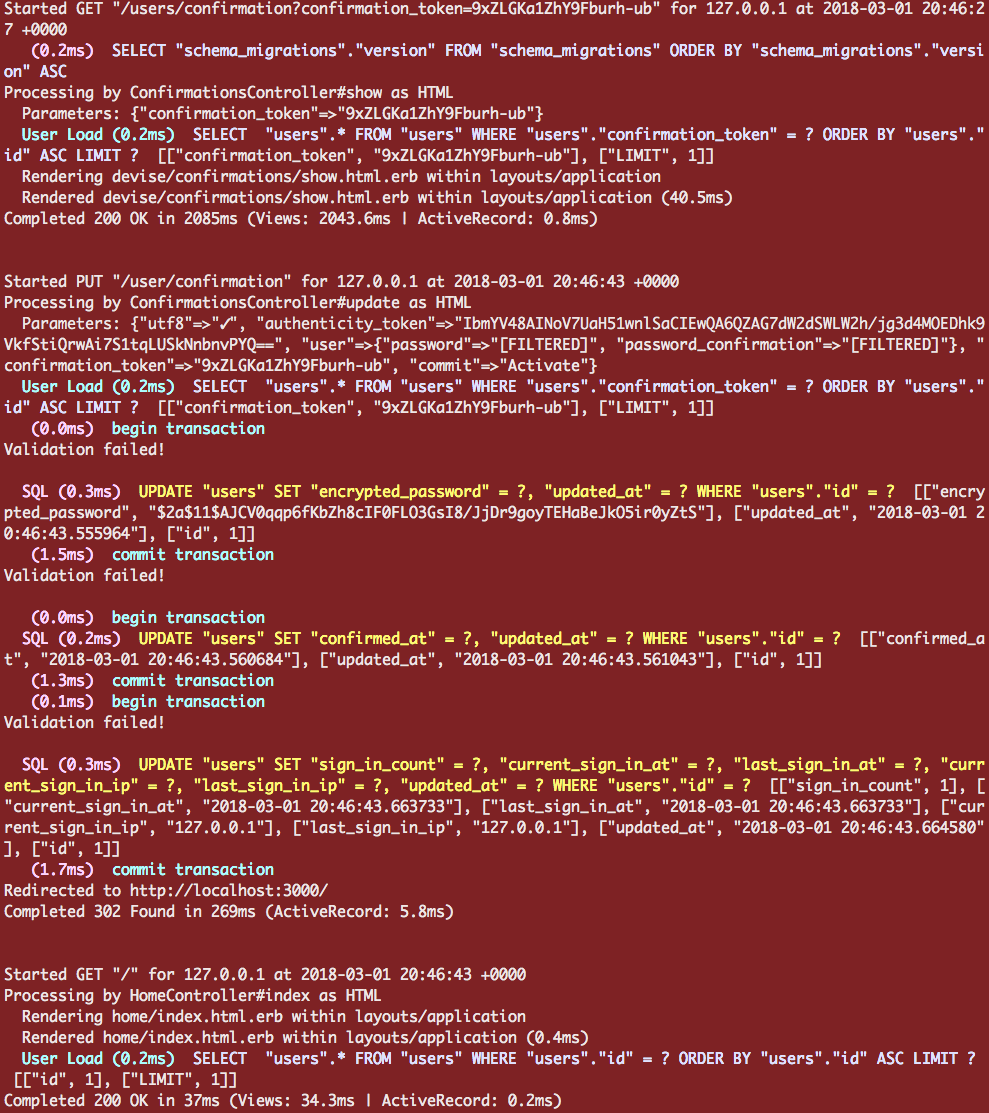
Account Successfully Created
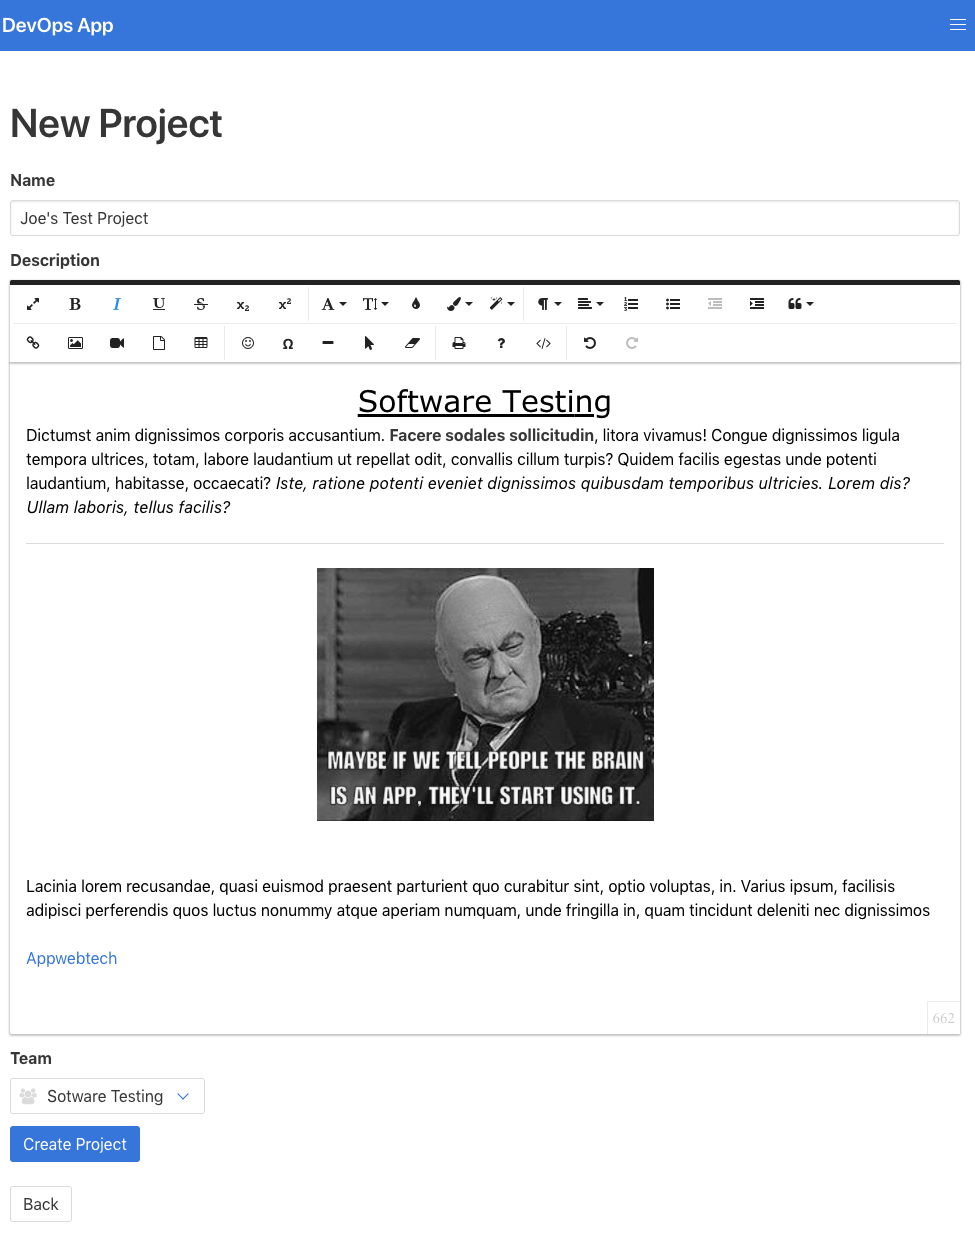
Create a new project
New Project Been created
Projects Page

You can see the Webpacker installation followed by Vue below;
Webpack Installation
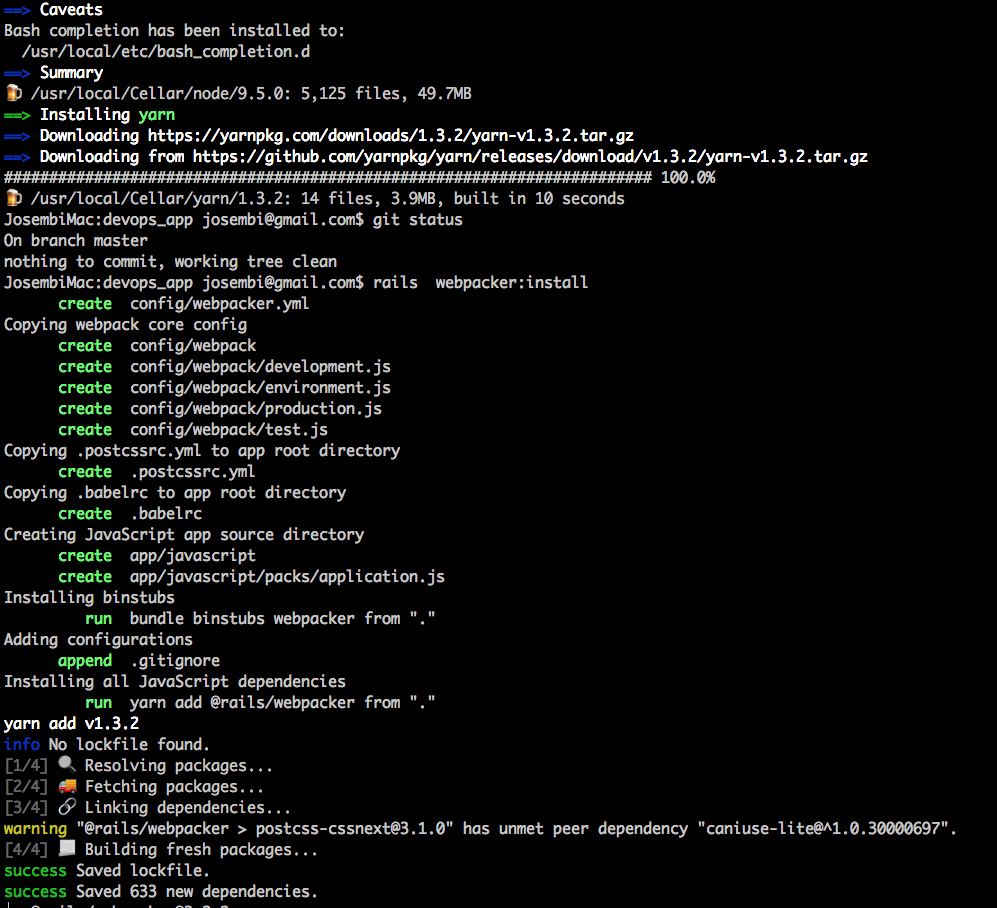
**Vue Installation** 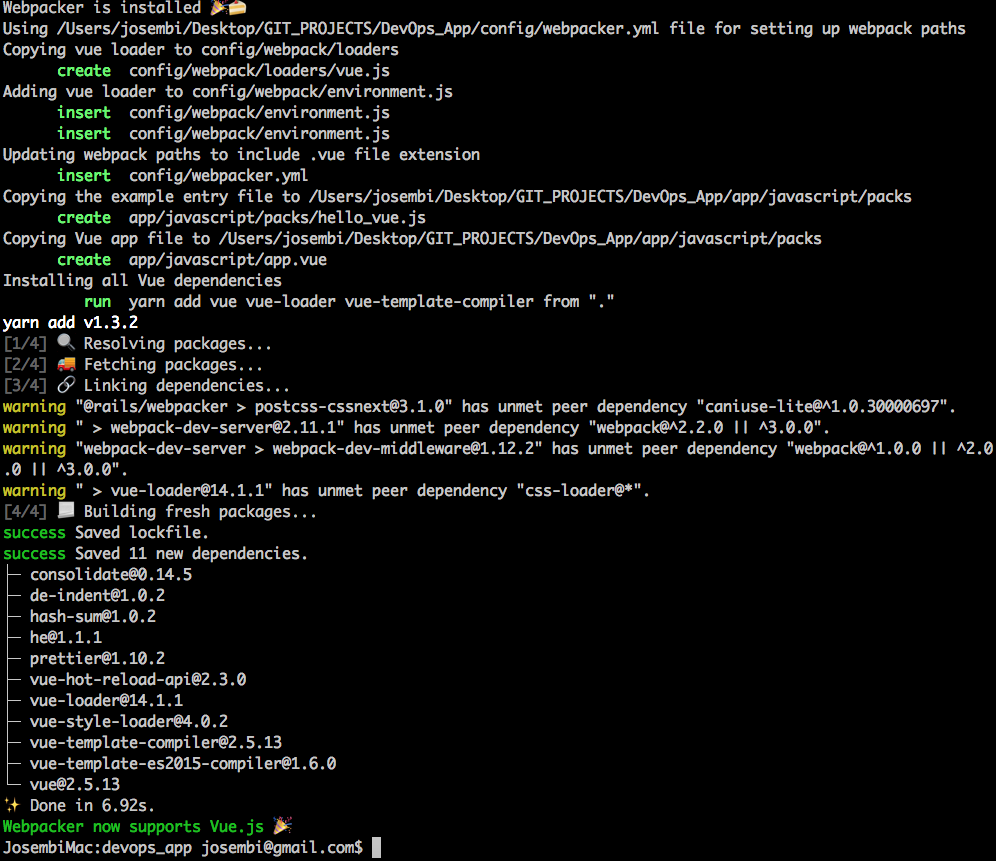
Vue has it's own turbolinks and conflicts with the rails JS tag (rails 5.1.5 and previous versions);
<%= javascript_pack_tag 'DevOps App' %>Although some warnings may be thrown, a successful installation will result with all dependencies installed successfully. The image has been truncated for obvious reasons.
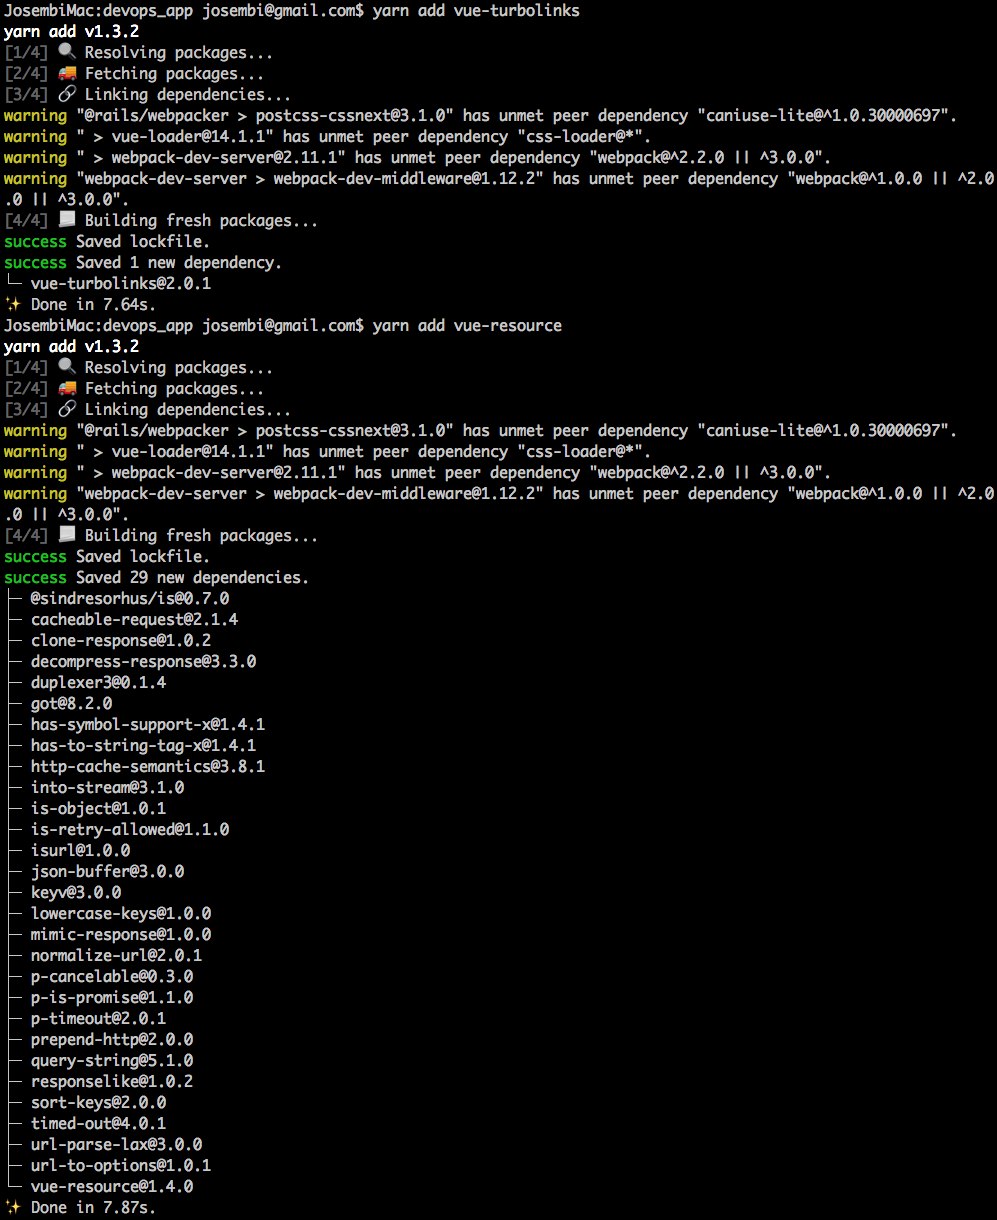
Vue turbolinks and resource installation
If installation is successful, it's possible to run a separate developer server for Frontend design. Webpack will do that for us, not to confuse with Rails Webrick, a precursor of Puma. This server which will run in http://localhost:3035 is important as it will watch the view files.
See a successful installation below

My approach was to mimic angular's two way data binding to update data in the DB and propagate dynamically to the UI resonating the power of MVC in software engineering.
There is a caveat: I tossed the vue.js file that is usually generated when you install webpacker, you can see it in the config/webpack/loader/vue.js path below. Usually I really don't keep redundant file as that adds more code contravening rails refactoring and DRY principle.
Webpack Installation
Later I ran into errors and webpack stopped compiling. You need to get that fixed if you want to watch your views. I added again the file but tossed the code (That is it's an empty file now which tricks webpack to compile). I can get that sorted by writting more code but it's time consuming.
Error encountered after I tossed hello_vue.js file
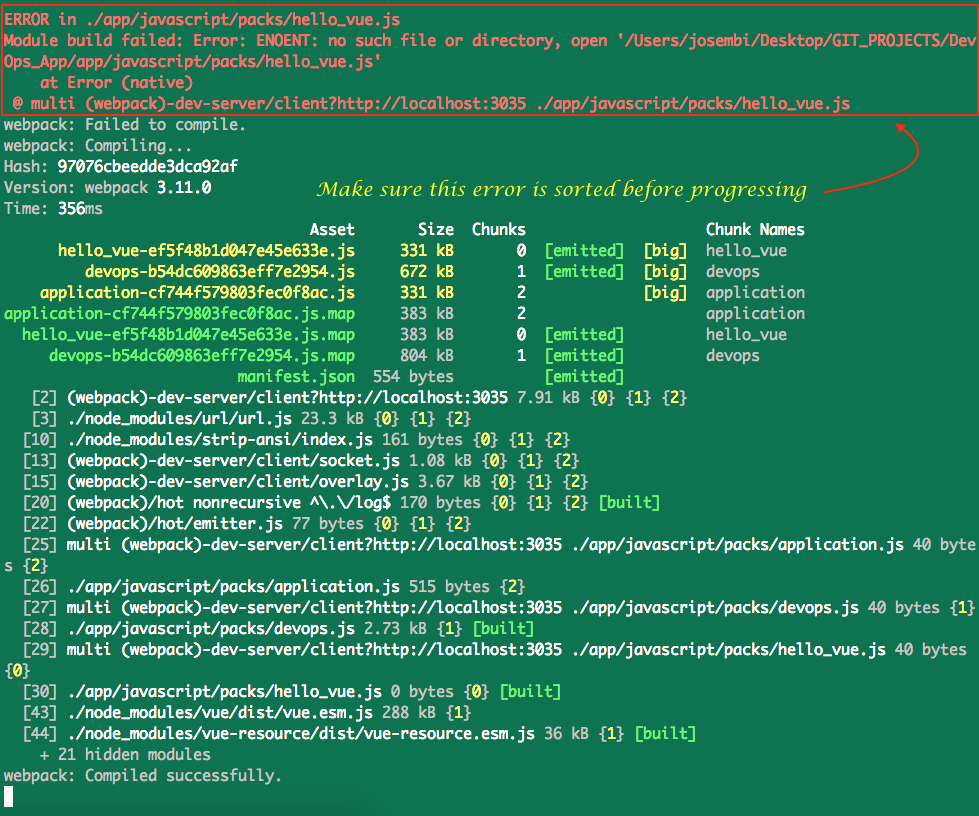
Error Sorted by running vue-resource via yarn. You can use NPM if you have Node


Simple, Heroku-friendly Rails app configuration using ENV and a single YAML file


NOTE: If you're using Figaro 0.7 or prior, please refer to the appropriate documentation or upgrade to Figaro 1.0.
Figaro was written to make it easy to securely configure Rails applications.
Configuration values often include sensitive information. Figaro strives to be secure by default by encouraging a convention that keeps configuration out of Git.
Figaro is inspired by the Twelve-Factor App methodology, which states:
The twelve-factor app stores config in environment variables (often shortened to env vars or env). Env vars are easy to change between deploys without changing any code; unlike config files, there is little chance of them being checked into the code repo accidentally; and unlike custom config files, or other config mechanisms such as Java System Properties, they are a language- and OS-agnostic standard.
This is straightforward in production environments but local development environments are often shared between multiple applications, requiring multiple configurations.
Figaro parses a Git-ignored YAML file in your application and loads its values
into ENV.
Integrates Bulma with the rails asset pipeline.
A modern CSS framework based on Flexbox.
Add this line to your application's Gemfile:
gem "bulma-rails", "~> 0.6.2"
And then execute:
$ bundle
To import all assets in your Rails project, add the following line to your application.scss:
@import "bulma";For information about customizing Bulma, see: http://bulma.io/documentation/overview/start/

By Plataformatec.


This README is also available in a friendly navigable format.
Devise is a flexible authentication solution for Rails based on Warden. It:
- Is Rack based;
- Is a complete MVC solution based on Rails engines;
- Allows you to have multiple models signed in at the same time;
- Is based on a modularity concept: use only what you really need.
It's composed of 10 modules:
- Database Authenticatable: hashes and stores a password in the database to validate the authenticity of a user while signing in. The authentication can be done both through POST requests or HTTP Basic Authentication.
- Omniauthable: adds OmniAuth (https://github.com/omniauth/omniauth) support.
- Confirmable: sends emails with confirmation instructions and verifies whether an account is already confirmed during sign in.
- Recoverable: resets the user password and sends reset instructions.
- Registerable: handles signing up users through a registration process, also allowing them to edit and destroy their account.
- Rememberable: manages generating and clearing a token for remembering the user from a saved cookie.
- Trackable: tracks sign in count, timestamps and IP address.
- Timeoutable: expires sessions that have not been active in a specified period of time.
- Validatable: provides validations of email and password. It's optional and can be customized, so you're able to define your own validations.
- Lockable: locks an account after a specified number of failed sign-in attempts. Can unlock via email or after a specified time period.

By Plataformatec.
Rails forms made easy.
Simple Form aims to be as flexible as possible while helping you with powerful components to create your forms. The basic goal of Simple Form is to not touch your way of defining the layout, letting you find the better design for your eyes. Most of the DSL was inherited from Formtastic, which we are thankful for and should make you feel right at home.
INFO: This README is also available in a friendly navigable format and refers to Simple Form 3.1. For older releases, check the related branch for your version.
Add it to your Gemfile:
gem 'simple_form'Run the following command to install it:
bundle installRun the generator:
rails generate simple_form:installjQuery! For Rails! So great.
This gem provides:
- jQuery 1, 2 and 3
- the jQuery UJS adapter
- assert_select_jquery to test jQuery responses in Ruby tests
Starting with v2.1, the jquery-rails gem follows these version guidelines to provide more control over your app's jQuery version from your Gemfile:
patch version bump = updates to jquery-ujs, jquery-rails, and patch-level updates to jQuery
minor version bump = minor-level updates to jQuery
major version bump = major-level updates to jQuery and updates to Rails which may be backwards-incompatible
See VERSIONS.md to see which versions of jquery-rails bundle which versions of jQuery.
The jquery and jquery-ujs files will be added to the asset pipeline and available for you to use. If they're not already in app/assets/javascripts/application.js by default, add these lines:
//= require jquery
//= require jquery_ujs
If you are running Rails 5.1 and up, and if you have included //= require rails-ujs, then jquery_ujs is not needed anymore. You can just add:
//= require jqueryIf you want to use jQuery 2, you can require jquery2 instead:
//= require jquery2
//= require jquery_ujs
And if you want to use jQuery 3, you can require jquery3:
//= require jquery3
//= require jquery_ujs
For jQuery UI, we recommend the jquery-ui-rails gem, as it includes the jquery-ui css and allows easier customization.
As of v3.0, jquery-rails no longer includes jQuery UI. Use the jquery-ui-rails gem above.
Rails view helper for grabbing Gravatar images. The goal here is to be configurable and have those configuration points documented!
Include the following line in your Rails environment
config/environment
  config.gem 'gravatar_image_tag'
Then ensure the gem is installed by running the following rake task from the your application root.
rake gems:installInclude the following line in your Rails environment
 Gemfile
  gem 'gravatar_image_tag'
p. Then ensure the gem is installed by running the following command from the application root.
bundle install


public_activity provides easy activity tracking for your ActiveRecord, Mongoid 3 and MongoMapper models
in Rails 3. Simply put: it records what has been changed or created and gives you the ability to present those
recorded activities to users - in a similar way to how GitHub does it.


wysiwyg-rails provides the Froala WYSIWYG HTML Editor javascript and stylesheets as a Rails engine for use with the asset pipeline.
Add this to your Gemfile:
gem "wysiwyg-rails"and run bundle install.
In your application.css.scss, include the css file:
/*
 @import "froala_editor.min";
 @import "froala_style.min";
 @import "font-awesome-sprockets";
 @import "font-awesome";
*/As of 1.4.0 version, public_activity now supports both Rails 3.X and 4.0.
Joseph Mwania
Available as open source under MIT License