A lightweight Universal Windows proxy app based on https://github.com/eycorsican/leaf
- Comes with Leaf core:
- Domain name resolution with built-in DNS processor
tun/shadowsocks/socks/trojan/wschainable inboundsdirect/drop/tls/ws/h2/shadowsocks/obfs/vmess/trojan/sockschainable outboundsfailover/tryall/staticcomposed outboundsamuxmultiplexing- Rule system based on IP, GeoIP and domain name
- External rules from GeoIP database and V2Ray Domain List Community
- Configuration management
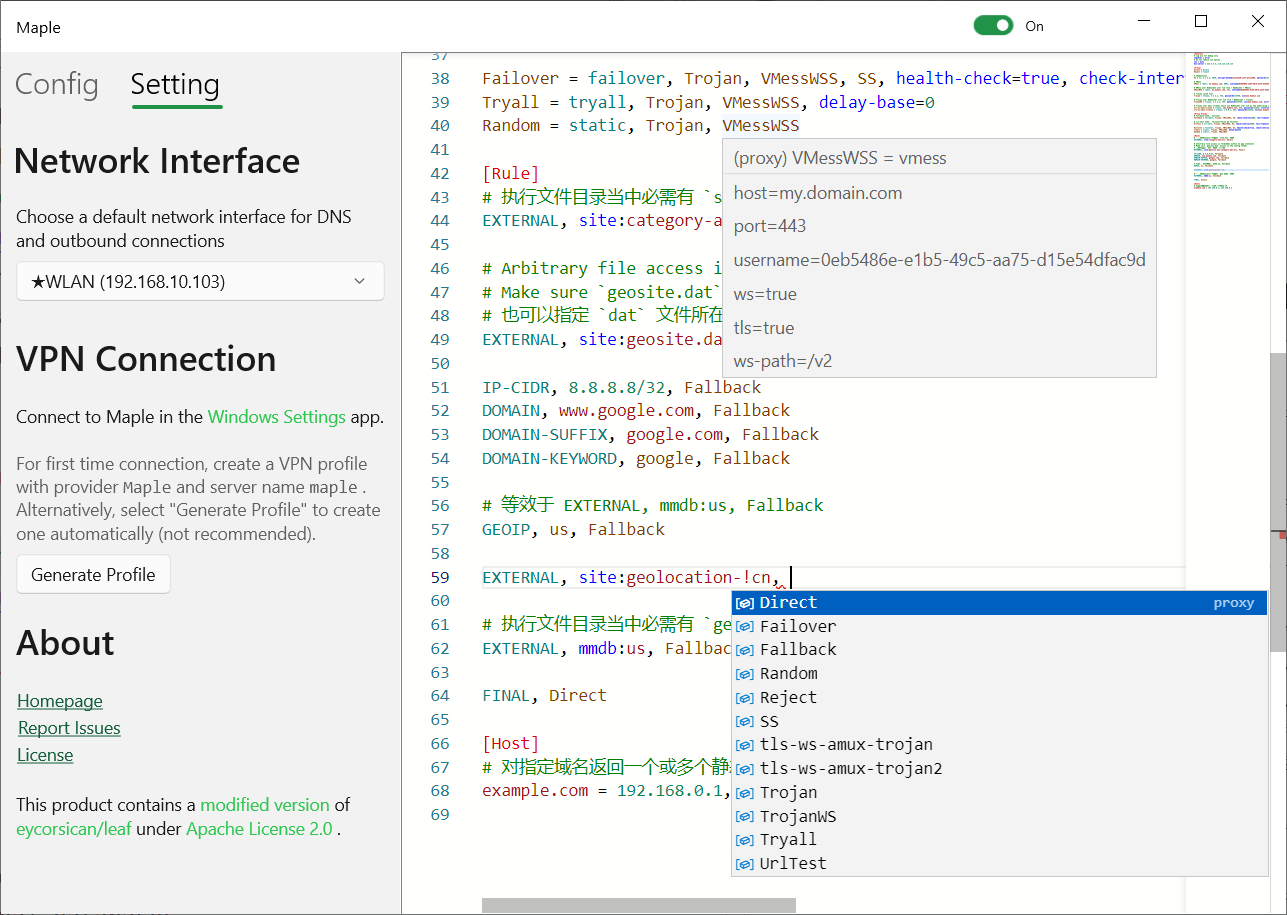
- Monaco-based conf editor with IntelliSence support
- Outbound network adapter selection
- UWP VPN Platform as TUN provider
Maple as a UWP app is distributed for sideloading only. When installed, it acts as a VPN provider which you will find in the VPN Settings. Use Maple app for configuration management, as well as adding external databases.
- Grab the latest package from Release page.
- Extract everything from the package.
- Right click the certificate (named
Maple.App_x.y.z.0_x64.cer) and select Install Certificate. - On the Certificate Import Wizard, select Local Machine. Administrator privileges may be required to proceed.
- Import the certificate to the Trusted Root Certification Authorities folder. Note: failure to import the certificate or choosing a wrong certificate store will prevent you from installing the app.
- Open the AppxBundle (named
Maple.App_x.y.z.0_x64.appxbundle) and follow the instructions until Maple is successfully installed on your computer.
- Launch Maple from the Start menu.
- Edit configuration. Refer to https://github.com/eycorsican/leaf/blob/master/README.zh.md for further explanation.
- Save the configuration file.
- If any
EXTERNALorGEOIPdirective is used, drag external database files intoConfigarea. V2Ray Domain List Community database can be fetched at https://github.com/v2ray/domain-list-community/releases/latest/download/dlc.dat . For GeoIP database, please go to MaxMind Developer Portal and sign up for free download. - Rename these databases accordingly (if applicable). By default, GeoIP database is
geo.mmdband V2Ray Domain List Community database issite.dat. - Go to Setting page in Maple. Choose your network adapter such as
EthernetorWLAN. - Launch Windows Settings app.
- Add a VPN connection.
- For VPN provider, choose Maple.
- In the Connection name box, enter Maple.
- In the Server name or address box, enter https://github.com/YtFlow/Maple .
- Select Save.
- If any Proxy Server has a loopback address (
127.0.0.1or::1), make sure Loopback Exemption is enabled for Maple. See https://docs.microsoft.com/en-us/previous-versions/windows/apps/hh770532(v=win.10) .
- Simply click the toggle button on the title bar, or
- In Windows 11, select the battery, network, or volume icon to open the Quick Settings panel. Find Maple in VPN panel and connect, or
- In Windows 10, select the Network icon on the taskbar, and click Maple. In Windows Settings app, select Maple, and then Connect.
Note: Modifying the current configuration file while VPN is connected will take effect immediately. Hot reloading may be removed in a future release.
- VPN lifecycle management on Maple UI
- Better editing experience
-
externalentries - Custom configuration folder location
- Log collection (currently logs are sent to Visual Studio Output window for debugging only)
- Unsandboxed Leaf core (#29)
- VPN On Demand
- Configurable routing entries
- IPv6 support
To build Leaf and Maple, you will need:
- a Rust
nightly-x86_64-pc-windows-msvctoolchain - Windows 10 SDK 10.0.22621
- Visual Studio 2022 with C++ Development Workflow
- C++/WinRT Visual Studio extension must be installed to generate Windows Metadata.
- Node.js 19.x or higher
Build steps:
- Recursively clone this repository.
- Open a PowerShell Prompt.
- Change working directory to
leaf. cargo build -p leaf-ffi -Z build-std=std,panic_abort --target x86_64-uwp-windows-msvc.
For Release builds, usecargo build -p leaf-ffi -Z build-std=std,panic_abort --target x86_64-uwp-windows-msvc --release.
See also https://github.com/eycorsican/leaf#build .- Change working directory to
Maple.App\MonacoEditor. - Build Monaco editor and language support:
npm install && npm run build. - Open
Maple.slnin Visual Studio. - Build Solution.