Provided in this repository is the released version of Authr along with additional ROS package dependencies configured to work with the Authr software.
Authr is an environment designed to allow engineers to translate existing manual processes into collaborative human-robot plans. Additionally, Authr provides the ability to design exclusively robotic plans.
What makes Authr novel is a fully defined pipeline for designing collaborative applications. The user can iteratively setup the virtual work environment model, program in a visual drag-and-drop programming environment, utilize automatic agent allocation, and simulate their plan with the built-in, ROS-based plan simulator. Authr is designed around a hierarchical task breakdown with three levels: the plan, tasks, and therbligs. Each task within a plan is a linear process of work composed of therbligs. Therbligs are the lowest-level action primitive used in Authr and originally established by Gilbreth and Gilbreth for human work. Authr currently implements a subset of the physical therbligs with the goal of future work to operationalize cognitive therbligs.
For more details on how we implemented and evaluated Authr, check out our paper Authr: A Task Authoring Environment for Human-Robot Teams.
If you find Authr useful for your project, please consider citing our paper,
@inproceedings{schoen2020authr,
  title={Authr: A Task Authoring Environment for Human-Robot Teams},
  author={Schoen, Andrew and Henrichs, Curt and Strohkirch, Mathias and Mutlu, Bilge},
  booktitle={UIST'20: Proceedings of the 32nd Annual ACM Symposium on User Interface Software and Technology},
  year={2020}
}
To get started using Authr, follow the installation guide below along with the starting Authr guide. Or to start investigating the implementation of Authr, check out the implementation details section at the bottom of this README.
Authr was developed for ROS Melodic on Ubuntu 18.04. Installation may need to be modified if targeting a different environment.
Note that using rosdep install <PACKAGE> will not install all of the dependencies for authr specific packages. Manual installation is required due to version / dependency issues. Follow the steps below.
First clone this repository into your ROS catkin workspace.
Next install the following ROS Bridge dependencies,
Then install the robot dependencies,
- MoveIt via
apt install ros-<VERSION>-moveit - industrial_core via
apt install ros-<VERSION>-industrial-core - (Install if using Franka Emika Panda) Follow their installation guide and checkout their Github: frankaemika/franka_ros
- (Install if using Universal Robots) Clone ros-industrial/universal_robot
Next install the following Python 2 modules using pip.
pip install z3-solver scipy numpy pyquaternion pymongo
We also need to confirm state of several modules in order for everything to work.
- tornado should be version 4.5.3 to fix disconnect issues with rosbridge. Install with
pip install tornado==4.5.3. - pymongo should be installed to fix disconnect issues with rosbridge.
- pyassimp needs to be at version 3.3 or 4.1.3 to fix a Segault when using MoveIt with custom mesh collider objects. Install with
pip install pyassimp==4.1.3.
Finally, for Authr's user interface install Node.js and NPM. For ROS Melodic just installing from the package manager may cause ROS to uninstall. Simply enter the following into the terminal.
curl -sL https://deb.nodesource.com/setup_12.x | sudo -E bash -
sudo apt-get install nodejs
Then run npm install inside the authr directory. This step is optional as part of building the workspace CMake will invoke this command.
That's it. Now just build and source the catkin workspace. To start Authr follow the description below.
To run Authr, enter the following into the terminal,
roslaunch authr authr.launch robot:=(ur3 | ur5 | ur10 | panda) [verifier:=(standard | advanced)]
Or launch the subsystems individually,
roslaunch authr frontend.launch
and
roslaunch authr backend.launch robot:=(ur3 | ur5 | ur10 | panda) [verifier:=(standard | advanced)]
Currently our implementation supports Universal Robots UR3, UR5, and UR10 and Franka Emika Panda. We do not provide preconfigured MoveIt packages for Universal Robots E-Series or other collaborative robots like Rethink's Sawyer robot. Authr can be extended to support these robots but will require some changes to the launch file. Checkout the implementation section of this README for details.
By default the verifier parameter is set to standard. This is the version we used for technical and user evaluations in our paper. The advanced option is a new Z3 implementation that provides shorter verification and allocation times.
We also provide a static build of our user interface here. The backend subsystem will still need to be run locally. Additionally, because Github enforces SSL, you will need to configure your backend to use a valid certificate.
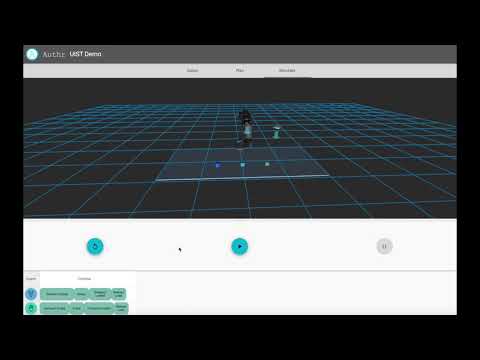
Once you have the frontend and backend running, you will need to point the browser to the hosted webpage. This should be printed in the output of NPM, but if you are running on your machine locally, this is likely localhost:4200. The launch page shows an entry field for the URL of the backend. The ROS connection uses port 9090 on localhost (unless you have specified otherwise), so entering localhost:9090 should allow you access to the tool. A video of using the tool can be found below:
In this repository we included the Authr interface itself along with several support libraries used in our lab to provide robot control to Authr. Checkout each subsystem's README files listed below.
-
Authr is a visual programming tool to convert manual tasks into human-robot programs.
-
robot_behavior provides a bridge between the Authr system and the low-level ROS and MoveIt systems.
-
robot_configurations provides standard robot configurations we use in our lab for various projects. For Authr we currently support Universal Robots UR3, UR5, and UR10 and Franka Emika Panda.
-
robotiq_85_gripper is a fork of the Robotiq driver that has been modified and extended by our lab. Robot configurations and robot_behavior depend on this version of the robotiq_85_gripper ROS package to supply an action server and a modified URDF.
-
custom_meshes provides ROS with the custom meshes used in the Authr visualization.
-
authr_pddl used to evaluate Authr's custom allocation algorithm against a traditional PDDL approach. This subdirectory is not needed to run the actual interface.
Adding a robot to Authr is relatively straightforward though it has a few caveats. Below we detail the steps you should take to configure your robot.
Authr uses MoveIt to control the robot agent for simulation and thus any robot used has to have a MoveIt Configuration. Often these are provided by the community though you may need to add a gripper to the robot arm and thus create a custom configuration or modify the existing. Refer to this tutorial to use the MoveIt Configuration Wizard. Authr requires the arm move-group to be called manipulator and the gripper move-group to be called gripper. Furthermore, Authr currently constrains the gripper to have the same value for each control joint.
Next you need to update the launch files to your robot configuration. First create a new launch file for your robot which will load MoveIt with your robot, provide joint-state / robot-state publishers, and provide any robot specific nodes. After creating that launch file, add it to the lookup table in backend.launch. The following code should be entered,
<include if="$(eval arg('robot') == '<YOUR_ROBOT_NAME>')" file="$(find authr)/launch/<YOUR_ROBOT_NAME>.launch">
  <arg name='simulated' value="$(arg simulated)"/>
</include>
Additionally, when launching authr_sim.py you will need to provide the gripper linear function converting effort to position. Effort is constrained to be between 0 and 1 inclusively. Add the following inside the node launch XML.
<param if="$(eval arg('robot') == '<YOUR_ROBOT_NAME>')" name="robot_effort_scalar" value="<YOUR_GRIPPER_CLOSED_STATE>"/>
<param if="$(eval arg('robot') == '<YOUR_ROBOT_NAME>')" name="robot_effort_offset" value="<YOUR_GRIPPER_OPENED_STATE>"/>
In order for Authr to visualize the robot within the embedded 3D workspace visualization, you will need to copy the robot's meshes into the following directory,
.\authr\src_angular\assets\meshes\<YOUR_ROBOT_DESCRIPTION_NAME>\*
The name and structure of the directory should match the convention provided in the robot's URDF.
If you think the robot configuration created is useful for other engineers, researchers, and developers then please feel free to create an issue or pull request. Likewise, if there is any challenge using Authr or if there are suggested features for future iterations, please create issues and pull requests.