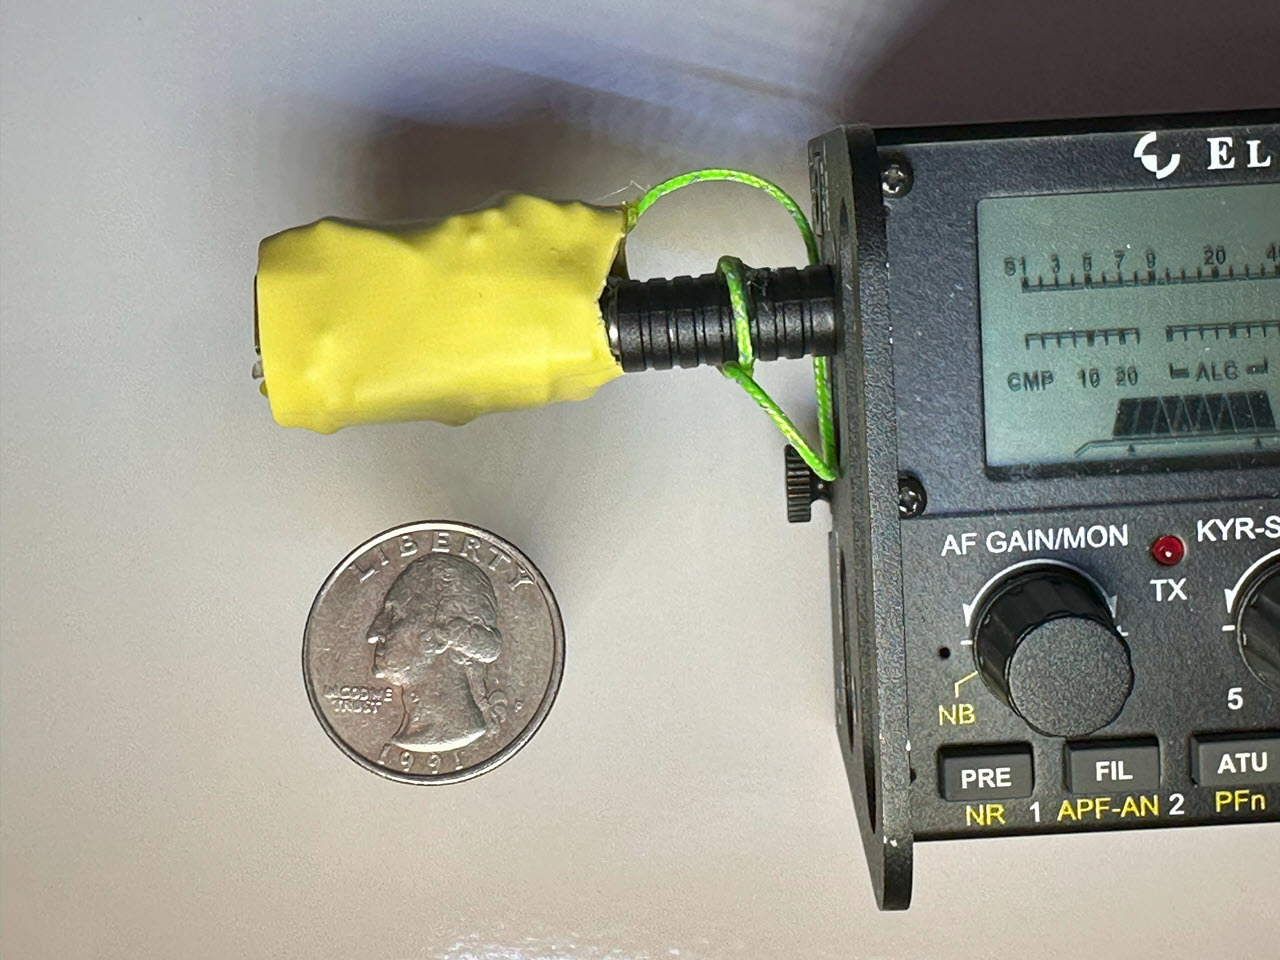
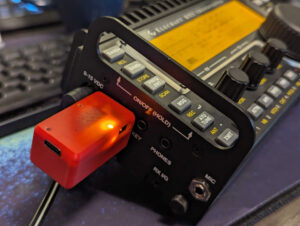
SOTACAT is a small hardware module that plugs into an Elecraft KX2 or KX3 radio’s CAT port (Computer Aided Transceiver port, also known as a serial port or an accessory port) and provides WiFi control of the radio from your mobile device. It provides the following features:
-
Your radio controlled from a web page:
Acts as a WiFi hotspot in the field and a web server. Your radio becomes a web page allowing control of your radio. Just connect to the WiFi hotspot “SOTACAT_xxxx” SSID in the field, and once connected launch your web browser and navigate to the page http://sotacat.local (some Android devcies don't understand
.localaddresses, in that case just use the URL 192.168.4.1 instead). -
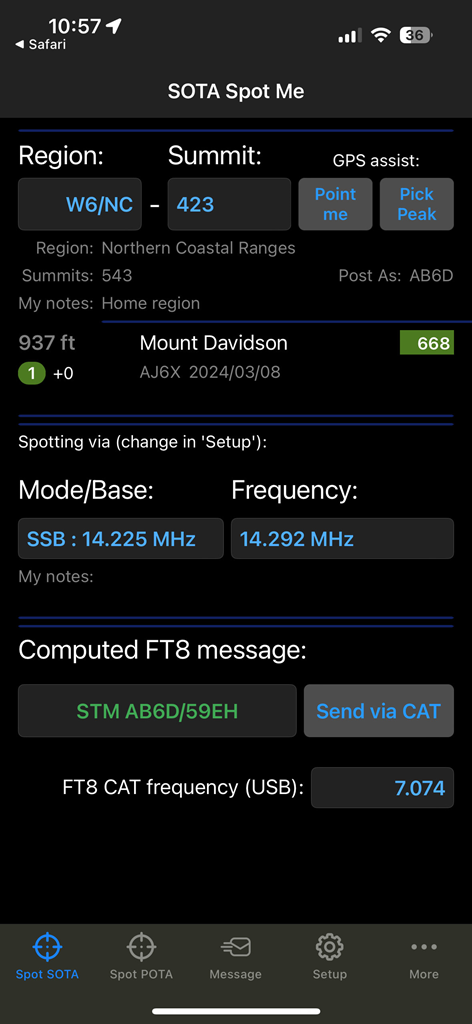
SOTA/POTA Click-to-Pounce:
When cell service is available, it allows SOTA and POTA operators to “click-to-pounce”. On the SOTACAT web page you see a list of recent SOTA and POTA spots. Clicking on one allows automatic tuning of the radio to the correct band, frequency, and mode to start a contact with that spotted operator.
-
Direct FT8 Synthesis without audio:
While CAT control isn’t new, one unique feature of SOTACAT is that it can manipulate the Elecraft radio’s pure CW signal and VFO frequency fast enough to generate the same FSK (frequency shift keying) signals as used by FT8 or other FSK based modes, but without using any audio signal (direct FSK synthesis). SOTACAT can accept an FT8 message and from it compute and transmit a 15 second set of FT8 FSK signals. There is a REST API to which you can give it an FT8 message to send and it will compute all the requied FSK signals and produce them in the Elecraft.
-
SOTAMAT integration: off-grid self-spotting, self-alerting:
SOTACAT can form a bidirectional connection with the SOTAMAT app on your phone allowing SOTAMAT to read what operating frequency and mode you have selected, or allowing SOTAMAT’s frequency / band selector to adjust the radio’s operating frequency/band/mode. Once you enter your peak or park ID (or use the automatic peak/park selector via GPS), SOTAMAT will use the SOTACAT to send the proper FT8 message to self-spot, self-alert, or send one of your pre-defined SMS/eMail messaging commands. Use of SOTAMAT requires a one-time configuration. Please see [https://sotamat.com/getting-started] for instructions.

-
Written instructions, for manually building your own SOTACAT, including:
- a Bill-Of-Materials
- links to parts on Amazon and other sites
- a Schematic, and
- Assembly instructions
-
YouTube build instructions video showing how to manually build your own SOTACAT
-
Firmware:
- For end-users (non developers): pre-built firmware and installation instructions with one-button deploy.
- For software developers: code is found right here (on Github)
-
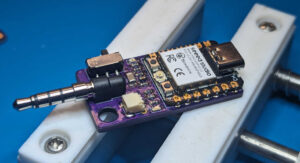
Pre-made PCB hardware: Hams K5EM and KE6MT have created custom circuit boards that implement a SOTACAT in a more compact and professionally designed package. Reach out to them for purchase instructions (QRZ or Slack-NA). Justin K5EM has posted his designs on Github.
-
Beta SOTAMAT app: A SOTAMAT compatible with SOTACAT has not yet been released and is in development. There are SOTACAT-aware Beta versions of SOTAMAT available at:
- iOS build on Apple's TestFlight App Store for Beta apps
- APK/AAB packaging for Android devices, and look for the highest build number.
Step-by-step instructions are found in the "Installing Firmware" section of the SOTACAT page on the SOTAMAT web site.
- git clone --recurse-submodules https://github.com/SOTAmat/SOTAcat.git
- Install VScode (visual studio code)
- Install PlatformIO into VScode
- Select a build target (at the bottom of the VScode screen on the task bar)
- Select the right-arrow icon "PlatformIO: Upload" (at the bottom of the screen)
Once the SOTACAT firmware is installed and running, you should:
- Use your mobile phone to connect to your SOTACAT WiFi hotspot:
- Go to your phone's WiFi settings and look for an SSID in the form of
SOTACAT_xxxxwhere thexxxxis unique to your device. - Connect with the default password
12345678
- Go to your phone's WiFi settings and look for an SSID in the form of
- Once connected to the hotspot WiFi, open a web browser on your phone and navigate to the URL sotacat.local (iOS and some Android devices), or if that doesn't work try 192.168.4.1 (all devices). Do not use HTTPS: the SOTACAT only supports HTTP connections.
- On the displayed SOTACAT page, select the "Settings" icon at the bottom. There you will set your preferred network credentials, following the instructions displayed. There are (up to) three networks to define there:
- SOTACAT connects to your Home WiFi: your SOTACAT can connect to your home network so you cell phone and SOTACAT and your computer can all be on the same network and all talk with each other. (optional)
- SOTACAT connects to your cellphone hotspot (in the field): This is useful for Android phones that don't support split networking (where the phone is connected to both SOTACAT via WiFi and the internet via the cellular network). By having the SOTACAT connect to the phone and the phone connects to the cell network you simulate split networking. This is NOT needed on iOS and you can leave these fields blank.
- Cellphone connects to the SOTACAT hotspot (in the field): On devcies that support split-networking (all iOS devices and some Androids, see notes above) this is the mode you should use. Your phone connects to the SOTACAT's hotspot via WiFi while also connected to the internet via the cellular network.
- AB6D, Brian Mathews: created the original SOTACAT concept, hardware, and firmware as well as a derivative version of the FT8 encoder originally developed by YL3JG, Karlis Goba.
- KC6X, Jeff Kowalski: a maintainer for the SOTACAT Github project, makes significant ongoing contributions to the SOTACAT code base.
- Justin K5EM: a regular contributor to the firmware and helped with some of the more challenging technical issues.
- KI6SYD, Max Praglin: provided key contributions to the implementation of direct FSK synthesis on the Elecraft KX radios, designed a REST API which SOTACAT borrows from, and implemented a similar testbed with his MAX-3B QRP transceiver on which SOTAMAT-to-radio control was first implemented.
- YL3JG, Karlis Goba: developed the original 'ft8_lib' FT8 CODEC. A derivative version was later created for encoding use in SOTACAT, and ported to C# for encoding in SOTAMAT by AB6D.
- Elecraft: N6KR, Wayne Burdick, and N1AL, Alan, provided guidance on control of Elecraft radios and Mathcad analysis of FT8 FSK harmonics.
- Justin K5EM and Rex KE6MT: Created derivative hardware versions, custom SMT PCBs, and helped with packaging analysis, circuit analysis, and testing.
- See Justin's SOTACAT-PCB Github page for an open source custom PCB (printed circuit board) that implements SOTACAT in a compact and professional way, as well as 3D printing files for an enclosure.
-
For developer support, post a question on the Github Discusson Q&A board
-
For end-user support, use the support email found on the SOTAMAT About page.