


A well typed React Native library providing support for Apple Authentication on iOS and Android, including support for all AppleButton variants.
The @invertase/react-native-apple-authentication library will not work if you do not ensure the following:
-
You are using React Native version
0.60or higher. -
(iOS only) You have setup react-native iOS development environment on your machine (Will only work on Mac). If not, please follow the official React Native documentation for getting started: React Native getting started documentation.
-
(iOS only) You are using Xcode version
11or higher. This will allow you to develop using iOS version13and higher, when the APIs for Sign In with Apple became available. -
Once you're sure you've met the above, please follow our Initial development environment setup guide.
Version 2 added Android support and introduced a few breaking changes with how methods are accessed. Please see the Migration Guide.
yarn add @invertase/react-native-apple-authentication

(cd ios && pod install)
You will not have to manually link this module as it supports React Native auto-linking.
Below are simple steps to help you get up and running. The implementation differs between iOS an Android, so if you're having trouble, be sure to look through the docs. Please skip and head to the full code examples noted below if you prefer to see a more complete implementation:
- React Hooks example (iOS)
- React Class example (iOS)
- React Hooks example (Android)
- If you're authenticating users via
React Native Firebase; see our Firebase guide - For Android support, a couple extra steps are required on your Apple developer account. Checkout our guide for more info.
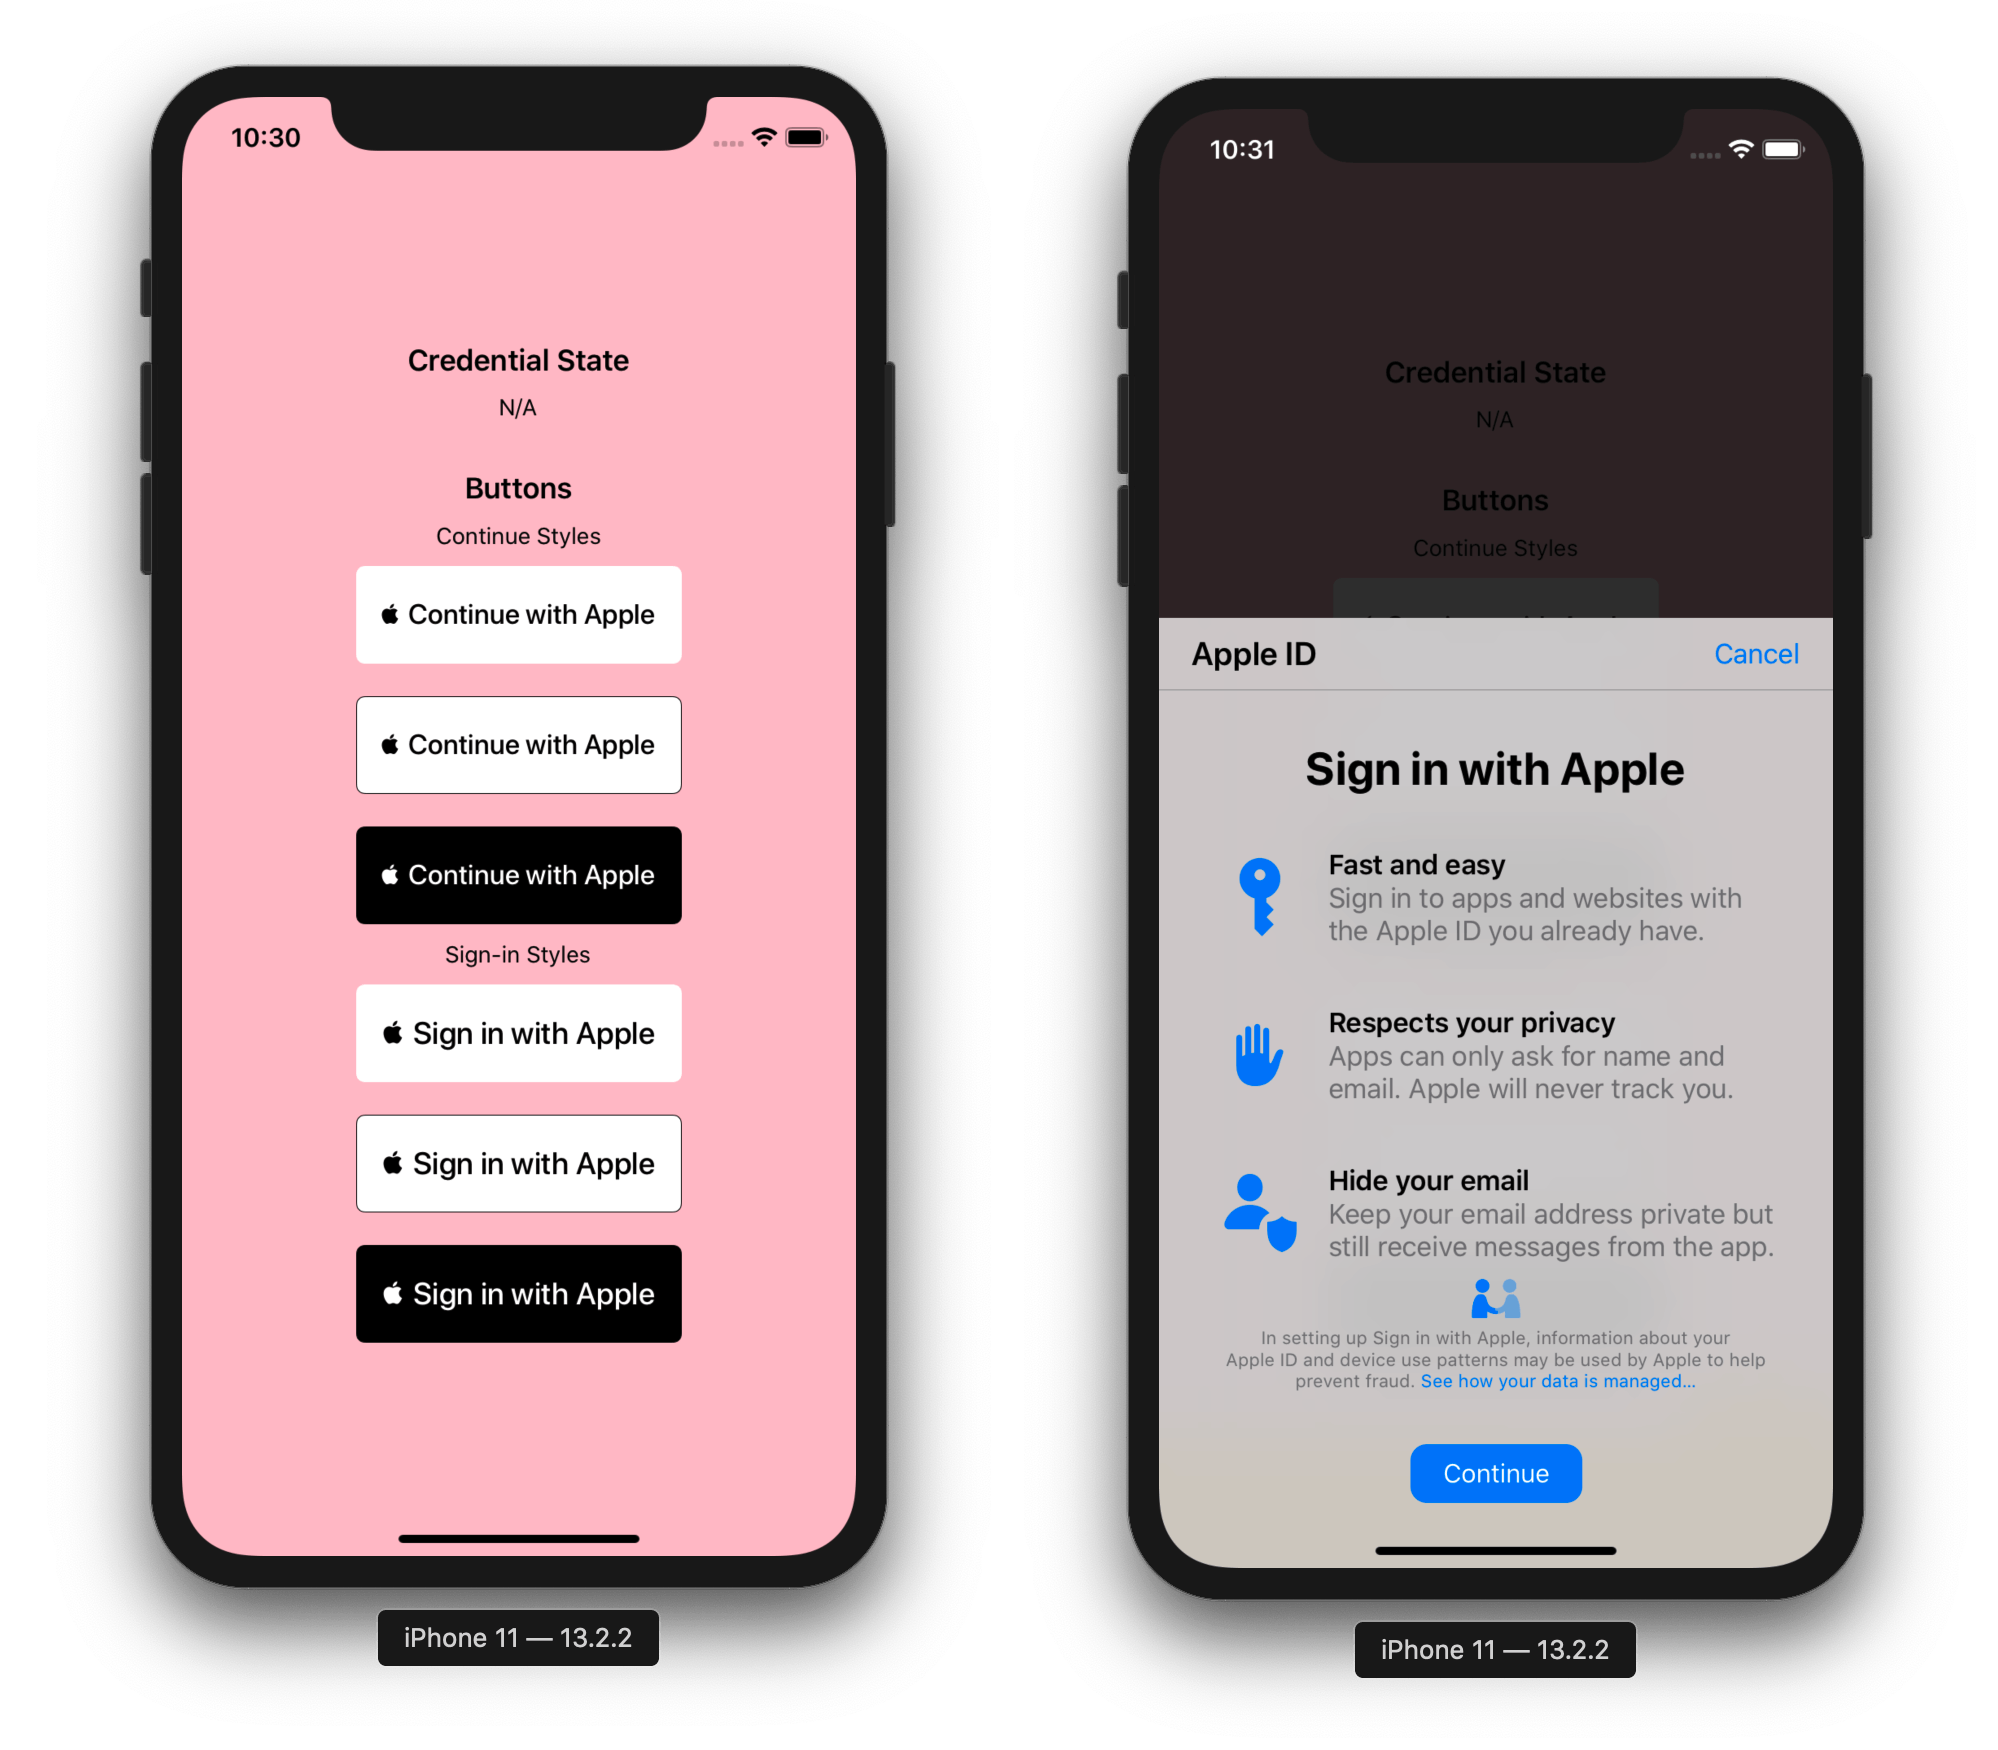
Import the appleAuth (API documentation) module and the AppleButton (API documentation) exported member element from the @invertase/react-native-apple-authentication library. Setup an event handler (onPress) to kick start the authentication request.
// App.js

import React from 'react';
import { View } from 'react-native';
import { AppleButton } from '@invertase/react-native-apple-authentication';

async function onAppleButtonPress() {

}

function App() {
  return (
    <View>
      <AppleButton
        buttonStyle={AppleButton.Style.WHITE}
        buttonType={AppleButton.Type.SIGN_IN}
        style={{
          width: 160, // You must specify a width
          height: 45, // You must specify a height
        }}
        onPress={() => onAppleButtonPress()}
      />
    </View>
  );
}// App.js
import { appleAuth } from '@invertase/react-native-apple-authentication';
async function onAppleButtonPress() {
// performs login request
const appleAuthRequestResponse = await appleAuth.performRequest({
requestedOperation: appleAuth.Operation.LOGIN,
requestedScopes: [appleAuth.Scope.EMAIL, appleAuth.Scope.FULL_NAME],
});
// get current authentication state for user
// /!\ This method must be tested on a real device. On the iOS simulator it always throws an error.
const credentialState = await appleAuth.getCredentialStateForUser(appleAuthRequestResponse.user);
// use credentialState response to ensure the user is authenticated
if (credentialState === appleAuth.State.AUTHORIZED) {
// user is authenticated
}
}Set up event listener for when user's credentials have been revoked.
// App.js

import React, { useEffect } from 'react';
import { View } from 'react-native';
import { appleAuth, AppleButton } from '@invertase/react-native-apple-authentication';

function App() {
  useEffect(() => {
    // onCredentialRevoked returns a function that will remove the event listener. useEffect will call this function when the component unmounts
    return appleAuth.onCredentialRevoked(async () => {
      console.warn('If this function executes, User Credentials have been Revoked');
    });
  }, []); // passing in an empty array as the second argument ensures this is only ran once when component mounts initially.

  return (
    <View>
      <AppleButton onPress={() => onAppleButtonPress()} />
    </View>
  );
}There is an operation appleAuth.Operation.LOGOUT, however it does not work as expected and is not even being used by Apple in their example code. See this issue for more information
So it is recommended when logging out to just clear all data you have from a user, collected during appleAuth.Operation.LOGIN.
Make sure to correctly configure your Apple developer account to allow for proper authentication on Android. You can checkout our guide for more info.
// App.js

import React from 'react';
import { View } from 'react-native';
import { appleAuthAndroid, AppleButton } from '@invertase/react-native-apple-authentication';

async function onAppleButtonPress() {
}

// Apple authentication requires API 19+, so we check before showing the login button
function App() {
  return (
    <View>
      {appleAuthAndroid.isSupported && (
        <AppleButton
          buttonStyle={AppleButton.Style.WHITE}
          buttonType={AppleButton.Type.SIGN_IN}
          onPress={() => onAppleButtonPress()}
        />
      )}
    </View>
  );
}// App.js
import { appleAuthAndroid } from '@invertase/react-native-apple-authentication';
import 'react-native-get-random-values';
import { v4 as uuid } from 'uuid'
async function onAppleButtonPress() {
// Generate secure, random values for state and nonce
const rawNonce = uuid();
const state = uuid();
// Configure the request
appleAuthAndroid.configure({
// The Service ID you registered with Apple
clientId: 'com.example.client-android',
// Return URL added to your Apple dev console. We intercept this redirect, but it must still match
// the URL you provided to Apple. It can be an empty route on your backend as it's never called.
redirectUri: 'https://example.com/auth/callback',
// The type of response requested - code, id_token, or both.
responseType: appleAuthAndroid.ResponseType.ALL,
// The amount of user information requested from Apple.
scope: appleAuthAndroid.Scope.ALL,
// Random nonce value that will be SHA256 hashed before sending to Apple.
nonce: rawNonce,
// Unique state value used to prevent CSRF attacks. A UUID will be generated if nothing is provided.
state,
});
// Open the browser window for user sign in
const response = await appleAuthAndroid.signIn();
// Send the authorization code to your backend for verification
}- Make sure to correctly configure your Apple developer account to allow for proper web based authentication.
- Install the React Native WebView
yarn add react-native-webview(or)npm i react-native-webviewin your project. Link native dependencies. - Your backend needs to implement web based authentification
// App.js
import React from "react";
import {
  View,
  TouchableWithoutFeedback,
  Text
} from "react-native";
import {
  appleAuth,
  appleAuthAndroid,
  AppleAuthWebView // Internaly using WebView
} from "@invertase/react-native-apple-authentication";

function onAppleLoginWebViewButtonPress() {

  // https://developer.apple.com/documentation/sign_in_with_apple/sign_in_with_apple_js/incorporating_sign_in_with_apple_into_other_platforms
  const appleAuthConfig = {
    // The Service ID you registered with Apple
    clientId: "com.example.client-web",

    // Return URL added to your Apple dev console. It must still match the URL you provided to Apple.
    redirectUri: "https://example.com/auth/callback",

    // The type of response requested - code, id_token, or both.
    responseType: "code id_token",

    // The amount of user information requested from Apple.
    scope: "name email"

    // Random nonce value that will be SHA256 hashed before sending to Apple.
    // nonce: nonce,

    // Unique state value used to prevent CSRF attacks. A UUID will be generated if nothing is provided.
    // state: state
  };

  this.setState(
    {
      appleAuthConfig: appleAuthConfig
    }
  );
}

function onAppleAuthResponse(responseContent) {

  // Handle your server response (after login - apple redirects to your server url)
  console.log("onAppleAuthResponse responseContent", responseContent);
}

// If no iOS or Android is supported than we use webView fallback with custom button
function App() {

  render() {
    const appleAuthConfig = this.state.appleAuthConfig;

    if (appleAuthConfig) {
      return (
        <AppleAuthWebView
          config={appleAuthConfig}
          // optional loadingIndicator property
          // loadingIndicator={
          //   () => {
          //     return (
          //       <Loading />
          //     );
          //   }
          // }
          onResponse={this.onAppleAuthResponse}
        />
      );
    }
  }

  return (
    <View>


      {
        // It makes sense to show the native buttons in a real app,
        // something like the code below, but we are just demonstrating web login here so it is commented out

        // (appleAuth.isSupported || appleAuthAndroid.isSupported) ? (
        //   <AppleButton
        //     buttonStyle={AppleButton.Style.BLACK}
        //     buttonType={AppleButton.Type.SIGN_IN}
        //     onPress={this.onAppleLoginButtonPress}
        //   />
        // )  // else add webView view button
      }

      <TouchableWithoutFeedback onPress={this.onAppleLoginWebViewButtonPress}>
        <Text>
          Sign in with Apple
        </Text>
      </TouchableWithoutFeedback>
    </View>
  );
}- Send the apple response to your server.
- See Serverside Verification
- Ensure that you pass the clientID as the web service ID, not the native app bundle. Since the project utilizes the service ID for authenticating web and android.
- Based on the Firebase implementation guidelines the nonce provided to
appleAuth.performRequest(iOS) andappleAuthAndroid.configure(Android) is automatically SHA256-hashed. - To verify the nonce serverside you first need to hash the nonce value, ie:
crypto.createHash('sha256').update(nonce).digest('hex');
- The nonce can then be easily compared serverside for extra security verification, ie:
import crypto from 'crypto';
import appleSigninAuth from 'apple-signin-auth';

appleIdTokenClaims = await appleSigninAuth.verifyIdToken(id_token, {
  /** sha256 hex hash of raw nonce */
  nonce: nonce ? crypto.createHash('sha256').update(nonce).digest('hex') : undefined,
});
- AppleRequestOptions
- AppleCredentialState
- AppleError
- AppleRealUserStatus
- AppleRequestOperation
- AppleRequestScope
-
Why does
full nameandemailreturnnull?- Apple only returns the
full nameandemailon the first login, it will returnnullon the succeeding login so you need to save those data. - For testing purposes, to be receive these again, go to your device settings;
Settings > Apple ID, iCloud, iTunes & App Store > Password & Security > Apps Using Your Apple ID, tap on your app and tapStop Using Apple ID. You can now sign-in again and you'll receive thefull nameand `email. - Keep in mind you can always access the
emailproperty server-side by inspecting theid_tokenreturned from Apple when verifying the user.
- Apple only returns the
-
How to change button language? (iOS)
- Native Apple Button component reads language value from CFBundleDevelopmentRegion at Info.plist file. By changing CFBundleDevelopmentRegion value you can change default language for component.
<key>CFBundleDevelopmentRegion</key>
<string>en</string>
- For supporting multi language, you can add CFBundleAllowMixedLocalizations key to Info.plist.
<key>CFBundleAllowMixedLocalizations</key>
<string>true</string>
The operation couldn’t be completed. (com.apple.AuthenticationServices.AuthorizationError error 1000.)
Check that the connection settings have been made correctly. The setup can be found here: Initial Setup
If you are using the function getCredentialStateForUser on a simulator, this error will always be triggered, for the reason that this function verifies the authenticity of the device.
You must test your code on a real device.
If you are using a simulator, go to Mange Apple Account.
Search for "Devices", select "Simulator" and press "Remove from Account".
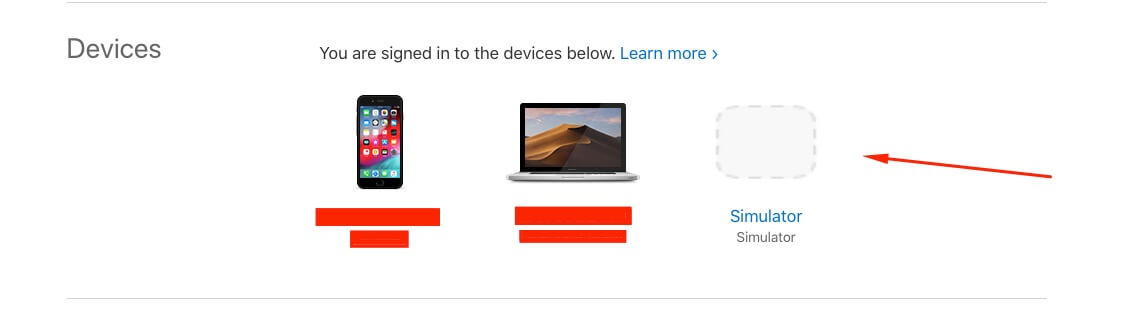
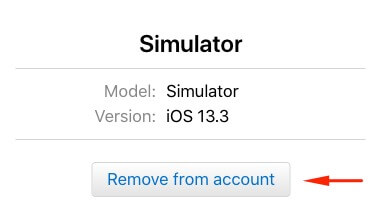
It should work fine.
"invalid_client" in Android webview
Make sure to read the Android services setup docs.
The clientId you passed to appleAuthAndroid.configure doesn't match the Service ID you setup in your Apple developer console.
Your Service ID is attached to the wrong Primary App ID, and therefore uses the incorrect Sign In with Apple key.
The redirectUri you passed to appleAuthAndroid.configure doesn't match one of the return URLs or domains/subdomains you added in your Apple developer console. The URL must match exactly, and cannot contain a query string.
- See LICENSE
Built and maintained with 💛 by Invertase.
💼 Hire Us | ☕️ Sponsor Us | 💻 Work With Us