My project includes the following files:
- model.py containing the script to create and train the model and performe the data augmentation
- drive.py for driving the car in autonomous mode
- final_model.h5 containing a trained Commaai convolution neural network
- writeup_report.md summarizing the results
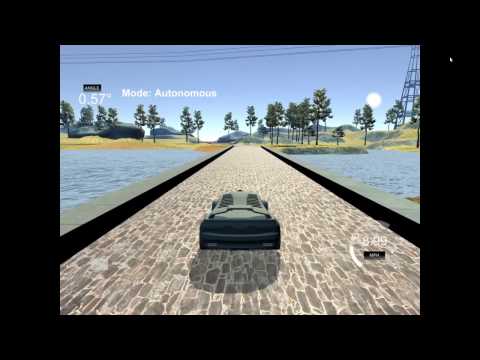
Using the Udacity provided simulator and my drive.py file, the car can be driven autonomously around the track by executing
python drive.py final_model.h5The model.py file contains the code for training and saving the convolution neural network. The file shows the pipeline I used for training and validating the model. In addition, the file contains the code for the image data generator to augment the training images
Due to memory restriction and efficiency I used the fit_generator and performed the data augmentation as needed and not in advance. Because the training data is heavily biased towards a centered steering angle, as shown in the following image, I used a couple of augmentation approaches to compensate for that.

I generated a histogram with 51 bins from all angles. However, I only selected as many images for the most common steering angle as there are in the second bin. The effect of this transformation with additional augmentation is shown in the next image. 
        # calculate histogram
        hist, bin_edges = np.histogram(np.array(csv_lines[:,3],dtype=float), bins=51, density=False)
        max_index = np.argmax(hist)

        hist_array = np.sort(hist)[::-1]
        # select lines with the values arround zero  np.take(zero_list,[1,2,5],axis=1)
        zero_list = [line for line in lines if float(line[3]) > bin_edges[max_index-1] and float(line[3]) < bin_edges[max_index+1]]
        index_list = np.random.random_integers(0,hist_array[0]-1,hist_array[1])
        # take the same number of near zero lines as the second most angle range
        zero_list = np.take(zero_list,index_list,axis=0)
non_zero_list = np.array([line for line in lines if float(line[3]) < bin_edges[max_index-1] or float(line[3]) > bin_edges[max_index+1]])The first track is a circle with a high bias towards left steering angles. By randomly flipping images the effect is filtered out.
    def random_flipp(self,image,angle):
return cv2.flip(image,1), angle * -1To make the model more robust to brightness changes and shadows on the road I added two functions in order to add random brightness and shadows to images.


    def random_brightness(self, image, lower_range = 0.4, upper_range = 0.6):

        brightness_image = np.zeros(image.shape[0:2],np.uint8)
        if np.random.choice([BrightnessType.Bright,BrightnessType.Dark]) == ShadowType.Bright:
            brightness_image[:,:] = 255

        brightness_alpha = np.random.uniform(lower_range,upper_range)
        image[:,:,0] = cv2.addWeighted(image[:,:,0],1. - brightness_alpha,brightness_alpha,brightness_alpha,0)
        return image

    def random_shadow(self, image, alpha_range = 0.2):

        shadow_image = np.zeros(image.shape[0:2],np.uint8)

        shadow_border_points_count = 4
        shape_points = np.random.uniform(0,image.shape[0],(shadow_border_points_count,2)).astype(np.int32) + (np.random.randint(0,image.shape[0]),0)
        cv2.fillConvexPoly(shadow_image, shape_points, 255)

        if np.random.choice([ShadowType.Bright,ShadowType.Dark]) == ShadowType.Bright:
            shadow_image = 255 - shadow_image

        shadow_alpha = np.random.uniform(0,alpha_range)
        image[:,:,0] = cv2.addWeighted(image[:,:,0],1. - shadow_alpha,shadow_image,shadow_alpha,0)

return imageEach line in the csv file contains a left and right camera image. I used this files to additionally increase my training size. For left images the steering angle is increased by 0.25 for right images the angle is decreased by the same factor.
                # if the loaded image is a left carmera image increase angle by 0.25
                if choice == ImageSelector.Left:
                    if angle + 0.25 > 1:
                        angle = 1
                    else:
                        angle = angle + 0.25
                # if the loaded image is a right carmera image deincrease angle by 0.25
                elif choice == ImageSelector.Right:
                    if angle - 0.25 < -1:
                        angle = -1
                    else:
angle = angle - 0.25Each image is augmented by up to three augmentation strategies per image. Results are shown in the following gif file.

    def select_random_argumentation(self,image, angle):
        choiceList = rnd.sample([DataArgumentationOptions.Unchanged,
                             DataArgumentationOptions.Flipp,
                             DataArgumentationOptions.Brightness,
                             DataArgumentationOptions.Shadow], rnd.randint(1,3))


        for choice in choiceList:
            if choice == DataArgumentationOptions.Unchanged:
                break
            elif choice == DataArgumentationOptions.Brightness:
                image = self.random_brightness(image)
            elif choice == DataArgumentationOptions.Flipp:
                image, angle = self.random_flipp(image,angle)
            elif choice == DataArgumentationOptions.Shadow:
                image = self.random_shadow(image)

return image, angleAs recommended by NVIDIA I used the YUV colorspace.
To cropp the image to the track in front of the car a Keras cropping layer was added into the model.
In my attempts to find a model that can perform well on both tracks I tried some models. Starting with the Commaai Model and the NVIDIA Model. After proper data augmentation and realising the different color channel order in the drive.py (RGB vs BGR) I figured out that the used model architecture was not important and both models were able to run both tracks successfully. Finally I used the Commaai mode.
| Layer (type) | Output Shape | Param | Hint |
|---|---|---|---|
| Lambda | lambda x : (x/255.) -0.5 | Exception add model saving. Not used. | |
| cropping2d_1 (Cropping2D) | (None, 65, 318, 3) | 0 | (70,25) |
| conv2d_1 (Conv2D) | (None, 17, 80, 16) | 3088 | |
| elu_1 (ELU) | (None, 17, 80, 16) | 0 | |
| conv2d_2 (Conv2D) | (None, 9, 40, 32) | 12832 | |
| elu_2 (ELU) | (None, 9, 40, 32) | 0 | |
| conv2d_3 (Conv2D) | (None, 5, 20, 64) | 51264 | |
| flatten_1 (Flatten) | (None, 6400) | 0 | |
| dropout_1 (Dropout) | (None, 6400) | 0 | |
| elu_3 (ELU) | (None, 6400) | 0 | |
| dense_1 (Dense) | (None, 512) | 3277312 | |
| dropout_2 (Dropout) | (None, 512) | 0 | |
| elu_4 (ELU) | (None, 512) | 0 | |
| dense_2 (Dense) | (None, 1) | 513 |
The model contains two dropout layers with a ratio of 20% and 50% in order to reduce overfitting.
The model was trained and validated on different image generator configurations. If the Train argument is passed the images will be augmented, in the Validation mode they won't. That was used to ensure that the model was not overfitting.
        train_generator = ImageDataGenerator(lines,ImageDataGeneratorMode.Train)
        validation_generator = ImageDataGenerator(lines,ImageDataGeneratorMode.Validation)
The model was tested by running it through the simulator and ensuring that the vehicle could stay on the track.
The model used an adam optimizer with Mean Squared Error, with the default learning rate from 0.001. The batch size was 128, the samples per epoch are the count of lines in the csv file and teen validation steps are performed after each epoch. The number of epochs was 15 but I used model checkpoints to save the best model and early stopping with a patience of 4 by a delta of 0.001. The best model was chosen by the minimal validation loss.

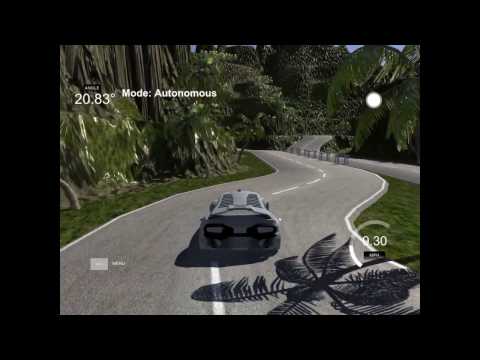
I was able to run the first track without problems by using the provided 8036 driving log lines with a total of 24.102 images.
On the second track this was a disastrous failure.
I recorded two laps in the simulator manually in both directions.
Each time the car stated with a sharp turn and hit the barrier between the two roads.

To overcome this behavior I placed the car in front of the barrier and performed a recorded sharp turn away from the barrier. After doing this multiple times the car was able to start on the track without problems. I copied the process for the other two places on the track where car was leaving the road.
At the end my training data contained around 18000 driving log lines with a total of 36.000 images
- Both models are too complex for the task, so reducing the number of filters per layer or the number of layers could also lead to good results
- The model makes a lot of small steering movements.I think with more data the model would be more robust regarding this
- The image augmentation step was very slow. A batch of 256 images needed 7 seconds to calculate which was longer than the fit process on the GPU.