This 1-click deployment allows the user to deploy a Proof-of-Concept environment of Azure Synapse Analytics with dataset (New York Taxi Trips & Fares data), pipeline to (ingest, merge, aggregate), notebook (Spark ML prediction)
Owner role (or Contributor roles) for the Azure Subscription the template being deployed in. This is for creation of a separate Proof-of-Concept Resource Group and to delegate roles necessary for this proof of concept. Refer to this official documentation for RBAC role-assignments.
-
Fork out this github repository into your github account.
If you don't fork repo:
- The pre-populated dataset, pipeline and notebook will not be deployed
- You will get a Github publishing error
-
Click 'Deploy To Azure' button given below to deploy all the resources.

-
Provide the values for:
- Resource group (create new)
- Region
- Company Tla
- Option (true or false) for Allow All Connections
- Option (true or false) for Spark Deployment
- Spark Node Size (Small, Medium, large) if Spark Deployment is set to true
- Sql Administrator Login
- Sql Administrator Login Password
- Sku
- Option (true or false) for Metadata Sync
- Frequency
- Time Zone
- Resume Time
- Pause Time
- Option (Enabled or Disabled) for Transparent Data Encryption
- Github Username (username for the account where this github repository was forked out into)
-
Click 'Review + Create'.
-
On successful validation, click 'Create'.
-
This template deploys necessary resources to run an Azure Synapse Proof-of-Concept. Following resources are deployed with this template along with some RBAC role assignments:
- An Azure Synapse Workspace
- An Azure Synapse SQL Pool
- An optional Apache Spark Pool
- Azure Data Lake Storage Gen2 account
- A new File System inside the Storage Account to be used by Azure Synapse
- A Logic App to Pause the SQL Pool at defined schedule
- A Logic App to Resume the SQL Pool at defined schedule
- A key vault to store the secrets
- Current Azure user needs to have "Storage Blob Data Contributor" role access to recently created Azure Data Lake Storage Gen2 account to avoid 403 type permission errors.
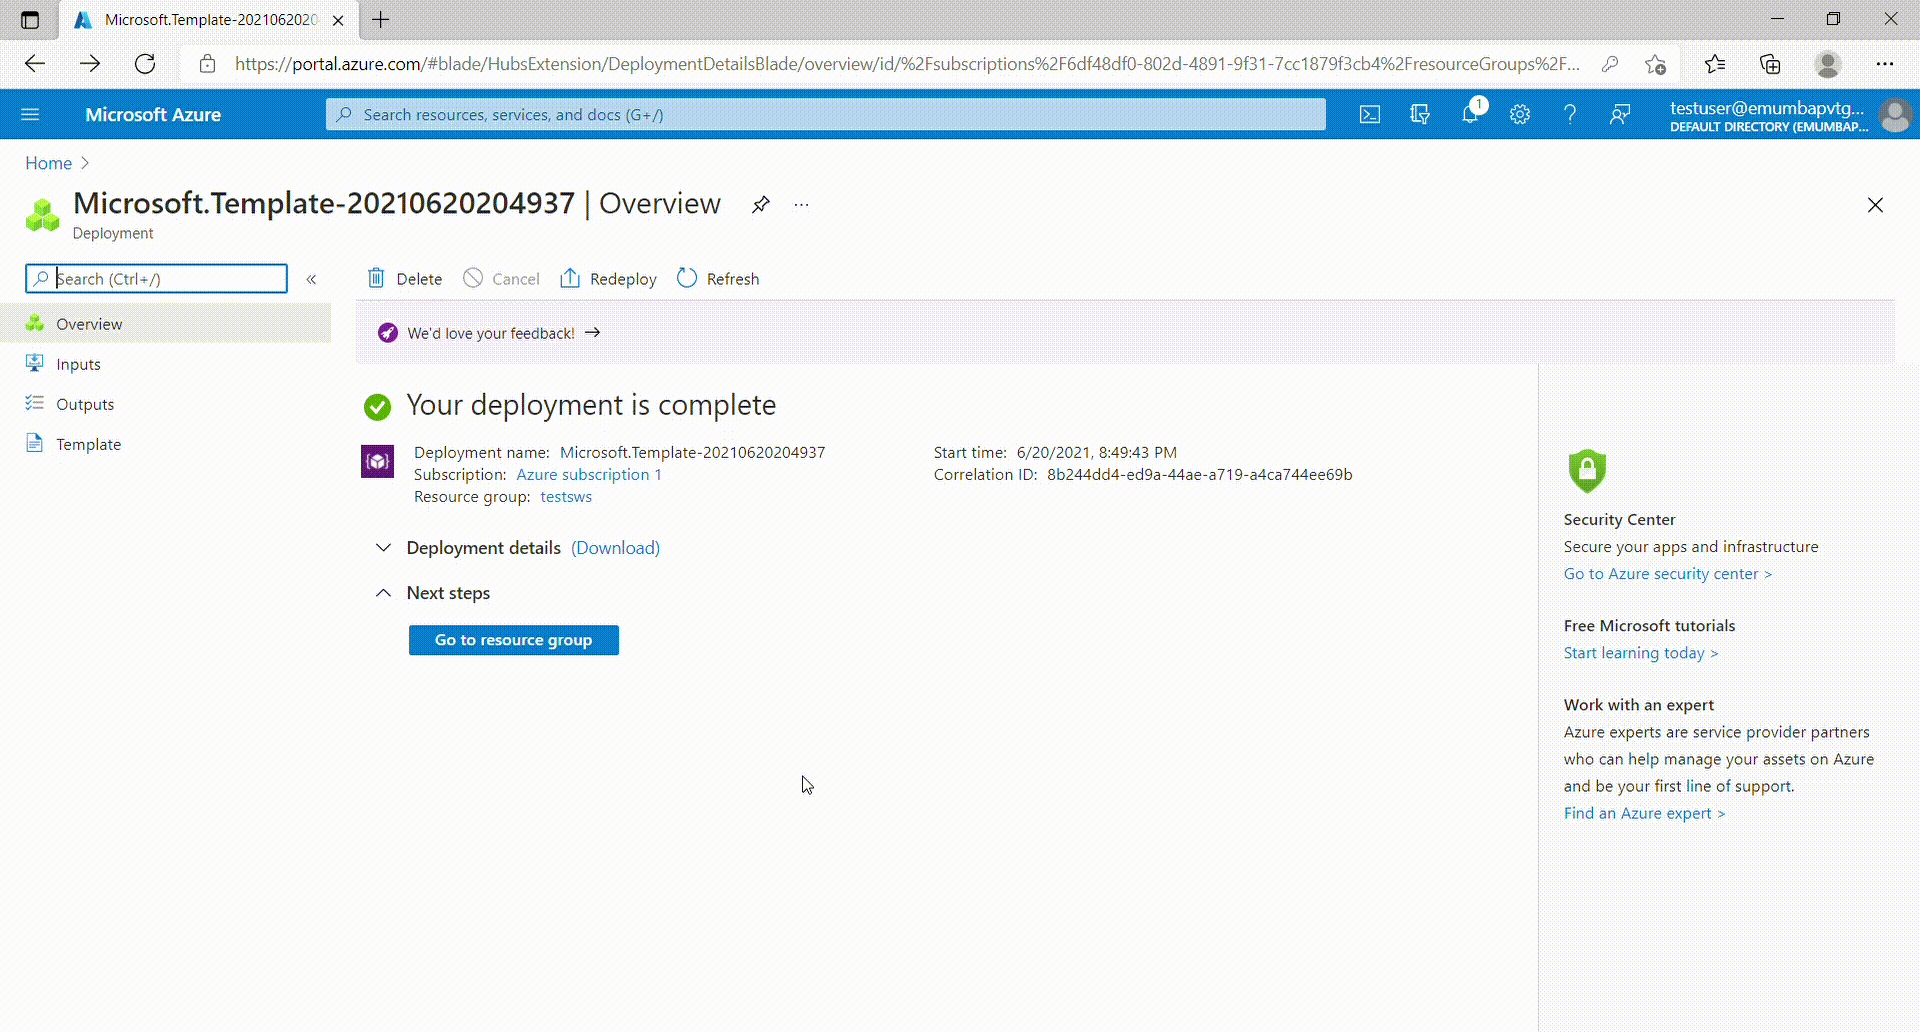
- After the deployment is complete, click 'Go to resource group'.
- You'll see all the resources deployed in the resource group.
- Click on the newly deployed Synapse workspace.
- Click on link 'Open' inside the box labelled as 'Open Synapse Studio'.
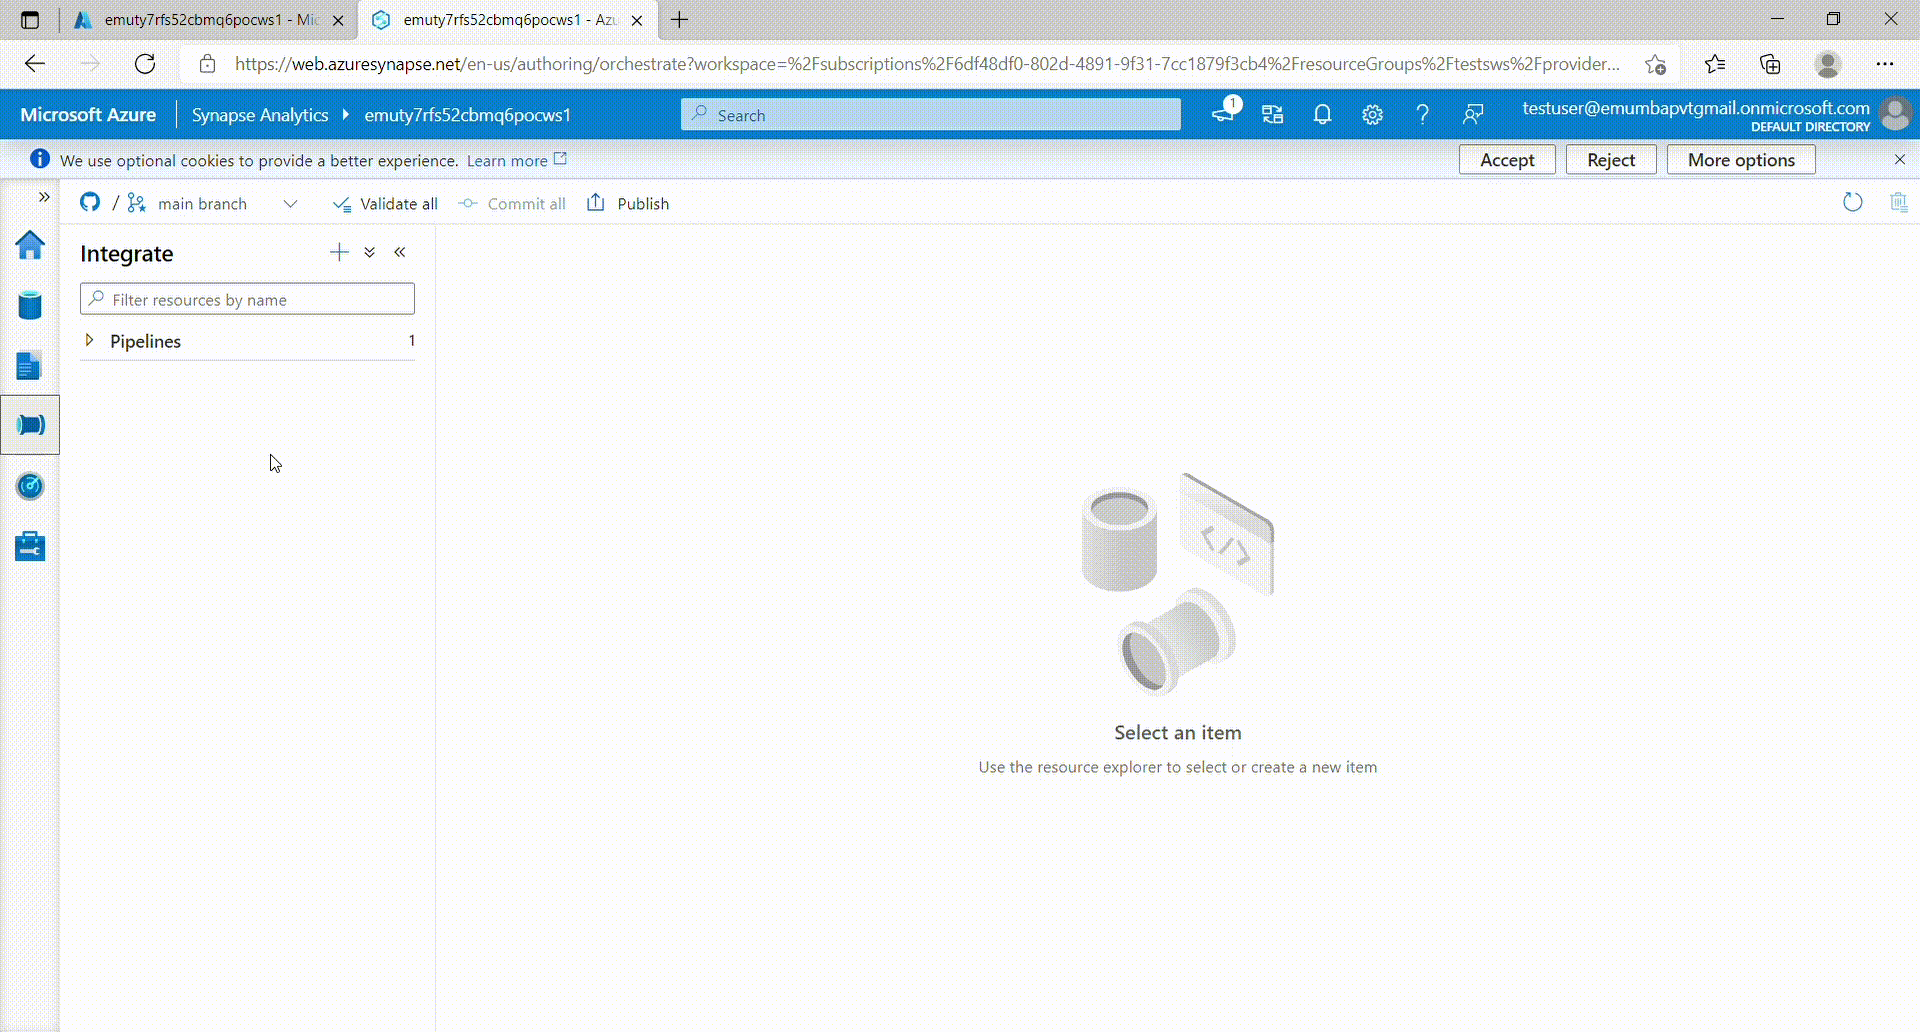
- Click on 'Log into Github' after workspace is opened. Provide your credentials for the github account holding the forked out repository.
- After logging in into your github account, click on 'Integrate' icon in the left panel. A blade will appear from right side of the screen.
- Make sure that 'main' branch is selected as 'Working branch' and click 'Save'.
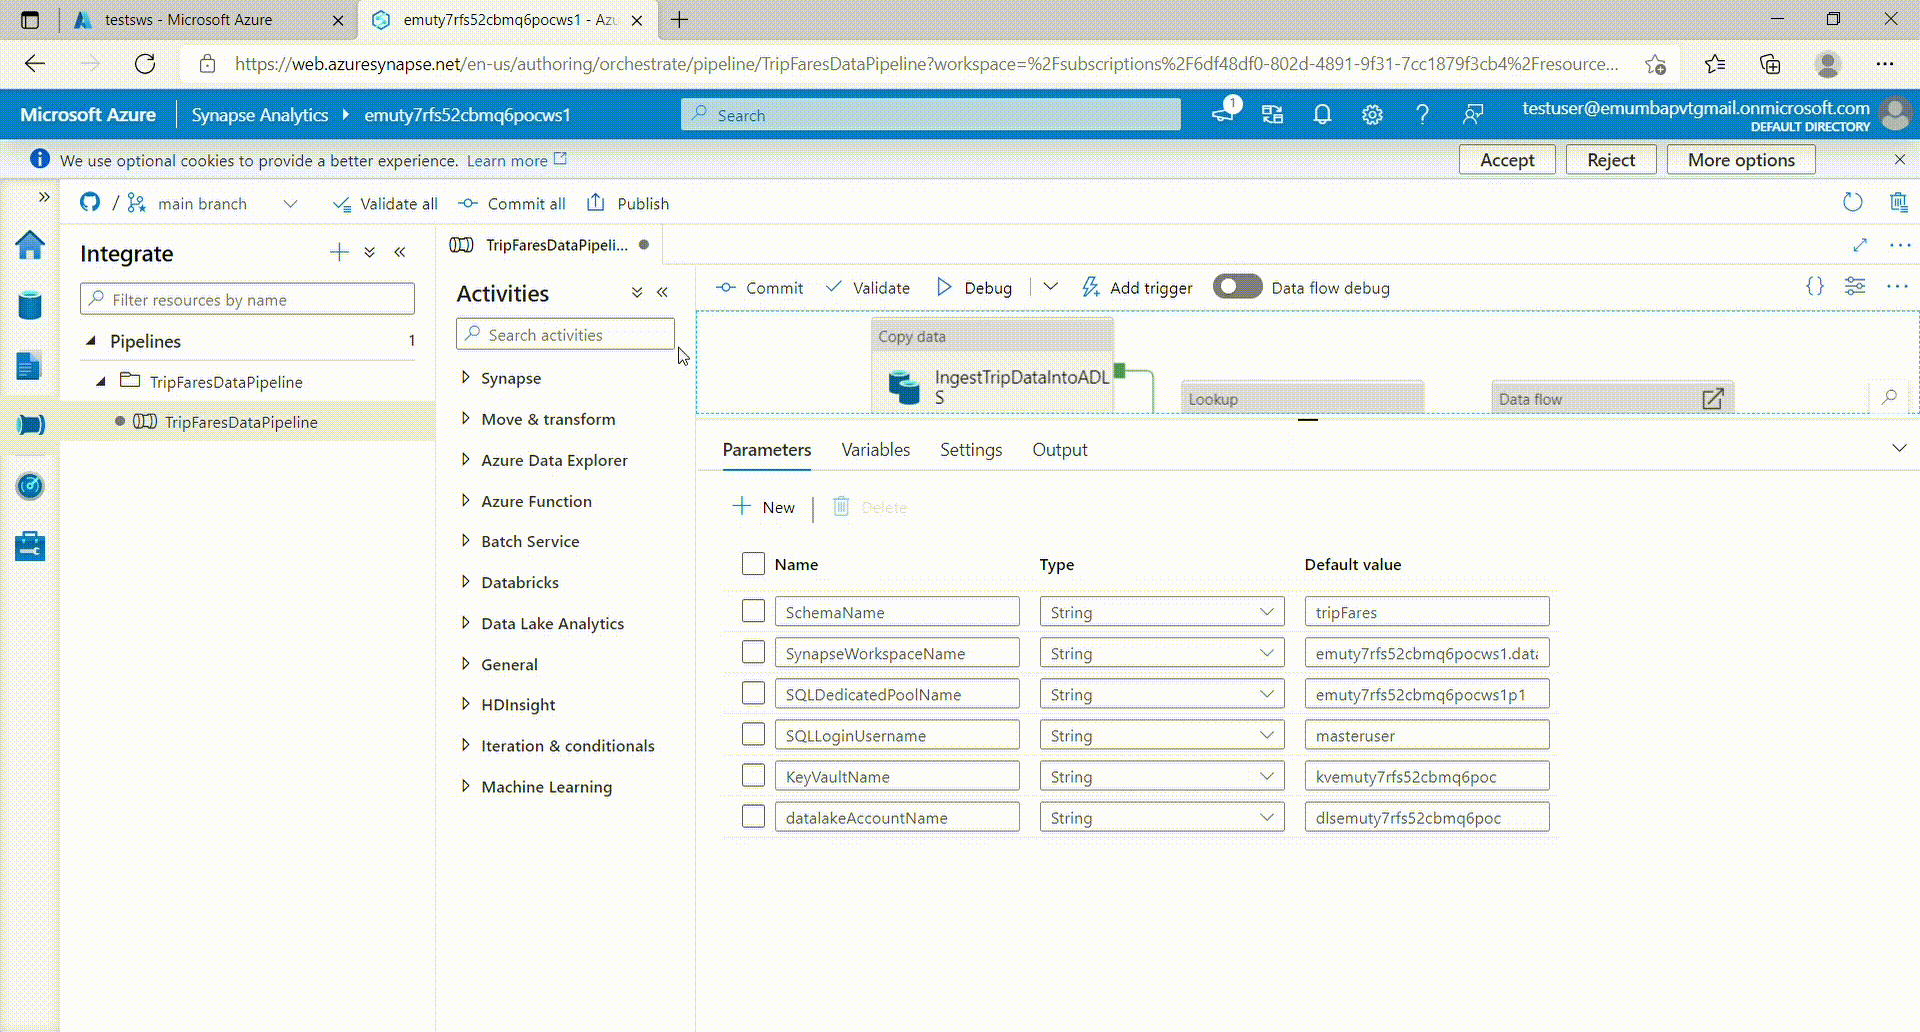
- Now open the pipeline named 'TripFaresDataPipeline'.
- Click on 'Parameters' tab at bottom of the window.
- Update the following parameter values. (You can copy the resource names from the resource group recently deployed.)
- SynapseWorkspaceName (Make sure workspace name is fully qualified domain name, i.e. workspaceName.database.windows.net)
- SQLDedicatedPoolName
- SQLLoginUsername
- KeyVaultName
- DatalakeAccountName
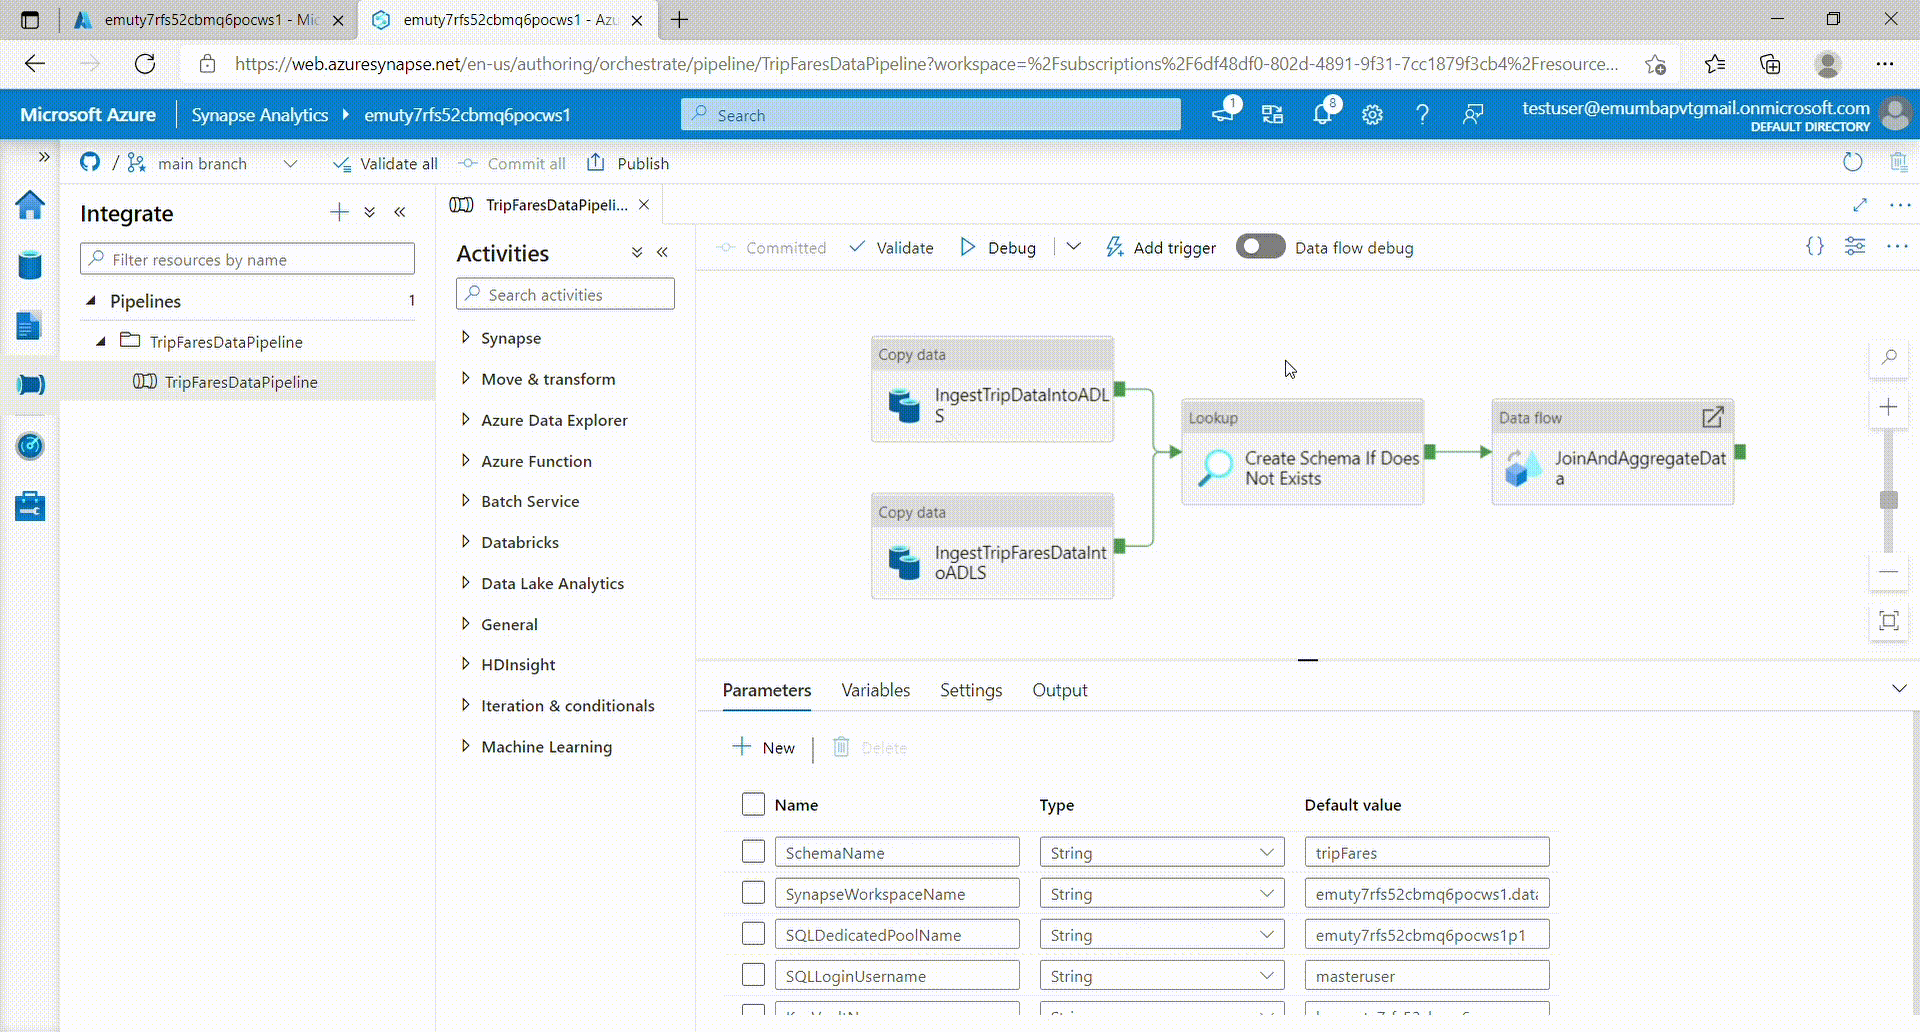
- After the parameters are updated, click on 'Commit all'.
- After successful commit, click 'Publish'. A blade will appear from right side of the window.
- Click 'Ok'.
- Now to trigger the pipeline, click 'Add trigger' at the top panel and click 'Trigger now'.
- Confirm the pipeline parameters' values and click 'Ok'.
- You can check the pipeline status under 'Pipeline runs' in the 'Monitor' tab on the left panel.
- To run the notebook (if spark pool is deployed), click on 'Develop' tab on the left panel.
- Now under 'Notebooks' dropdown on left side of screen, click the notebook named 'Data Exploration and ML Modeling - NYC taxi predict using Spark MLlib'.
- Click 'Run all' to run the notebook. (It might take a few minutes to start the session)

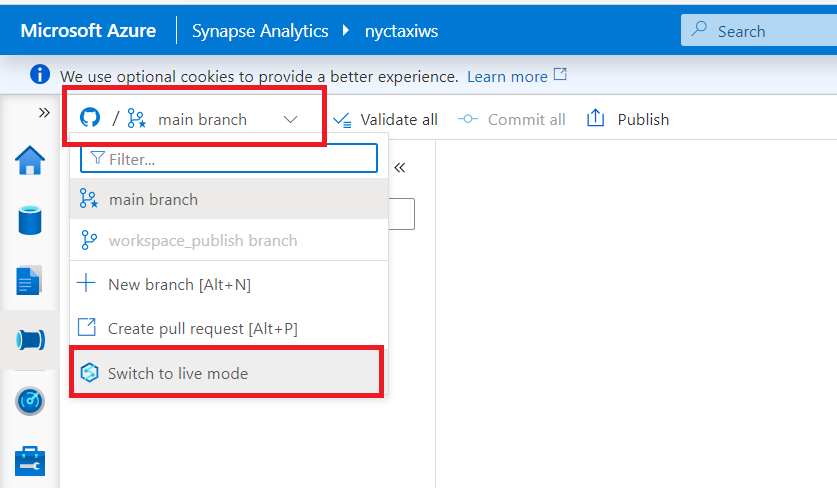
- Once published all the resources will now be available in the live mode.
- To switch to the live mode from git mode, click the drop down at top left corner and select 'Switch to live mode'.
Pre-requisites
PowerBI workspace created. Please note that you can’t use default workspace (‘My workspace’). create a new PBI workspace or use any other workspace other than ‘My workspace’.
Create PowerBI workspace --> https://docs.microsoft.com/en-us/power-bi/collaborate-share/service-create-the-new-workspaces
Link Azure Synapse workspace to PowerBI workspace
- In Synapse workspace, go to Manage --> Linked Services.
- Click on PowerBIWorkspaceTripsFares linked service
- From the drop down list, select your PowerBI workspace and Save and publish.

- Download [NYCTaxiCabTripAndFare.pbit] (https://github.com/Azure/Test-Drive-Azure-Synapse-with-a-1-click-POC/tree/main/synapsepoc/PowerBITemplate/NYCTaxiCabTripAndFare.pbit) from PowerBITemplate folder
- Provide ServerName, DatabaseName and login credentials. ServerName and DatabaseName can be found in connection strings.
- To get the connection string, click on Dedicated SQL Pool
- On the left hand side menu, click on connection strings
- Copy ServerName and DatabaseName from connection string, paste them in PowerBI and click on 'Load'.
- Select 'Database' (instead of default 'Windows') and provide User name, Password and click on 'Connect'

- Change the sensitivity level to 'Public' and save the dashboard.
- Publish the dashboard to the PowerBI workspace you have created by clicking on 'Publish' and selecting the workspace.
- In Synapse workspage navigate to Develop --> PowerBI --> Refresh.
- You see the PowerBI report in Synapse you had published in PowerBI workspace.
