- Microsoft Docs: Azure Pipelines Agents - guidelines for setting up your own private "self-hosted" agent.
- UI testing for Windows apps with WinAppDriver and Appium in Azure Devops - a Microsoft Tech Community post with further in-depth details on how you can add WinAppDriver UI tests in DevOps and configure your Pipeline for CI.
The following are prequisites for running UI tests with WinAppDriver in Azure DevOps:
-
An agent running on Windows 10 configured as interactive is required.
- The following hosted agents are supported: HostedVS2019 and HostedVS2017.
- If you wish to use a private agent, please refer to the Azure documentation here on setting one up.
- If the hosted agents do not meet your requirement, try using a private agent. More information on this below.
- The following hosted agents are supported: HostedVS2019 and HostedVS2017.
-
Use Azure Pipelines - get started today for free.
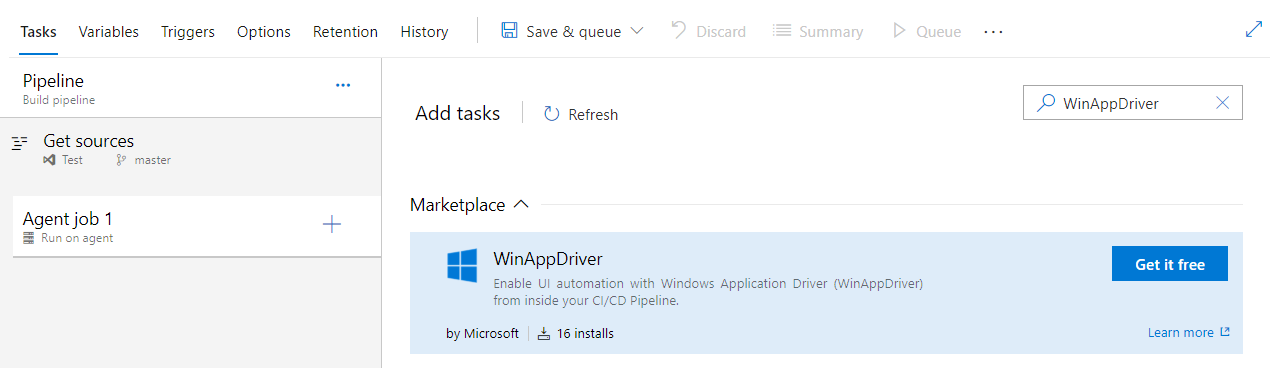
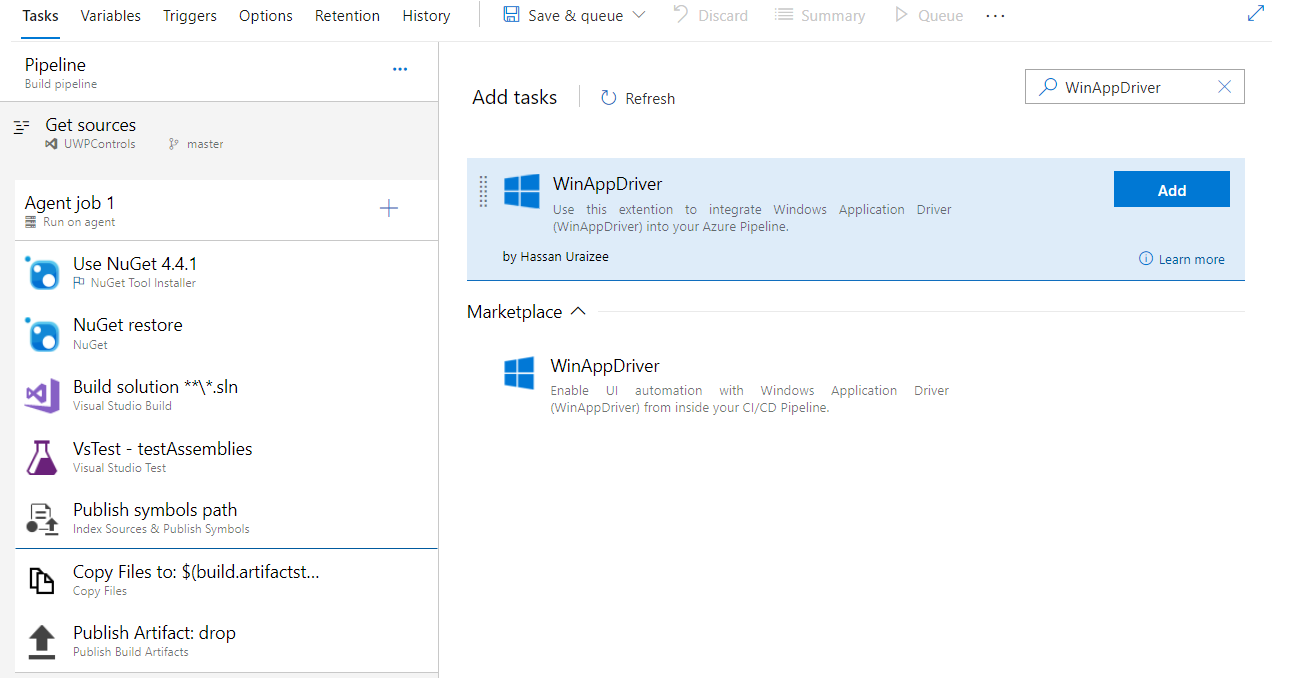
There's now a dedicated WinAppDriver Pipelines Task available on the Azure Marketplace to help you easily enable and configure WinAppDriver from inside your DevOps Pipeline. To get started, install the WinAppDriver task onto your DevOps organization from here, or you can search through the Add Tasks menu from inside your Pipeline Editor -
Once installed, the WinAppDriver task can be added to your pipeline.
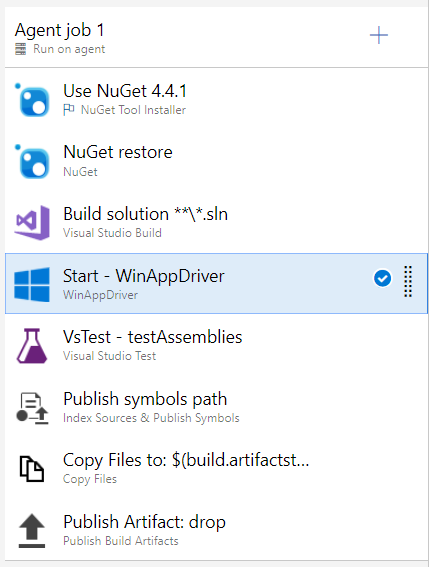
It is recommended to place the WinAppDriver task in conjunction with a separate Test Runner utility - in this case our pipeline has been pre-equipped with the Visual Studio Test Runner Task to drive the test cases.
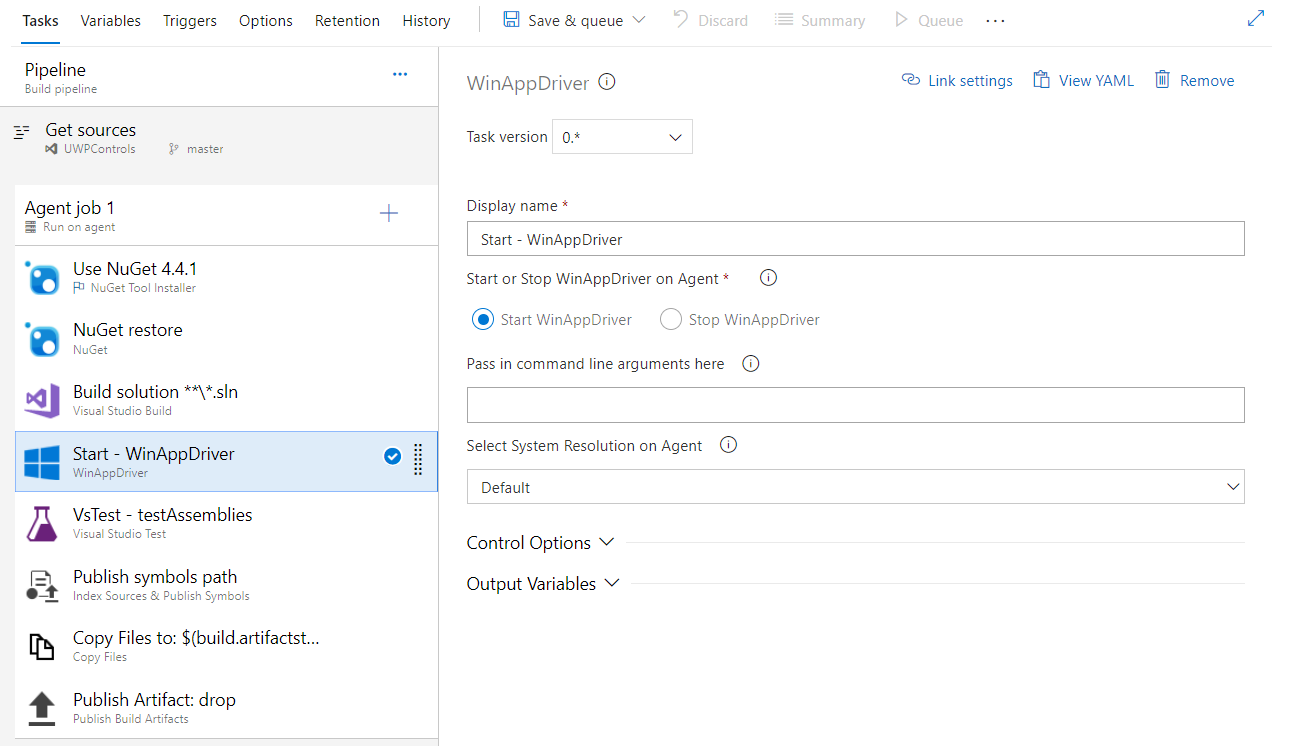
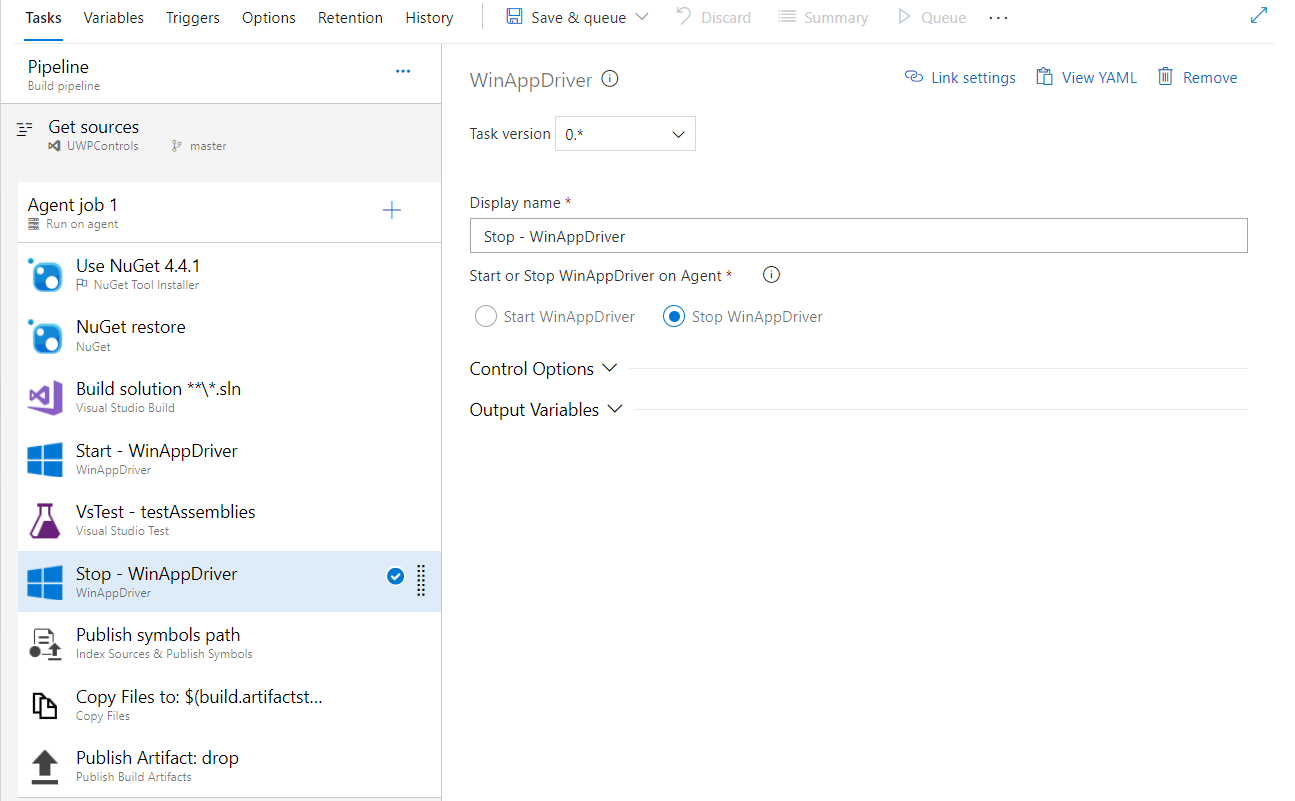
We can now configure the task - you can see that automatically the Task is named to "Start - WinAppDriver". It is not required to pass in any arguments, but it is recommended to set the System Resolution on Agent to 1080P - this will be especially important to declare on a hosted agent.
Once configured, it's recommended to add another instance of the WinAppDriver task, this time having it be configured to "Stop" WinAppDriver on the agent. The "Stop- WinAppDriver" instance of the task should be placed after the VS Test task, so that WinAppDriver is terminated on the agent once all the test cases have been executed.
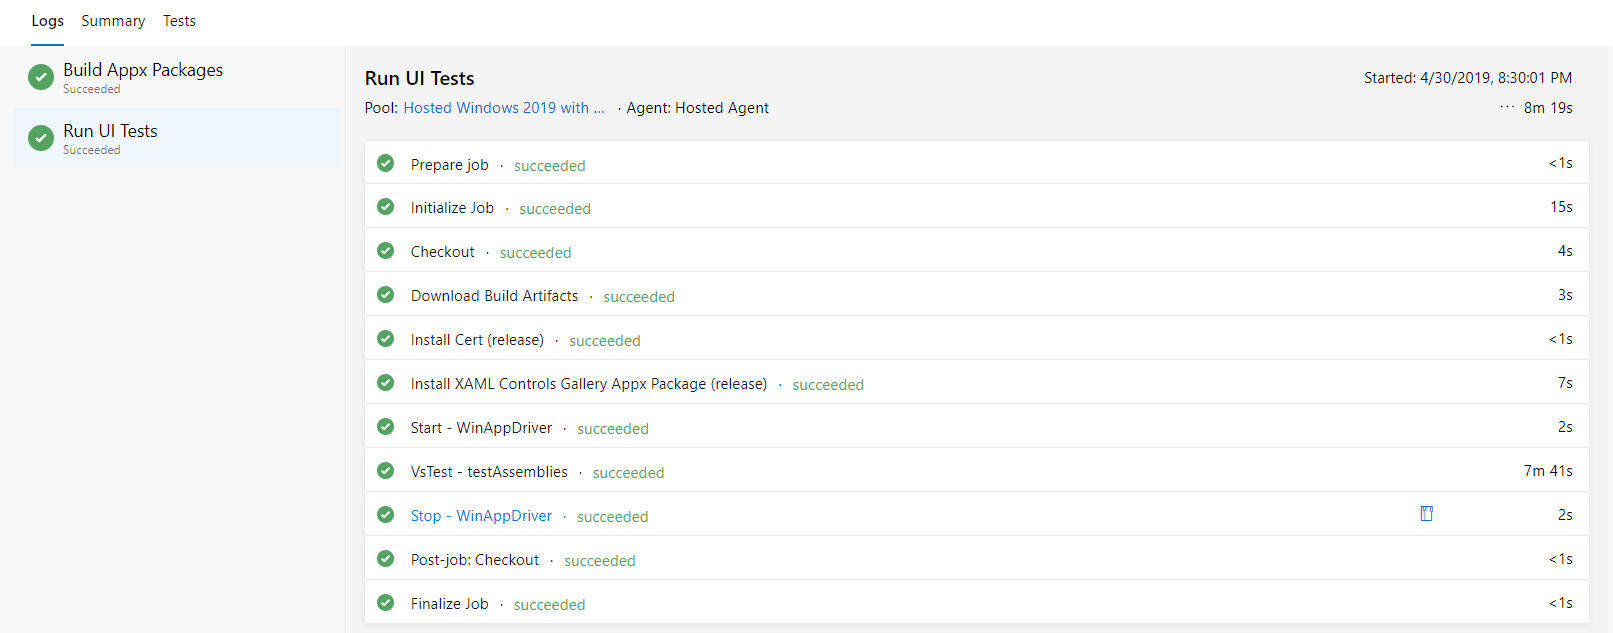
Congratulations! Assuming all went well, you can now view the captured WinAppDriver logs from the Summary Panel of the "Close - WinAppDriver" instance of the task.
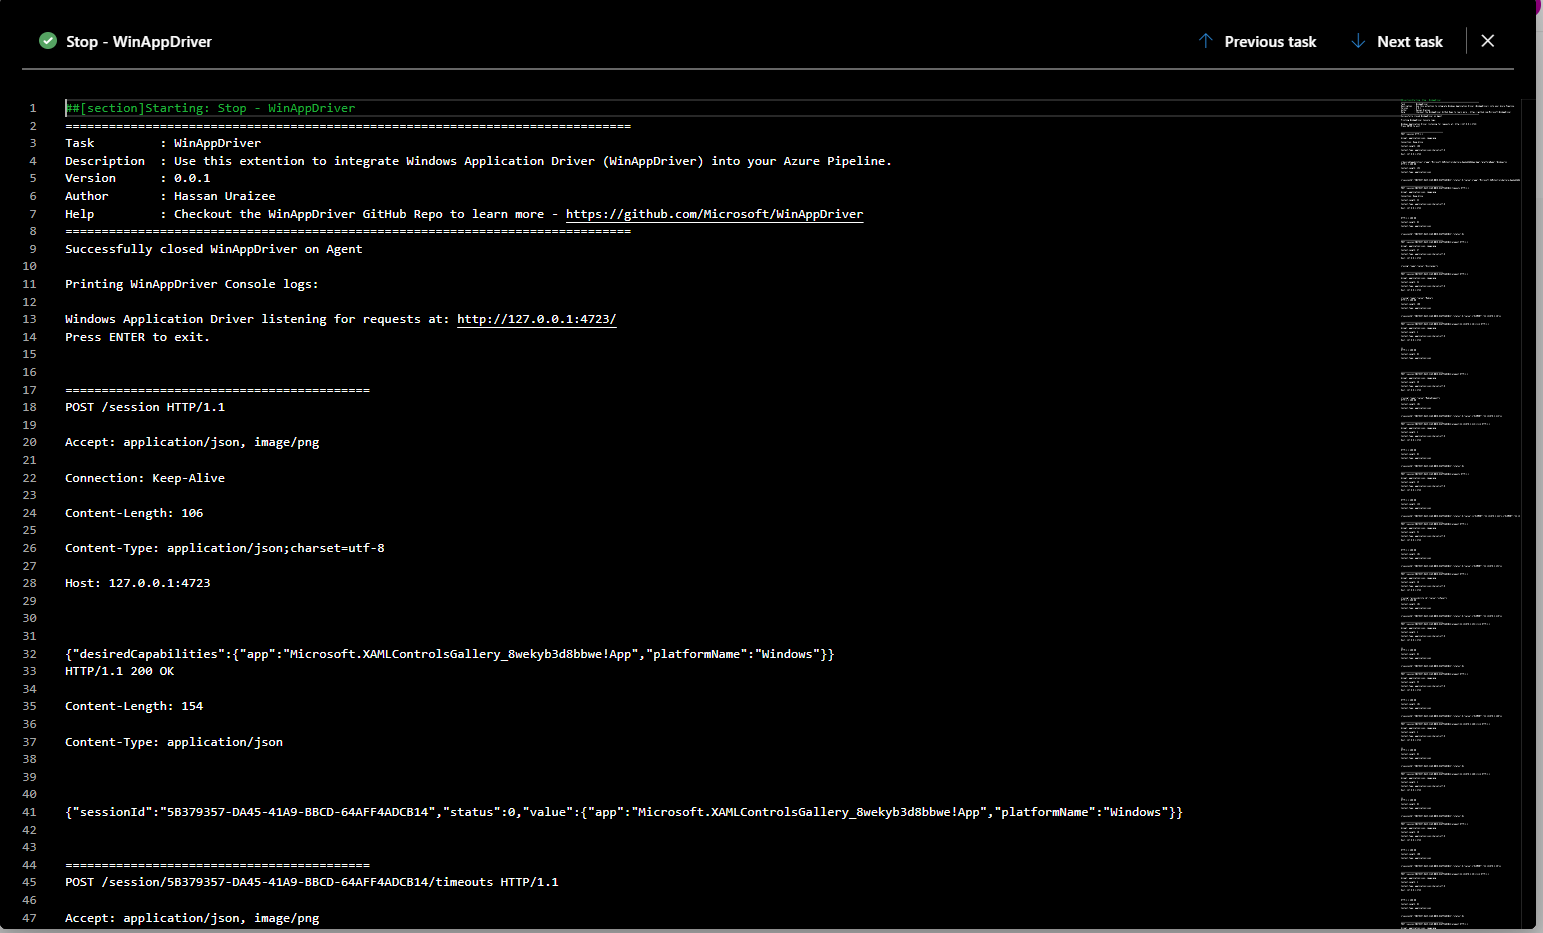
And the WinAppDriver logs,
Finally after you've finished with all the steps above, don't forget to add the finishing touches to your repository by embedding the official Azure Pipelines status badge!