Welcome to Cocreate! Cocreate is a web-based shared whiteboard tool for drawing, teaching, and brainstorming. It's intended to work well both by yourself and working live with others (e.g., in a video conference). See the feature list for a high-level overview.
To see what's changed in Cocreate recently, check out the Changelog.
To get started, you need
- a device (computer, tablet, or phone, equipped with mouse, pen, and/or touchscreen); and
- a modern web browser (we recommend Google Chrome as it's the most tested).
Then open Cocreate in the browser:
- If you've been given a link to a Cocreate room, just open that link and you should enter the room.
- If you're currently in Cocreate and want to make a new Cocreate room,
you can click on the
 New Room button.
 - If you want to create a new Cocreate room from scratch, go to the root URL
of your Cocreate server (which should look something like
https://cocreate.your.domain/) and you'll be put into a fresh room (with URL something likehttps://cocreate.your.domain/r/gLoBaLlYuNiQuEiD7). - If you want to share the room you're in with others, click the
 Share Link button
to copy the URL to your clipboard (or select and copy it
from the URL bar at the top of your browser), then paste it into your
favorite messaging platform (e.g., email).
Share Link button
to copy the URL to your clipboard (or select and copy it
from the URL bar at the top of your browser), then paste it into your
favorite messaging platform (e.g., email).
Note that anyone you send the room link to will be able to draw on your
board, delete and edit objects, etc.
You should not share your room link with anyone malicious
or publicly on the Internet.
This is also why room URLs are randomly generated with 101 bits of entropy,
so that they are extremely difficult to guess.
(In case you have problems, past versions of your boards are always available
in the
![]() Time Travel view.)
Time Travel view.)
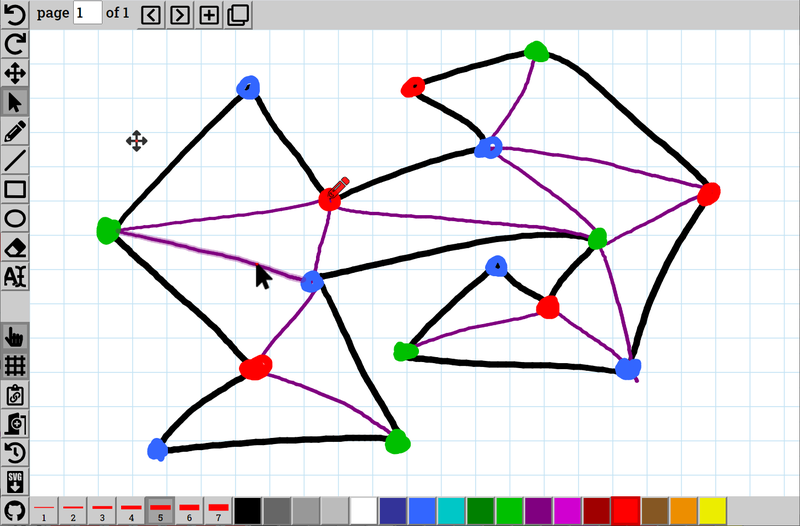
Most of the Cocreate window is taken up by the page where you can draw. In addition to your own cursor, you'll see the cursors of anyone else connected to the board, live as they move their cursor. This is extremely useful for pointing at things while discussing them. You can see what tool they're using and (for drawing tools) what color they're using, so you can use colors as a makeshift way to identify each other's cursors in a group meeting.
On the left, top, and bottom sides of the Cocreate window, you'll see three different "palettes" of tools:
Hovering your mouse or pen over these tools (or holding your finger on them) brings up a helpful tooltip explaining what the tool does, how it works, and any keyboard shortcuts. In the rest of this guide, we give more detail on each tool.
Undo/redo are familiar options in most software, and their meaning is clear
enough when you're working by yourself. Conceptually, there's an undo stack
of the operations you've performed since starting Cocreate, and
![]() Undo will
walk those operations back by doing the inverse operations:
deleting a previously drawn object, putting back a deleted object,
or changing the color back to what it used to be.
Undo is an easy way to fix a mistake: if you didn't like
the stroke you drew, just undo it and try again.
Undo will
walk those operations back by doing the inverse operations:
deleting a previously drawn object, putting back a deleted object,
or changing the color back to what it used to be.
Undo is an easy way to fix a mistake: if you didn't like
the stroke you drew, just undo it and try again.
Conversely, if you undid too much,
![]() Redo
will undo the effect of the last undo operation:
putting the drawn object back, deleting the object again, or
changing the color back again.
Repeatedly undoing and redoing a change is a simple way to demonstrate a
before and after picture too.
But be careful: as soon as you do any operation that's not undo or redo
(like drawing), you can no longer redo undo operations.
Conceptually, you're maintaining a linear timeline of operations,
and you can go back into the past via undo,
and go back to the future via redo,
but once you make a change,
you're on a new timeline and can't get back.
Redo
will undo the effect of the last undo operation:
putting the drawn object back, deleting the object again, or
changing the color back again.
Repeatedly undoing and redoing a change is a simple way to demonstrate a
before and after picture too.
But be careful: as soon as you do any operation that's not undo or redo
(like drawing), you can no longer redo undo operations.
Conceptually, you're maintaining a linear timeline of operations,
and you can go back into the past via undo,
and go back to the future via redo,
but once you make a change,
you're on a new timeline and can't get back.
How does this work with multiple people drawing at once?
Cocreate maintains a linear timeline for the entire drawing that is an
interleaving of all the users' operations, so that everyone sees the same
picture.
But undo and redo only apply to your own operations;
you can't undo someone else's changes. (It would be pretty annoying if
you're about to undo your drawing, but then someone else draws something,
and you undo their drawing instead.)
So undo and redo are implemented by adding the inverse of your operations
to the end of the timeline.
Undoing a drawing operation is simulated by deleting that drawn object;
redoing that undo is simulated by inserting the object again.
You can see this result by playing with the
![]() Time Travel tool.
Time Travel tool.
This usually works fine, but there are exceptions. If you draw an object, and someone else deletes it, and then you undo the draw operation, then you'll attempt to delete it again. Nothing bad will happen, but you'll get an error message in the JavaScript console. If you draw an object, someone edits it (e.g. changes the color), and you undo and redo drawing the object, then you get the original object and the edit is lost. There are some other edge cases when two people are editing the same object, but usually it all works fine.
The Pan Tool is the first "mode" in the list: you can be in only one mode at once. It's also the mode that Cocreate starts in (because it can't accidentally do anything, so is a safe starting point). This tool does one thing: scroll around the page. To use it, drag the page as you would a physical piece of paper, and it moves around as you'd expect.
Panning is special because it's accessible in any mode by holding down either the Space key or the middle mouse button and then dragging the page. (This behavior combines features common in many drawing tools such as Adobe Illustrator, Adobe Photoshop, GIMP, and Inkscape.)
A scroll wheel or a touchpad's scroll gesture (typically two-finger dragging) also pans the canvas.
Related, if you want to zoom into or out of the page, check out the
![]() Zoom Out /
Zoom Out /
![]() Zoom In
or
Zoom In
or
![]() Zoom To Fit
buttons.
You can also zoom using a scroll wheel while holding Ctrl,
or using a touchpad's zoom gesture (typically two-finger pinching).
On a multitouch device (most tablets and laptops with touchscreens),
two-finger dragging also activates pan and zoom in this mode.
Zoom To Fit
buttons.
You can also zoom using a scroll wheel while holding Ctrl,
or using a touchpad's zoom gesture (typically two-finger pinching).
On a multitouch device (most tablets and laptops with touchscreens),
two-finger dragging also activates pan and zoom in this mode.
Cocreate remembers your last view (pan and zoom) of each page that you visit (via the
browser's local storage), so that you can easily pick up where you left off.
Use ![]() Zoom Reset
to go back to the default initial view.
Zoom Reset
to go back to the default initial view.
The Select Tool is the second "mode": you can be in only one mode at once. In general, it lets you manipulate existing drawn objects: you can move, duplicate, delete, or change color/thickness.
Selecting objects directly. If you hover over an object (with mouse or pen), you will see it "highlight" in the form of a shadow. If you click/tap an object, it will get an even darker shadow to indicate that it's currently selected. If you click/tap on another object, the previous object will normally be deselected. But if you hold down Shift while clicking/tapping, then the object you select will toggle in/out of the selection. This method is good for selecting a specific object (or a few), but it gets tedious if you want to manipulate several objects at once.
Rectangular selection. If you click/tap and hold on a spot without an object, and then drag, you create a selection rectangle. When you let go, any object intersected by the rectangle will get selected. This is a great way to select many objects at once, and is often convenient even for selecting a simple object using less precision. You can select more objects with multiple rectangles by holding Shift; each time an object is intersected by a selection rectangle, it toggles in/out of the selection.
Deselection. If you click outside the current selection rectangle, or press the Escape key, you will deselect everything.
Attributes. When you select one or more objects, your current attributes will update to match those objects, when their corresponding attributes are all the same. For example, if you select a filled-blue outlined-green width-5 rectangle, your fill color will change to blue (and fill will turn on), your outline color will change to green, and your line width will change to 5. If you select two objects with line width 3, then your line width will change to 3; but if you simultaneously select one object with line width 3 and another object with line width 5, then your line width won't change. This feature makes it easy to inspect an object's attributes (just select it to see what they are) and makes it easy to draw more objects in a similar style (select then draw).
Editing objects.
- To change the selected objects' line width, just click/tap the desired line width.
- To change the selected objects' outline color, just click/tap the desired color.
- To change the selected objects' fill color, hold Shift and click/tap the desired color.
Moving objects. To move the selected objects, click/tap and hold on one of the objects in the selection and drag it a nontrivial distance. (It's important to start the drag on one of the existing objects, or else you'll lose your selection and get a fresh selection rectangle instead. If you're using a mouse or pen with hover detection, make sure a suitable object highlights before dragging.)
If you hold Shift while dragging, the move is constrained to be purely horizontal or vertical.
You can also nudge objects horizontally or vertically using the arrow keys. Normally, objects move by one grid unit. If you hold Shift while pressing arrow keys, the move is by half-grid units.
Cut/copy/paste/duplicate/delete. You can copy or cut your selection and paste it anywhere else in Cocreate, such as another page or another board altogether. Use your browser's standard clipboard operations; with a keyboard:
- Copy via Ctrl-C or Command-C on a Mac.
- Cut via Ctrl-X or Command-X on a Mac.
- Paste via Ctrl-V or Command-V on a Mac.
In addition, Cocreate offers two nonclipboard operations:
- You can duplicate the selected objects (with a one-grid-cell horizontal and vertical shift) via Ctrl-D or Command-D on a Mac.
- You can delete the selected objects by pressing the Delete
or Backspace key.
(If you prefer a pen interface for deleting objects, check out the
 Erase Tool.)
The Select Tool is another selection second that lets you manipulate the
geometry of existing drawn objects. Specifically, you can drag the points
that define a
![]() Segment,
Segment,
![]() Rectangle,
Rectangle,
![]() Ellipse,
or
Ellipse,
or
![]() Polygon.
Polygon.
Switching to this mode displays small squares at all the draggable points, called "anchors". Drag any of these anchors to the desired location. Hold Shift while dragging to constrain the move to be purely horizontal or vertical.
You can select multiple anchors in two ways:
- Clicking/tapping on individual anchors while holding Shift, to toggle selection. This method is good for selecting a few specific anchors at different locations, but it gets tedious if you want to manipulate several anchors at once or several angles at the same location.
- Dragging a rectangle around anchors to select the anchors whose centers are within the rectangle. Without Shift, this resets the selection. With Shift, this toggles the selection.
You can then move the selected anchors by dragging one of the selected anchors, or dragging an additional anchor to select while holding Shift. Alternatively, you can nudge objects horizontally or vertically using the arrow keys. Normally, objects move by one grid unit. If you hold Shift while pressing arrow keys, the move is by half-grid units.
The Pen Tool is a drawing mode that lets you draw freehand. It's especially useful when you have a digital pen or stylus, in which case it feels like a real pen or pencil. But you can use a mouse in a pinch.
If your pen supports pressure sensitivity (e.g., many Wacom pens, Surface pens, Samsung S-Pen, and Apple Pencil), then Cocreate will use this pressure information to modulate the width of your stroke, between 50% and 150% of the currently selected line width.
The Segment Tool is a drawing mode that lets you draw perfectly straight lines. If you click/tap on one point, drag to another point, and release, then you get the line segment connecting the two points. You and others can see the line-segment-in-process as you're doing this.
If you hold Shift, then the line segment will be constrained to be horizontal or vertical. If you hold Alt or Option on Mac, then the line segment will be centered at the first point and have the second point as one endpoint; the other endpoint is its reflection through the first point. You can use both modifiers at once, and you can play with these toggles while you're drawing a line. (This behavior matches Adobe Illustrator.)
The Rectangle Tool is a drawing mode that lets you draw perfect axis-aligned rectangles (or squares). If you click/tap and release on one point (without dragging), you get a small square "dot" centered at the point, whose size is proportional to the current line width. If you click/tap on one point, drag to another point, and release, then you get the rectangle with those two points as opposite corners.
If you hold Shift while dragging, then the rectangle will be constrained to be a square (1:1 aspect ratio). If you hold Alt or Option on Mac, then the rectangle will be centered at the first point and have the second point as one corner; the opposite corner is its reflection through the first point. You can use both modifiers at once to draw a square centered at a point, and you can play with these toggles while you're drawing a rectangle. (This behavior matches Adobe Illustrator.)
The Ellipse Tool is a drawing mode that lets you draw perfect axis-aligned ellipses (or circles). If you click/tap and release on one point (without dragging), you get a small circular "dot" centered at the point, whose size is proportional to the current line width. If you click/tap on one point, drag to another point, and release, then you get the ellipse inscribed in the axis-aligned rectangle having those two points as opposite corners.
If you hold Shift while dragging, then the ellipse will be constrained to be a circle (1:1 aspect ratio). If you hold Alt or Option on Mac, then the ellipse will be centered at the first point and have the second point as one bounding-box corner. You can use both modifiers at once to draw a circle centered at a point, and you can play with these toggles while you're drawing an ellipse. (This behavior matches Adobe Illustrator.)
The Polygon Tool is a drawing mode that lets you draw polygonal lines (open or closed). Click/tap successive points. To finish your polygon (e.g. to start a new one), you have several options:
- Right click the final point
- Double click the final point (easiest to achieve in grid snapping mode)
- Type Escape (which removes the floating point of the cursor)
- Click/tap the
 Polygon Tool button
(which also removes the floating point of the cursor)
Polygon Tool button
(which also removes the floating point of the cursor) - Switch drawing modes (which also removes the floating point of the cursor)
You can also type Backscape or Delete to undo the last clicked point, in case you make a mistake.
If you hold Shift, then the current line segment will be constrained to be horizontal or vertical.
The Erase Tool is a drawing mode that erases/deletes previously drawn objects.
Like the
![]() Select Tool,
if you hover over an object (with mouse or pen),
you will see it "highlight" in the form of a shadow.
If you then click/tap, you will erase that object
(and only that object, if you don't move before releasing).
Alternatively, you can click/tap and hold, and drag over multiple objects
to erase them all once.
(Currently you need to drag somewhat slowly over the objects to erase
or you might miss them.)
Select Tool,
if you hover over an object (with mouse or pen),
you will see it "highlight" in the form of a shadow.
If you then click/tap, you will erase that object
(and only that object, if you don't move before releasing).
Alternatively, you can click/tap and hold, and drag over multiple objects
to erase them all once.
(Currently you need to drag somewhat slowly over the objects to erase
or you might miss them.)
The Text Tool is a drawing mode that lets you type text and mathematical
formulas. Click/tap on a blank area of the page to start a new text object,
or on an existing text object to edit its text.
(Like the
![]() Select Tool,
if you hover over a text object with mouse or pen,
you will see it "highlight" in the form of a shadow.)
Then you will get a text entry field near the bottom of the screen,
and you can start typing.
You (and everyone) will immediately see your text rendered on the page as well.
Select Tool,
if you hover over a text object with mouse or pen,
you will see it "highlight" in the form of a shadow.)
Then you will get a text entry field near the bottom of the screen,
and you can start typing.
You (and everyone) will immediately see your text rendered on the page as well.
You can use basic Markdown syntax to style your text:
*italic*renders as italic.**bold**renders as bold.***bold***renders as bold italic (Github-Flavored Markdown extension).`code`renders ascode.~~strike~~renders asstrike(Github-Flavored Markdown extension).- To avoid these behaviors, escape the special characters with
\. For example,\*normal\*renders as *normal*.
You can use LaTeX syntax $...$ or $$...$$ to write formulas.
For example: $e^{i \pi} + 1 = 0$ or $$\int_0^1 {dx \over x}$$.
See the
list of supported MathJax commands and extensions.
To write multiple lines of text, add manual line breaks via the
Enter key. As an exception, line breaks are ignored
within math mode: any math within $s renders on a single line,
even if it contains newlines.
You can use the Tab key to enter tab characters, which currently render as large spaces (without any magic alignment). If you want to cycle to the next element via keyboard navigation, use Escape first.
When you're done typing in a text object, press the Escape key. This won't deselect the object, but it will defocus the text entry field, allowing you to press other keyboard shortcuts to use other tools.
Cocreate does its best to handle multiple people editing the same text object, but it won't be perfect: if two people type changes at exactly the same time, one of their changes will get lost.
If you have text already on your clipboard, you can paste it directly onto your Cocreate board without changing tools. Just press Ctrl-V or Command-V on a Mac.
The Image Tool is a drawing mode that lets you embed images from the web into your Cocreate boards. Just type or paste the URL to an image (SVG, PNG, JPEG, etc.) in the text entry field at the bottom of the screen, and hit Enter (or otherwise defocus the text entry) to embed the image. Before typing the URL, you can click on an existing image object to edit its URL; or you can click on an empty point to define the starting location for the image.
Alternatively, you don't need to use the Image Tool at all. You can drag an image (or link to an image) from another website and drop it on your Cocreate board. Or you can use the clipboard: right click or long press on an image on a webpage, copy the image address/location, and paste it directly into Cocreate via Ctrl-V or Command-V on a Mac.
You cannot directly upload an image from your device to Cocreate, as Cocreate does not offer the ability to store files. Instead, upload your image to a service such as Imgur (which offers free unlimited hidden JPEG/PNG image uploads) or Coauthor (if you already share a Coauthor group with the people you're collaborating with). Then drag the image from Imgur or Coauthor and drop it into Cocreate.
Embedded images are linked into the page via the URL, not stored by Cocreate,
so be careful that the image doesn't disappear from the web. (If it needs to
change locations, you can always edit the URL in the Cocreate page.)
If you're unable to access an image, it will render as
![]() .
To permanently archive a page's contents, including the images, you can use
.
To permanently archive a page's contents, including the images, you can use
![]() Download SVG,
which inlines all of the images in the resulting SVG file.
Download SVG,
which inlines all of the images in the resulting SVG file.
When you embed an image, Cocreate does its best to figure out how to access the URL. It first tries to directly embed the image. If the server supports CORS (such as Imgur or Coauthor), this may work on the first try. There are two situations that require a second try:
- If the server reports that the image needs authentication to access, Cocreate will try again using the server's cookies (assuming the server is configured to allow CORS credentials). For example, you can embed images from Coauthor which are accessible only to those in a Coauthor group, and only those properly logged into Coauthor will be able to see the images.
- If the server does not seem to support CORS, and Cocreate is properly configured, then it will proxy the image through its CORS Anywhere proxy.
Time Travel is a toggling/overlay mode that lets you look at the history of past versions of the current page. It replaces the attribute palette at the bottom of the window with a slider which starts at the far left (the beginning of time). As a result, you'll see a blank screen. By dragging the slider to different points in the timeline, you'll see the evolution of the page.
While in Time Travel mode, you can do the following:
- Using the
 Pan Tool,
drag on the page to pan around.
On a multitouch device (most tablets and laptops with touchscreens),
two-finger dragging will also activate pan and zoom during Time Travel.
Pan Tool,
drag on the page to pan around.
On a multitouch device (most tablets and laptops with touchscreens),
two-finger dragging will also activate pan and zoom during Time Travel. - Using the
 Select Tool,
select objects and copy them to the clipboard via
Ctrl-C or Command-C on a Mac.
(Paste is disabled while in Time Travel, but you can paste into the present,
via Ctrl-V or Command-V on a Mac,
after exiting Time Travel.)
Select Tool,
select objects and copy them to the clipboard via
Ctrl-C or Command-C on a Mac.
(Paste is disabled while in Time Travel, but you can paste into the present,
via Ctrl-V or Command-V on a Mac,
after exiting Time Travel.) - Use the
 Undo /
  Redo
buttons to take single steps backward or forward in the timeline.
Redo
buttons to take single steps backward or forward in the timeline.  Zoom Out /
  Zoom In
using the buttons, using a scroll wheel while holding
Ctrl, or using a touchpad zoom gesture.
Zoom In
using the buttons, using a scroll wheel while holding
Ctrl, or using a touchpad zoom gesture. Zoom Reset or
  Zoom To Fit.
 Download SVG
or
Download SVG
or
 Download PDF
for the currently viewed page or selection.
Download PDF
for the currently viewed page or selection.
The tool palettes switch to a sepia tone to indicate you're time traveling.
You can't make any changes or see others' cursors while time traveling.
You can leave Time Travel mode by clicking
![]() Time Travel
again, or by selecting a tool other than
Time Travel
again, or by selecting a tool other than
![]() Pan Tool
or
Pan Tool
or
![]() Select Tool
from the left palette.
Select Tool
from the left palette.
This button toggles whether Cocreate will allow drawing via touchscreen.
By default, this toggle is on (the button is down) and it will.
But if you're using a pen-enabled device and want to ignore your palm
resting on screen, then you can toggle it off. When off,
touch will work only for clicking buttons and in nondrawing modes:
![]() Pan
and
Pan
and
![]() Select.
In addition, turning this option off on a multitouch device
(most tablets and laptops with touchscreens) enables two-finger pan and zoom
in drawing modes (as if you were in
Select.
In addition, turning this option off on a multitouch device
(most tablets and laptops with touchscreens) enables two-finger pan and zoom
in drawing modes (as if you were in
![]() Pan
mode).
Pan
mode).
This button toggles whether to use a simple crosshair for the mouse cursor, instead of the default behavior of using an icon in the shape of the tool itself. The crosshair might be preferable for aiming the mouse precisely.
But mostly this feature is a workaround for a bug in Chrome 86 that will cause drawing to be in the wrong place relative to an SVG cursor (if your display is scaled), meaning that Chrome 86 will draw correctly with the crosshair cursor but not with the fancy tool-specific cursors. Cocreate therefore turns on the crosshair option automatically if you're using Chrome 86, unless you've turned it off explicitly (e.g., because you're not using a scaled display).
This button toggles "dark mode", which uses a dark background and flips dark and light colors, roughly preserving hue and contrast. Dark mode is useful if you have light sensitivity or are in a dark room.
This toggle affects only your view, not others' views, so one user can be in (default) light mode while another user is in dark mode, and they see roughly the same diagram. Dark mode approximately preserves the hue of colors, but the brightness is inverted, so one user's "bright blue" is another user's "dark blue".
Cocreate initially chooses light or dark mode according to your browser or operating system's theme/setting. Once you click button, Cocreate remembers and uses your light/dark mode preference.
This button toggles whether the current page has a square grid like graph paper. (Currently, the grid size cannot be configured.) This change affects everyone, but it affects only the current page.
When you create a
![]() New Page,
it has the same grid (or no grid) according to the current page.
New Page,
it has the same grid (or no grid) according to the current page.
This button toggles whether the current page has an equilateral triangle grid. (Currently, the grid size cannot be configured.) This change affects everyone, but it affects only the current page.
When you create a
![]() New Page,
it has the same grid (or no grid) according to the current page.
New Page,
it has the same grid (or no grid) according to the current page.
This button toggles "snapping" geometry to the current grid,
as selected via
![]() Square Grid Toggle
or
Square Grid Toggle
or
![]() Triangular Grid Toggle.
(Even if the grid is invisible, the last chosen grid defines the snapping behavior.)
Triangular Grid Toggle.
(Even if the grid is invisible, the last chosen grid defines the snapping behavior.)
![]() Segments,
Segments,
![]() Rectangles,
Rectangles,
![]() Ellipses,
and
Ellipses,
and
![]() Polygons
will have their defining points rounded to the nearest grid point.
The
Polygons
will have their defining points rounded to the nearest grid point.
The ![]() Pen Tool
is unaffected by grid snapping.
Pen Tool
is unaffected by grid snapping.
![]() Selecting
and dragging objects will move by multiples of grid cells.
This can be useful in combination when duplicating objects, which shift
by exactly one grid dimension down and right, so you can use grid-snapped
dragging to get them back into perfect alignment with the original.
Selecting objects (by clicking on them or dragging a rectangle)
is unaffected by grid snapping.
Selecting
and dragging objects will move by multiples of grid cells.
This can be useful in combination when duplicating objects, which shift
by exactly one grid dimension down and right, so you can use grid-snapped
dragging to get them back into perfect alignment with the original.
Selecting objects (by clicking on them or dragging a rectangle)
is unaffected by grid snapping.
Cocreate remembers the last choice you made for this setting on each board (via the browser's local storage), so you can quickly resume drawing in the same style as before.
When the
![]() Grid Snap Toggle
is turned on, this button toggles a modified behavior where the snapping
is to the half-grid. The grid doesn't change visually, but the snapping
behavior is one level finer. In both the square and triangular grid,
this lets you snap to the centers of edges and cells (squares or triangles).
Grid Snap Toggle
is turned on, this button toggles a modified behavior where the snapping
is to the half-grid. The grid doesn't change visually, but the snapping
behavior is one level finer. In both the square and triangular grid,
this lets you snap to the centers of edges and cells (squares or triangles).
This button aims to make it easy to share the link to this Cocreate room/board with other people or devices.
First, if allowed by your browser, it copies the link to your clipboard, so you should be able to paste the link directly into your favorite messaging platform (e.g., chat or email).
Second, it brings up a dialog with the link itself, presented as text and as a QR code.
- Scanning the QR code is a quick way to switch to using your mobile device.
- On some browsers (e.g. Chrome logged into multiple devices), you can right-click the link and send it to other devices.
- On some mobile browsers, you can long-press on the link to bring up a Share interface.
This button creates a new Cocreate room/board, with a new URL,
in a new browser tab. You can achieve the same effect by removing the
last part of the URL (r/gLoBaLlYuNiQuEiD7), but this button saves that work.
This button exports either the current selection or the entire current page to
SVG format
and downloads it as an .svg file.
SVG should perfectly reproduce the page in full vector quality, including
the text and mathematics, though the text may require a font download.
If you're using the
![]() Select Tool
(or beware, the
Select Tool
(or beware, the
![]() Text Tool),
and have one or more objects selected, then the SVG file will include just
those objects.
This is useful for exporting one subfigure from a sprawling whiteboard:
just drag a rectangle to span the part you want, and fine-tune by
shift-clicking individual objects you want or don't want.
If no objects are selected (e.g. you're using any other tool),
you get the entire page.
Text Tool),
and have one or more objects selected, then the SVG file will include just
those objects.
This is useful for exporting one subfigure from a sprawling whiteboard:
just drag a rectangle to span the part you want, and fine-tune by
shift-clicking individual objects you want or don't want.
If no objects are selected (e.g. you're using any other tool),
you get the entire page.
The downloaded file is named cocreate-gLoBaLlYuNiQuEiD7.svg
where the second part is the unique ID of your room.
This way, if you lose the link to the Cocreate room, you can figure it
out from the filename. But be careful not to accidentally leak it to someone
you don't want to by sending them the file with its original name.
The downloaded file inlines all embedded images (as described in
![]() Image Tool).
Thus the SVG file serves as a permanent archive of the page's contents,
and can be edited in vector drawing programs such as
Inkscape or Adobe Illustrator.
However, the font used in nonmathematical text is currently loaded
by a Google Fonts URL, so it requires an Internet connection to access.
Image Tool).
Thus the SVG file serves as a permanent archive of the page's contents,
and can be edited in vector drawing programs such as
Inkscape or Adobe Illustrator.
However, the font used in nonmathematical text is currently loaded
by a Google Fonts URL, so it requires an Internet connection to access.
In some environments, you can select some objects and copy the SVG directly to your clipboard using Ctrl-C or Command-C on a Mac.
Sometimes it's more convenient to have a PDF representation of your drawing.
PDF isn't as editable as SVG, so is less good for archival,
but it's often easier for people to view,
so can be useful for quickly sending a file for someone to look at.
Use this button to save your drawing as PDF, instead of SVG with
![]() Download SVG.
Download SVG.
The PDF is generated via svg2pdf.js. It inlines all necessary images and fonts, so should be fully standalone. But the output may not always be perfect. For example, this feature currently doesn't support italics or bold-monospace text. It also doesn't yet support downloading multiple pages in one PDF.
This button opens a new browser tab with Cocreate's Github page where you can read this documentation, read the source code, and report bugs and request features.
This button opens a new browser tab with this User Guide. Perhaps it's how you got here?
Each Cocreate board can have multiple pages, ordered 1, 2, ... You start on page 1, but can freely add more pages. (You currently cannot delete pages, however.) For example, you might start a new page when you want to start a fresh idea, problem, etc. It's also a good idea, for higher performance, to use more pages with less information on them.
These buttons change your view of the current page, zooming out or in by 20%. They affect only your view, not other users. Click/tap a button multiple times to zoom out/in more.
Each zoom operation is relative to the center of your current view.
So if you want to zoom on something specific,
![]() Pan
to put it in the center of your view, and then
Pan
to put it in the center of your view, and then
![]() Zoom In.
Zoom In.
You can also zoom using a scroll wheel while holding Ctrl,
or using a touchpad's zoom gesture (typically two-finger pinching).
On a multitouch device (most tablets and laptops with touchscreens),
two-finger dragging also activates pan and zoom when using the
![]() Pan Tool.
Pan Tool.
This button resets the zoom level to 100% and pans to put the origin at the top-left corner, the same as when you first load a Cocreate page. This is helpful if you get lost zooming in or out, or if you want to see what other people would see when first loading the page.
This button sets the zoom and pan so that all objects fit inside the display. This can be useful to get an overall picture of the page, and then zoom into a part of interest. In particular, it can help you find parts of the page that are previously off-screen.
You can also
![]() Select
a subset of objects and then
Select
a subset of objects and then
![]() Zoom To Fit
the selection to the screen.
Zoom To Fit
the selection to the screen.
To jump to a page, just click on the corresponding page number.
You can see which users have people viewing them by the people icons:
if there are 1, 2, or 3+ users on a page, you'll see
![]() ,
,
![]() , or
, or
![]() respectively.
Hovering on the page number shows a tooltip
with the names of users on that page.
respectively.
Hovering on the page number shows a tooltip
with the names of users on that page.
Page buttons are regular links, so you can right click on a page number to
copy the link location to your clipboard (to link to a specific page), or
to open the page in a new browser tab. When you click on a page, the URL
changes to include the unique page ID after a # mark. This makes it easy
to link to the specific page you're viewing.
These buttons navigate your view to the previous or next page. They affect only your view, not other users. If you're meeting with others, communicate what page you're looking at.
This button creates a new blank page immediately after the current page, and goes to that page. If you were on page 6, this button will create and go to a new blank page 7, shifting all later pages up in page number.
This button toggles a dropdown list of every user's name and what page they're on. Clicking on a user teleports your view to be centered on their current cursor (including jumping to the page that they're on). This is a one-time operation, not a tracking/follow mode; afterwards, your views can diverge.
This button duplicates the current page into a new page immediately after, and goes to that new page. If you were on page 6, this button will create and go to a new page 7 with the same objects as page 6 (but without the history of changes), shifting all later pages up in page number.
If you type your name into the box in the top right, then your name will appear next to your cursor on everyone else's screen. This makes it easy to figure who's drawing and who's pointing at what. Assuming your browser isn't in "private" mode, your name gets saved by your browser for future visits, and synchronizes across Cocreate tabs.
If you're using Cocreate in Comingle, your name in Cocreate automatically gets set to your name in Comingle.
The tools in the bottom palette serve two functions:
- they change the attributes (line width, font size, and color) for any objects you'll draw next; and
- they change the attributes of any objects you currently have selected,
if you're using the
Select Tool.
If you're using a "nondrawing" tool (any tool that doesn't create objects) and do not have any objects selected, then clicking/tapping on any of these attribute tools will switch to the last drawing tool you used (defaulting to the pen). The idea is, if you want to go straight to drawing in purple, you can click/tap on purple and go straight to drawing, without having to reset your tool.
These buttons control the outline/stroke width of objects with an outline:
![]() Pen,
Pen,
![]() Segments,
Segments,
![]() Rectangles,
Rectangles,
![]() Ellipses,
and
Ellipses,
and
![]() Polygons.
Currently, you have seven integral choices.
Polygons.
Currently, you have seven integral choices.
When you're using the
![]() Text Tool,
or the
Text Tool,
or the
![]() Select Tool
to select only text objects,
the line-width choices are replaced by font-size choices.
These control the size of the entire text object.
Currently, you have seven integral choices.
Select Tool
to select only text objects,
the line-width choices are replaced by font-size choices.
These control the size of the entire text object.
Currently, you have seven integral choices.
These buttons control the outline/stroke style of objects with an outline:
![]() Pen,
Pen,
![]() Segments,
Segments,
![]() Rectangles,
Rectangles,
![]() Ellipses,
and
Ellipses,
and
![]() Polygons.
Currently, you have four choices: solid, dotted, dashed, and dot-dashed.
Polygons.
Currently, you have four choices: solid, dotted, dashed, and dot-dashed.
These buttons toggle whether
![]() Segments
include arrowheads at the start and/or end.
Arrowheads are supported by the
Segments
include arrowheads at the start and/or end.
Arrowheads are supported by the
![]() Pen
and
Pen
and
![]() Segment
tools.
Segment
tools.
This button toggles whether objects are partially transparent/opaque.
Click/tap the button to switch between the normal fully opaque mode
(when the button is "out") and partially transparent/opaque mode
(when the button is "in").
In partially transparent/opaque mode, three additional buttons will display
for selecting among 25%, 50%, or 75% opacity.
This setting will affect both stroke and fill opacity for fillable objects:
![]() Rectangles,
Rectangles,
![]() Ellipses,
and
Ellipses,
and
![]() Polygons.
Polygons.
Currently,
![]() Pen
does not support pressure sensitivity together with opacity.
Make pen objects fully opaque to see their pressure-dependent width.
Pen
does not support pressure sensitivity together with opacity.
Make pen objects fully opaque to see their pressure-dependent width.
This button controls whether objects have a fill color or are hollow
(transparent inside).
Click/tap the button to switch between
![]() Fill and
Fill and
![]() No Fill.
The button's icon will be colored according to the current fill color,
set by Shift-clicking on a color in the
Color Palette.
No Fill.
The button's icon will be colored according to the current fill color,
set by Shift-clicking on a color in the
Color Palette.
This toggle only affects objects that support fill:
![]() Rectangles,
Rectangles,
![]() Ellipses,
and
Ellipses,
and
![]() Polygons.
Polygons.
These buttons normally control the outline/stroke color of objects. (This includes the color of text objects.)
If you hold down Shift on your keyboard when choosing a color,
you control the fill color of objects that support fill:
![]() Rectangles,
Rectangles,
![]() Ellipses,
and
Ellipses,
and
![]() Polygons.
When you choose a fill color, you automatically turn on
Polygons.
When you choose a fill color, you automatically turn on
![]() Fill.
Fill.
The last color button ![]() has a rainbow on it, indicating that it can take on any color.
Selecting the rainbow subicon brings up a color selection widget
(dependent on your browser), letting you change the custom color
which is indicated by the colored border around the rainbow.
Selecting the colored border directly lets you choose the same color again
without bringing up the color selection widget.
If you want to match the color of an existing object, use the
has a rainbow on it, indicating that it can take on any color.
Selecting the rainbow subicon brings up a color selection widget
(dependent on your browser), letting you change the custom color
which is indicated by the colored border around the rainbow.
Selecting the colored border directly lets you choose the same color again
without bringing up the color selection widget.
If you want to match the color of an existing object, use the
![]() Select Tool
to select just that object, which will set the current attributes
(including custom color) to the attributes of that object.
Select Tool
to select just that object, which will set the current attributes
(including custom color) to the attributes of that object.
If something weird is happening in Cocreate, you should check the JavaScript console for any error messages. Just follow these instructions for opening the JavaScript console, and look for red error messages.
If you think something is wrong with Cocreate, please report a bug. You can use the same system to request features (but please first check for an existing request for that feature).